
In this post we are going to cover how to deploy a Linux VM using the Microsoft Azure ARM portal, Azure CLI, and the template and VHD we created in the previous post.
First, you will want to ensure you have Azure CLI installed. You can download it for free here. Again, you will want to make sure you are signed into Azure CLI and have switched from asm mode to arm.
Next, in the following variables, add in the name of your existing resource group, virtual network and subnet, and add in new names for a new public IP address, network interface, and virtual machine.
—- Existing Resources —- $rgName = “LVMTest” $vNet = “LVMTest” $subnet = “Default” $location = “westus” # —- New Network Resources —- $pip = “CoolVHDTest” $nic = “LVMNic2” # —- Network Creation —- azure network public-ip create $rgName $pip -l $location azure network nic create $rgName $nic -k $subnet -m $vNet -p $pip -l $location # — Run the command below to grab the ID of the new Nic. Copy it somewhere safe azure network nic show $rgName $nic # —- Deployment —- $deployName = “LVMDemo” $template = “C:TemplatesTemplate1.json” # local file path specified azure group deployment create $rgName $deployName -f $template
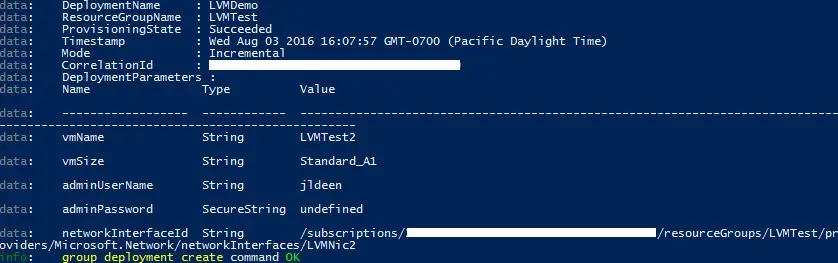
And that’s it, you then should see the command executing, which will then prompt you to type in the vmName, adminUserName, adminPassword, and networkInterfaceID (copied from the azure network nic show command). Once completed successfully, you’ll see a print out like this: