
It’s that time again! The time to write another epic blog post, this time for WSL, also known as Windows Subsystem for Linux. One of my most popular posts is my badass terminal post for iTerm2/MacOS so I thought it was only fitting to try and recreate the same environment for WSL. The Windows 10 Fall Creator’s Update (FCU) introduces a few new features to WSL. Below are the key ones:
- WSL is no longer a Beta feature
- Install Linux distros via the Windows Store
- WSL now runs multiple Linux distros
- WSL no longer requires developer mode
- WSL comes to Windows Server & Microsoft Azure VM’s!
- WSL now supports USB/serial comms
- Miscellaneous fixes and improvements
- Deprecating the name “Bash on Windows”
Prior to the release, I had already planned on creating an automated install script for Linux / WSL to customize the terminal. With the new WSL release now available via the Windows Store, I’m even more excited for my script / this post. Key changes in WSL as part of the FCU now allows commands like “chsh” to work, which means we can use our favorite shell (zsh, fish, etc.) directly.
A few key points before we dive into the #badass customizations:
- lxrun.exe is deprecated and is now considered legacy - This means your LXSS data no longer lives in
%USERPROFILE%appdatalocallxss- Your data now lives in%USERPROFILE%appdatalocalPackagesCanonicalGroupLimited.UbuntuonWindows_[random-numbers-and-characters]LocalStaterootfshome - This also means you no longer run
lxrun.exe /uninstall /full /yto remove your WSL instance (when installed from the Windows Store). Instead, you would uninstall Ubuntu (WSL) the same way you would any other app – find the app in your start menu, right click, uninstall. Easy peasy.
The Setup
Everything shown here is available on my Github in the WSL branch of my dotfiles repo. To start the configuration, including copying the current dotfiles I use, you would simply type the following from your WSL Ubuntu Console.
bash -c “$(curl -fsSL https://raw.githubusercontent.com/jldeen/dotfiles/wsl/configure.sh)"
What will this install?
- Update package lists
- zsh
- git completion
- oh-my-zsh - zsh-completions plugin
- zsh-autosuggestions plugin
- zsh-syntax-highlighting plugin
- powerlevel9k
- vimrc undle
- pathogen
- nerdtree
- wombat vim colorsheme
- midnight commander
- bashrc colorscheme – solarized dark
- optional: my dotfiles
- optional: az cli 2.0
- optional: change default shell to zsh
A few notes:
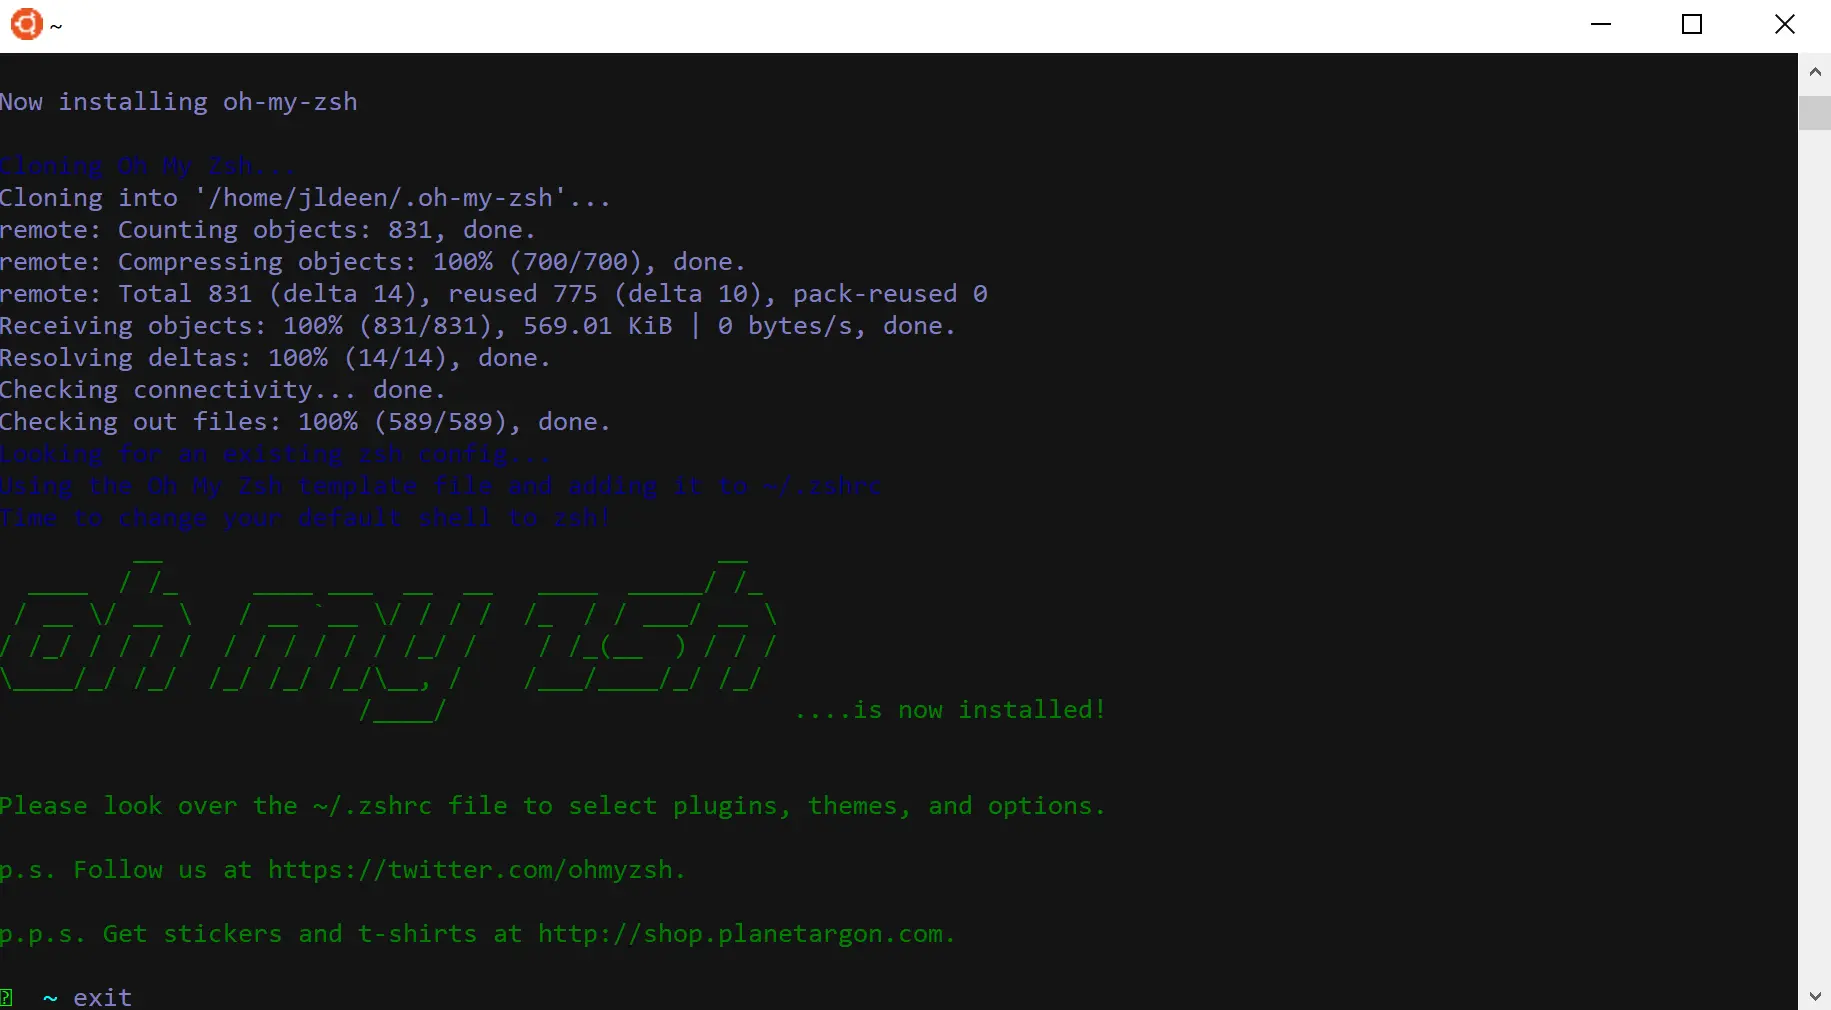
- A clean install from this configuration.sh script (not using my dotfiles) looks like this. (See pic below)

- you will need to enter your password during the oh-my-zsh install. You will also need to type “exit” after it completes so the remaining parts of the configuration.sh script can continue to install. (See pic below)
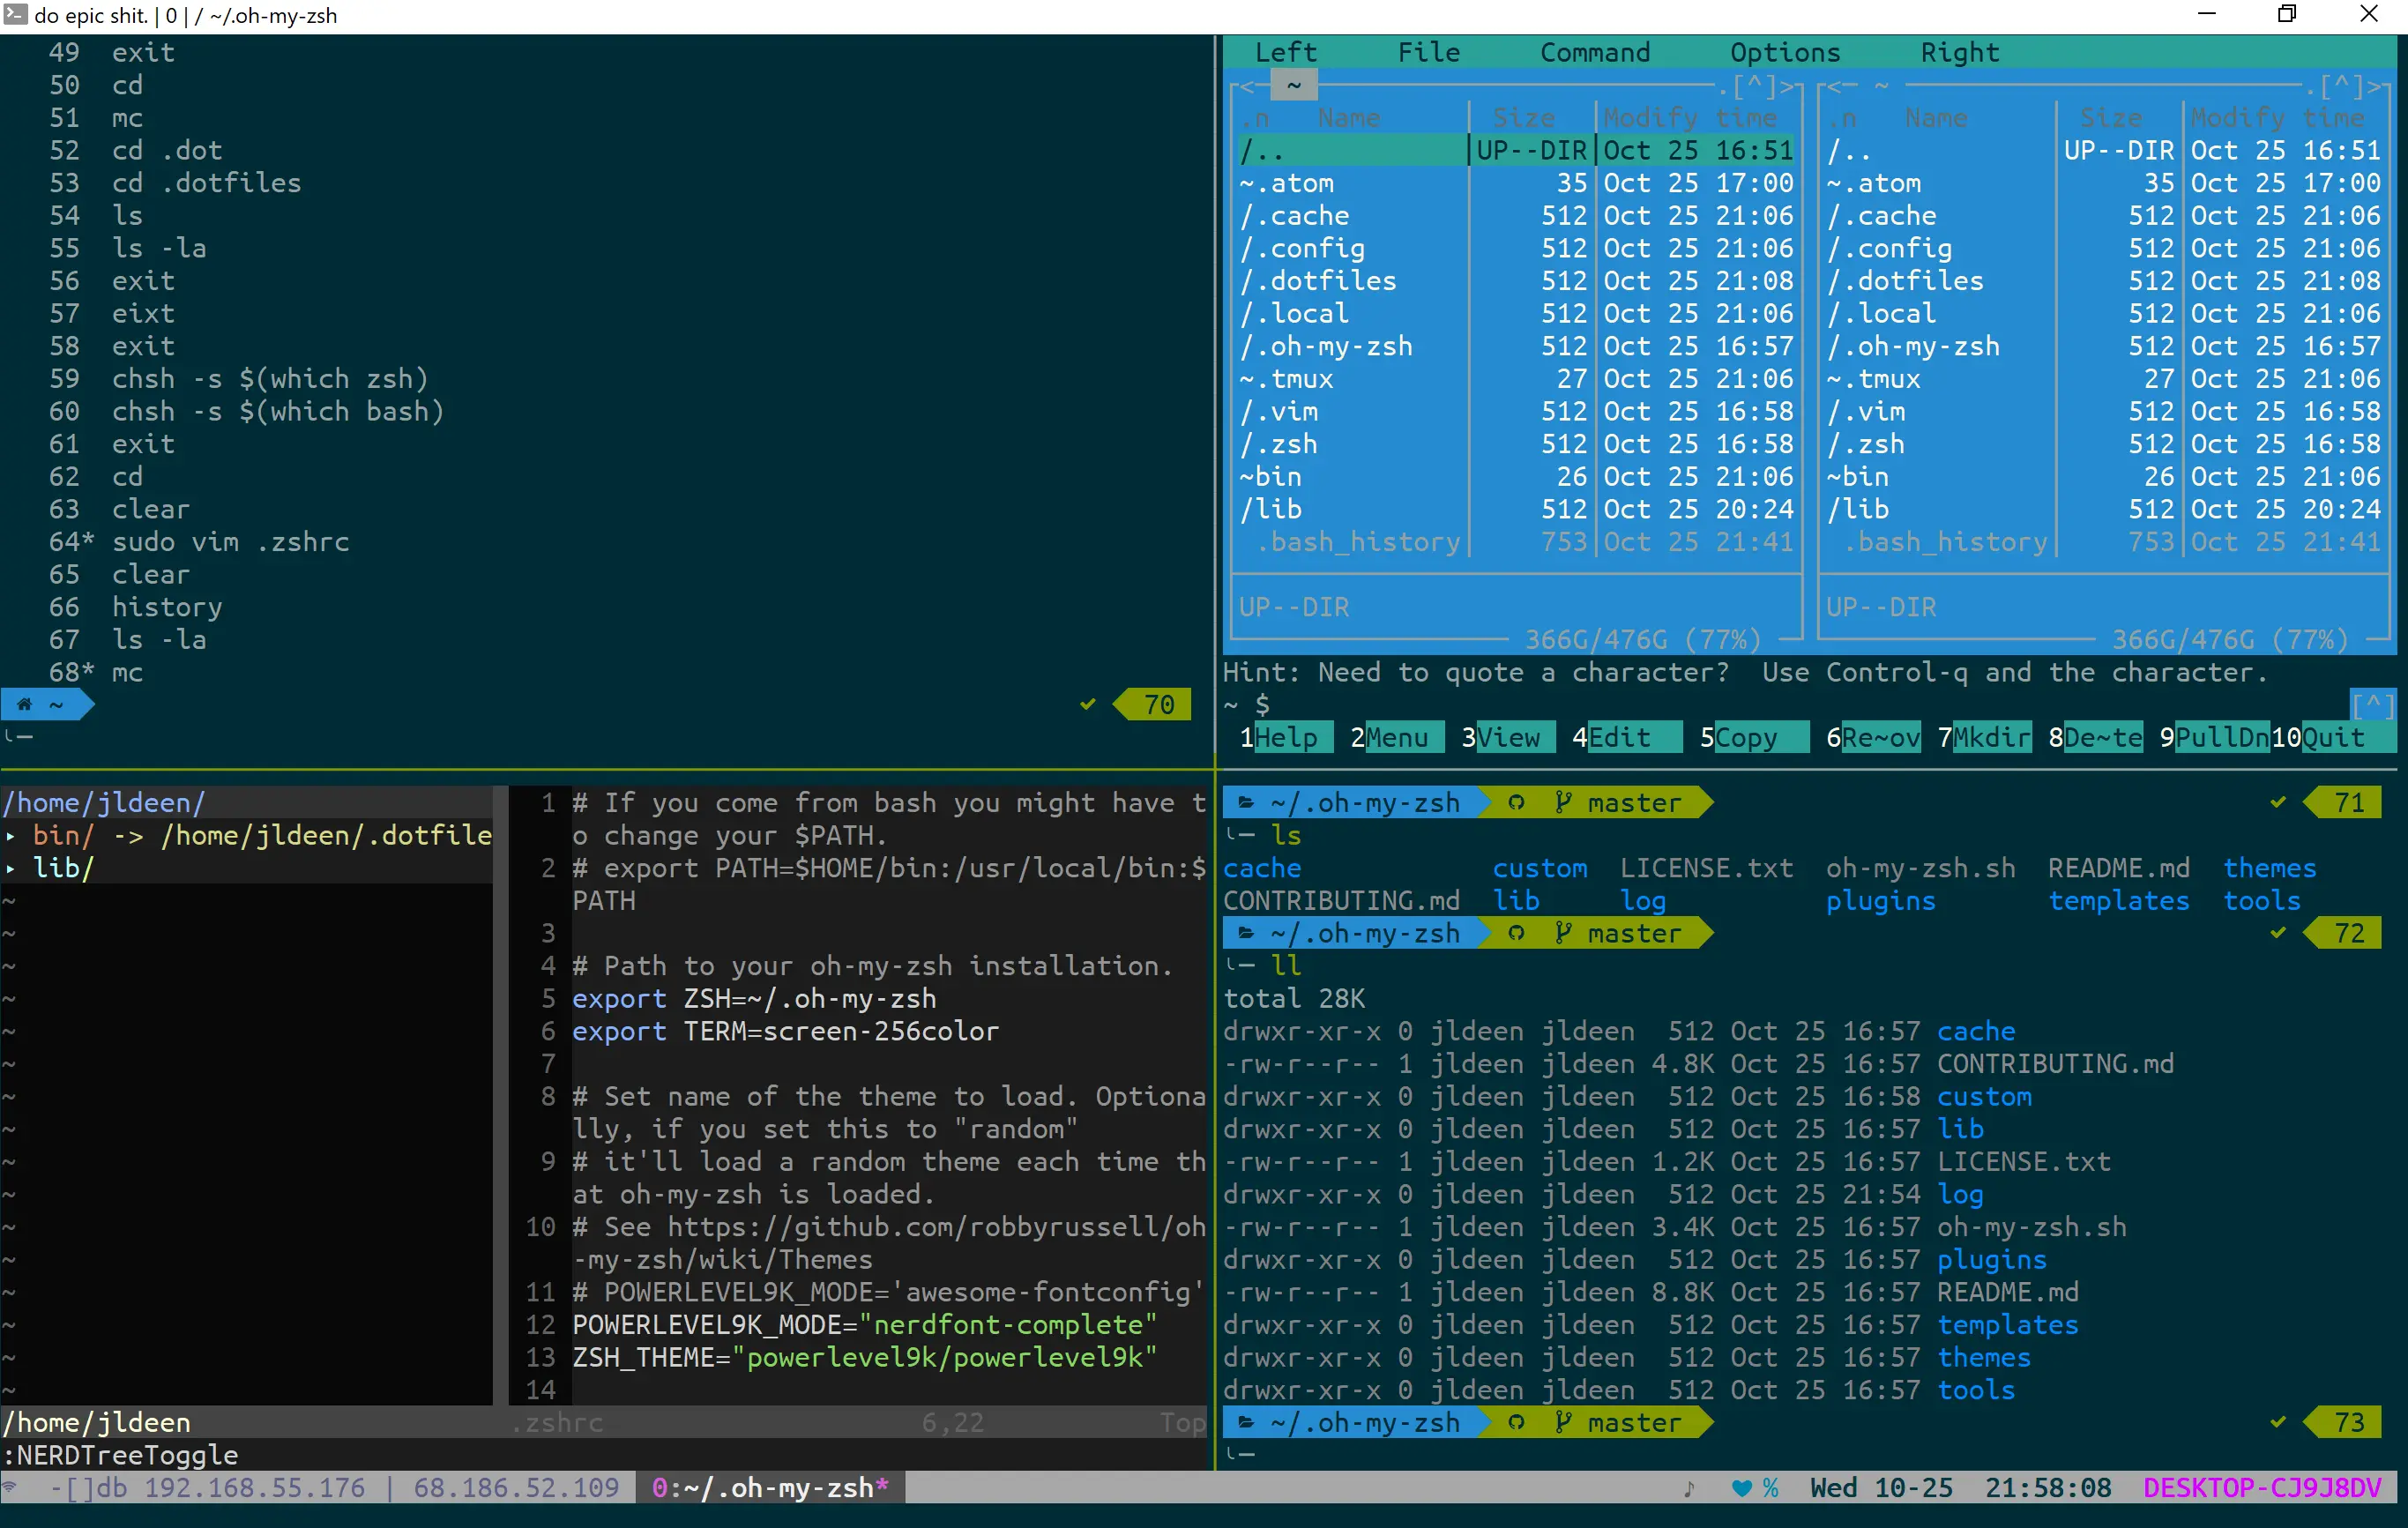
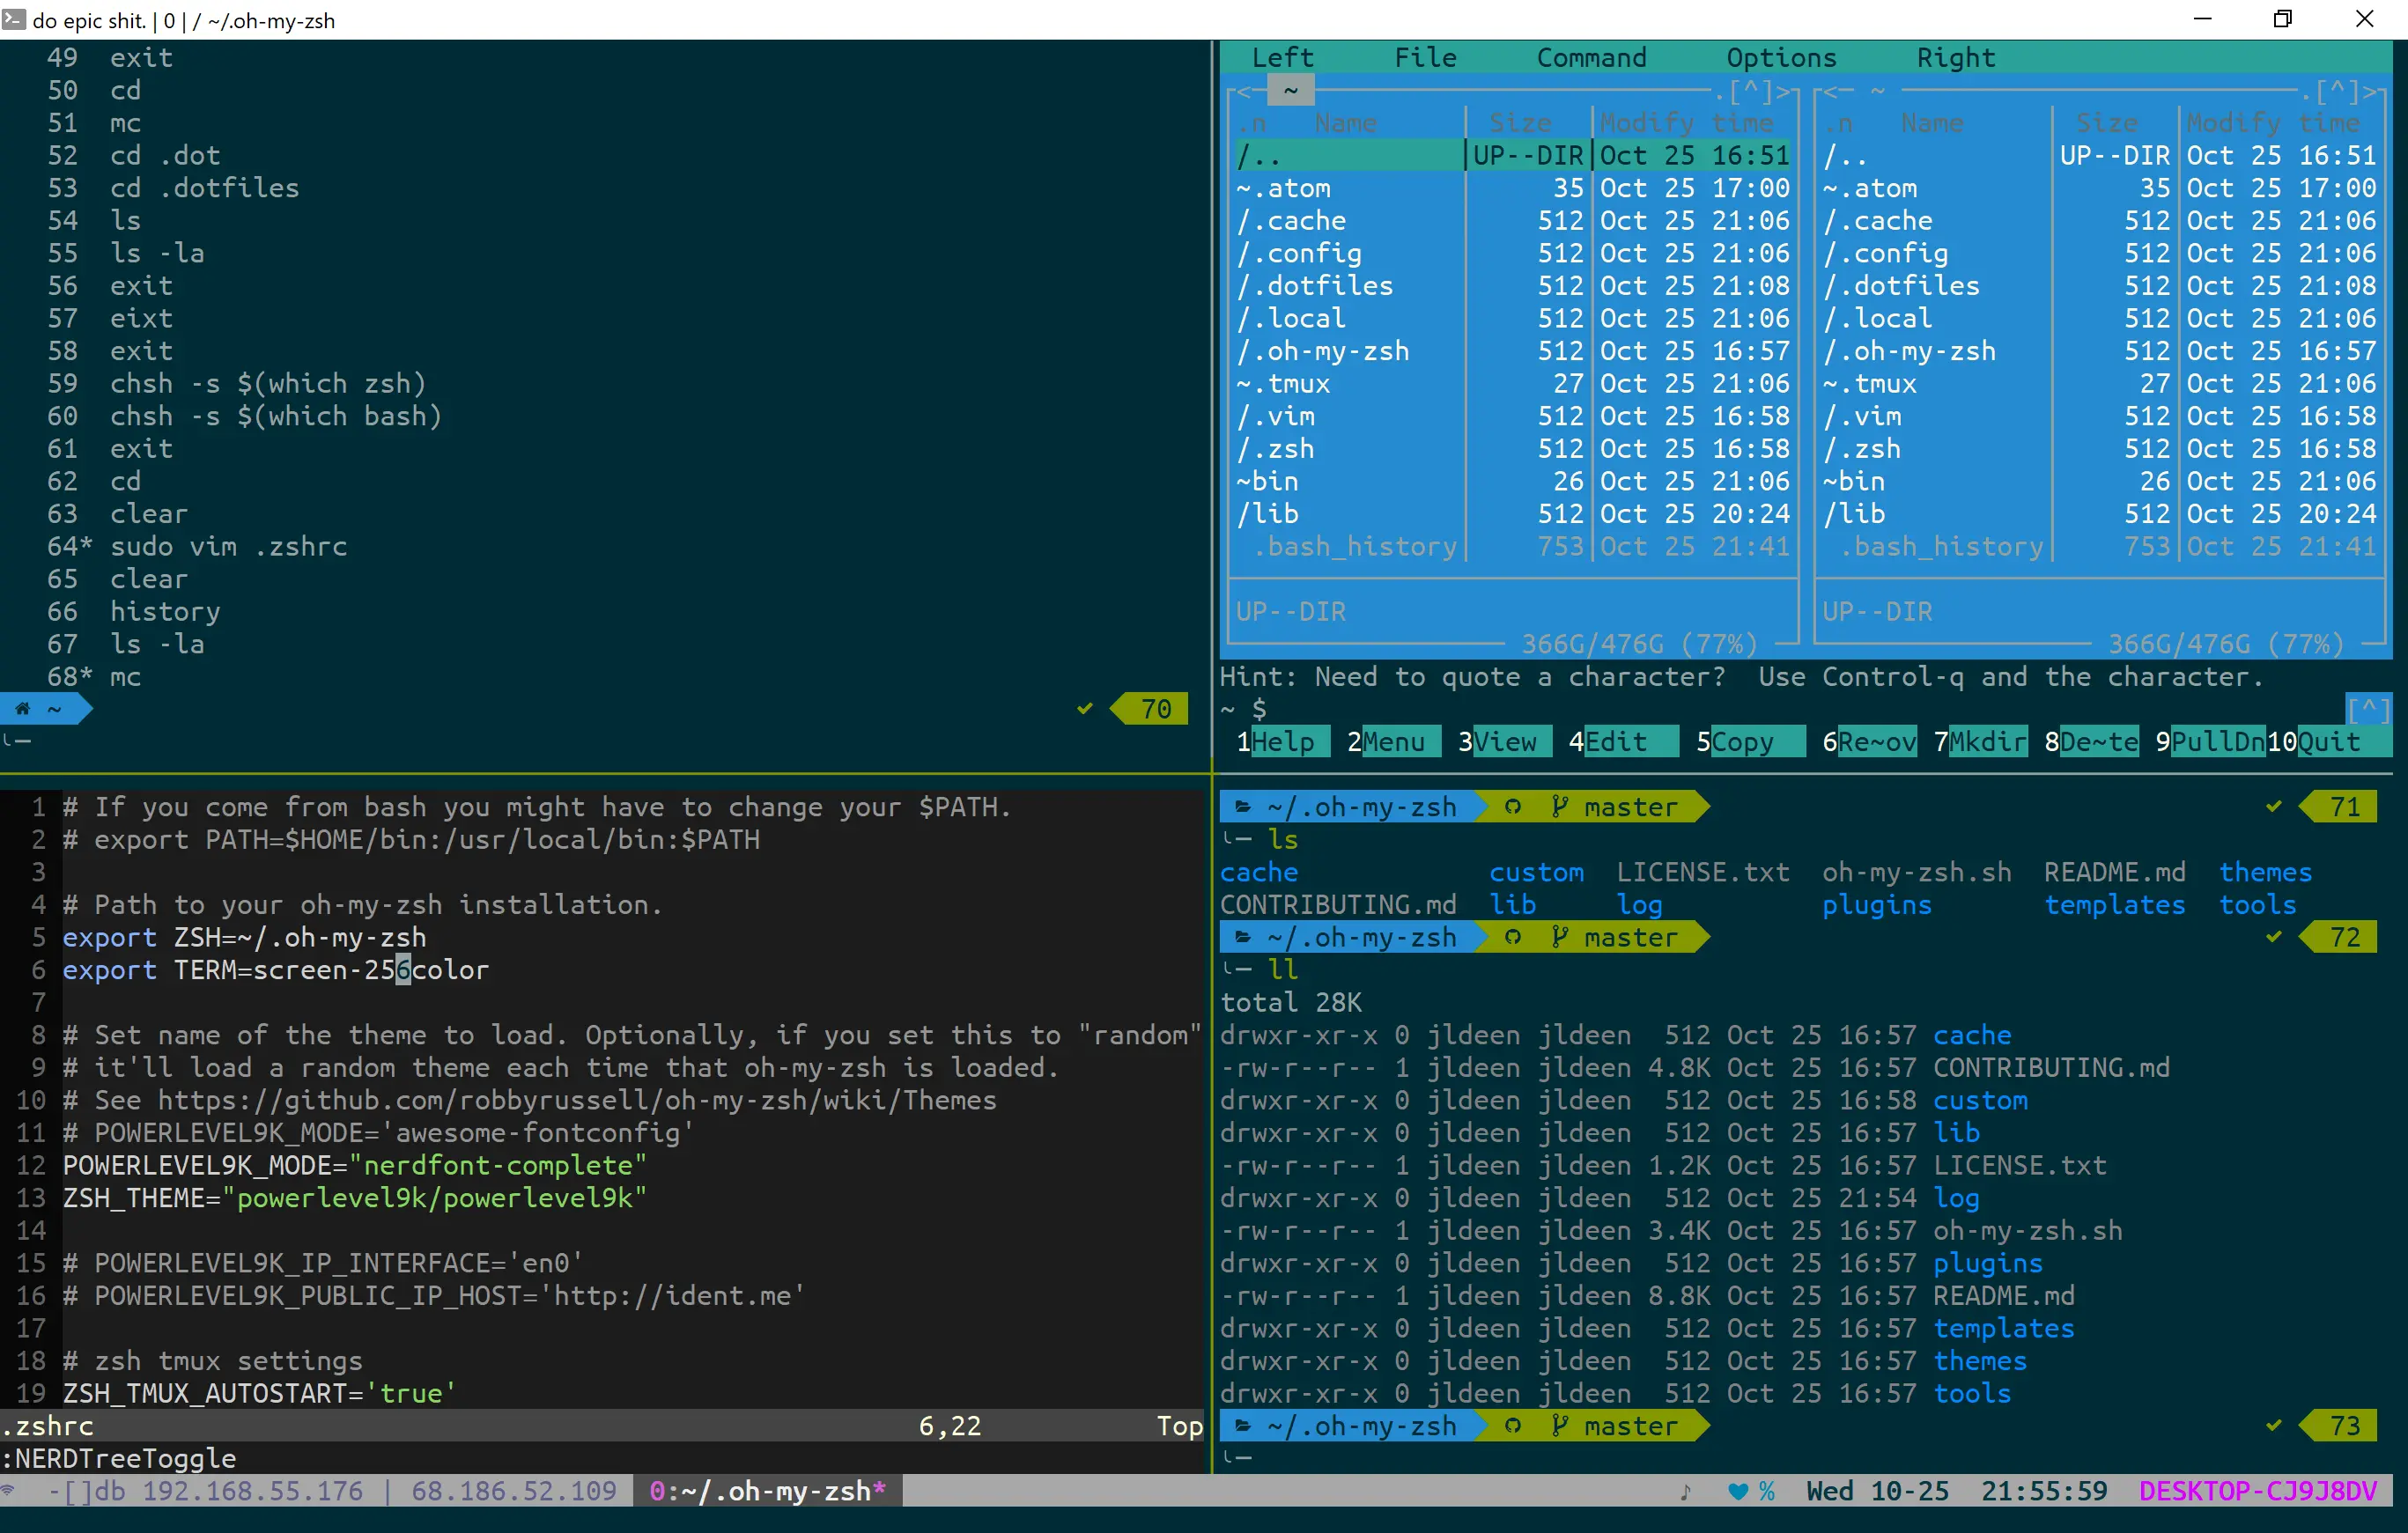
- You will be prompted if you want to use my dotfiles. If you hit yes, this will create symlinks to the usual dotfiles and use the .dotfiles from my repo. To learn more, check out Zach Holman’s blog post, as I forked his repo and modified it accordingly. Side note: I started keeping a record of my dotfiles awhile back when I read this blog post from Nicola Paolucci. This allowed me to duplicate my environment seamlessly as I moved from system to system. Zach’s project is one Nicola moved to and I adapted as well. If you choose to use my dotfiles and the WSL Terminal Emulator I suggest below, your terminal will look like this. (See pic below)
Now, my .tmux.conf file runs .sh scripts for the status bar. As of now, those scripts don’t play nicely with Ubuntu WSL so I use a WSL Terminal Emulator. Fear not, I wrote you an install script to get that going, too. From an Administrator PowerShell prompt, run the following:
Set-ExecutionPolicy Bypass; iex ((New-Object System.Net.WebClient).DownloadString('https://raw.githubusercontent.com/jldeen/dotfiles/wsl/wslterm.ps1'))
This will set up your WSL Terminal Emulator and add a shortcut named “bash” to your desktop. I don’t know why I named it ‘bash’ as I’ve been using ZSH for quite some time now, but alas, that’s the name. Update the shortcut name if you wish.
Fonts and Themes:
You will need to install a font to use some of the Unicode characters I have in my configuration. Both WSL Terminal Emulator and Ubuntu WSL support mono fonts so you can choose whichever patched mono font you want. I recommend picking one from Nerd Fonts. The one I’m using is Ubuntu Mono Regular for Windows. It is also in my repo. You will also need to select a theme for the WSL Emulator. I am using base16-solarized-dark.minttyrc.
From there, you will need to ensure you select that font in your Ubuntu or WSL Terminal: Right-click on the title bar at top > Properties > Font (or Text). Similarly, you will do the same for Themes in WSL Emulator (Right-click on the title bar at top > Options > Select Theme (under Looks).


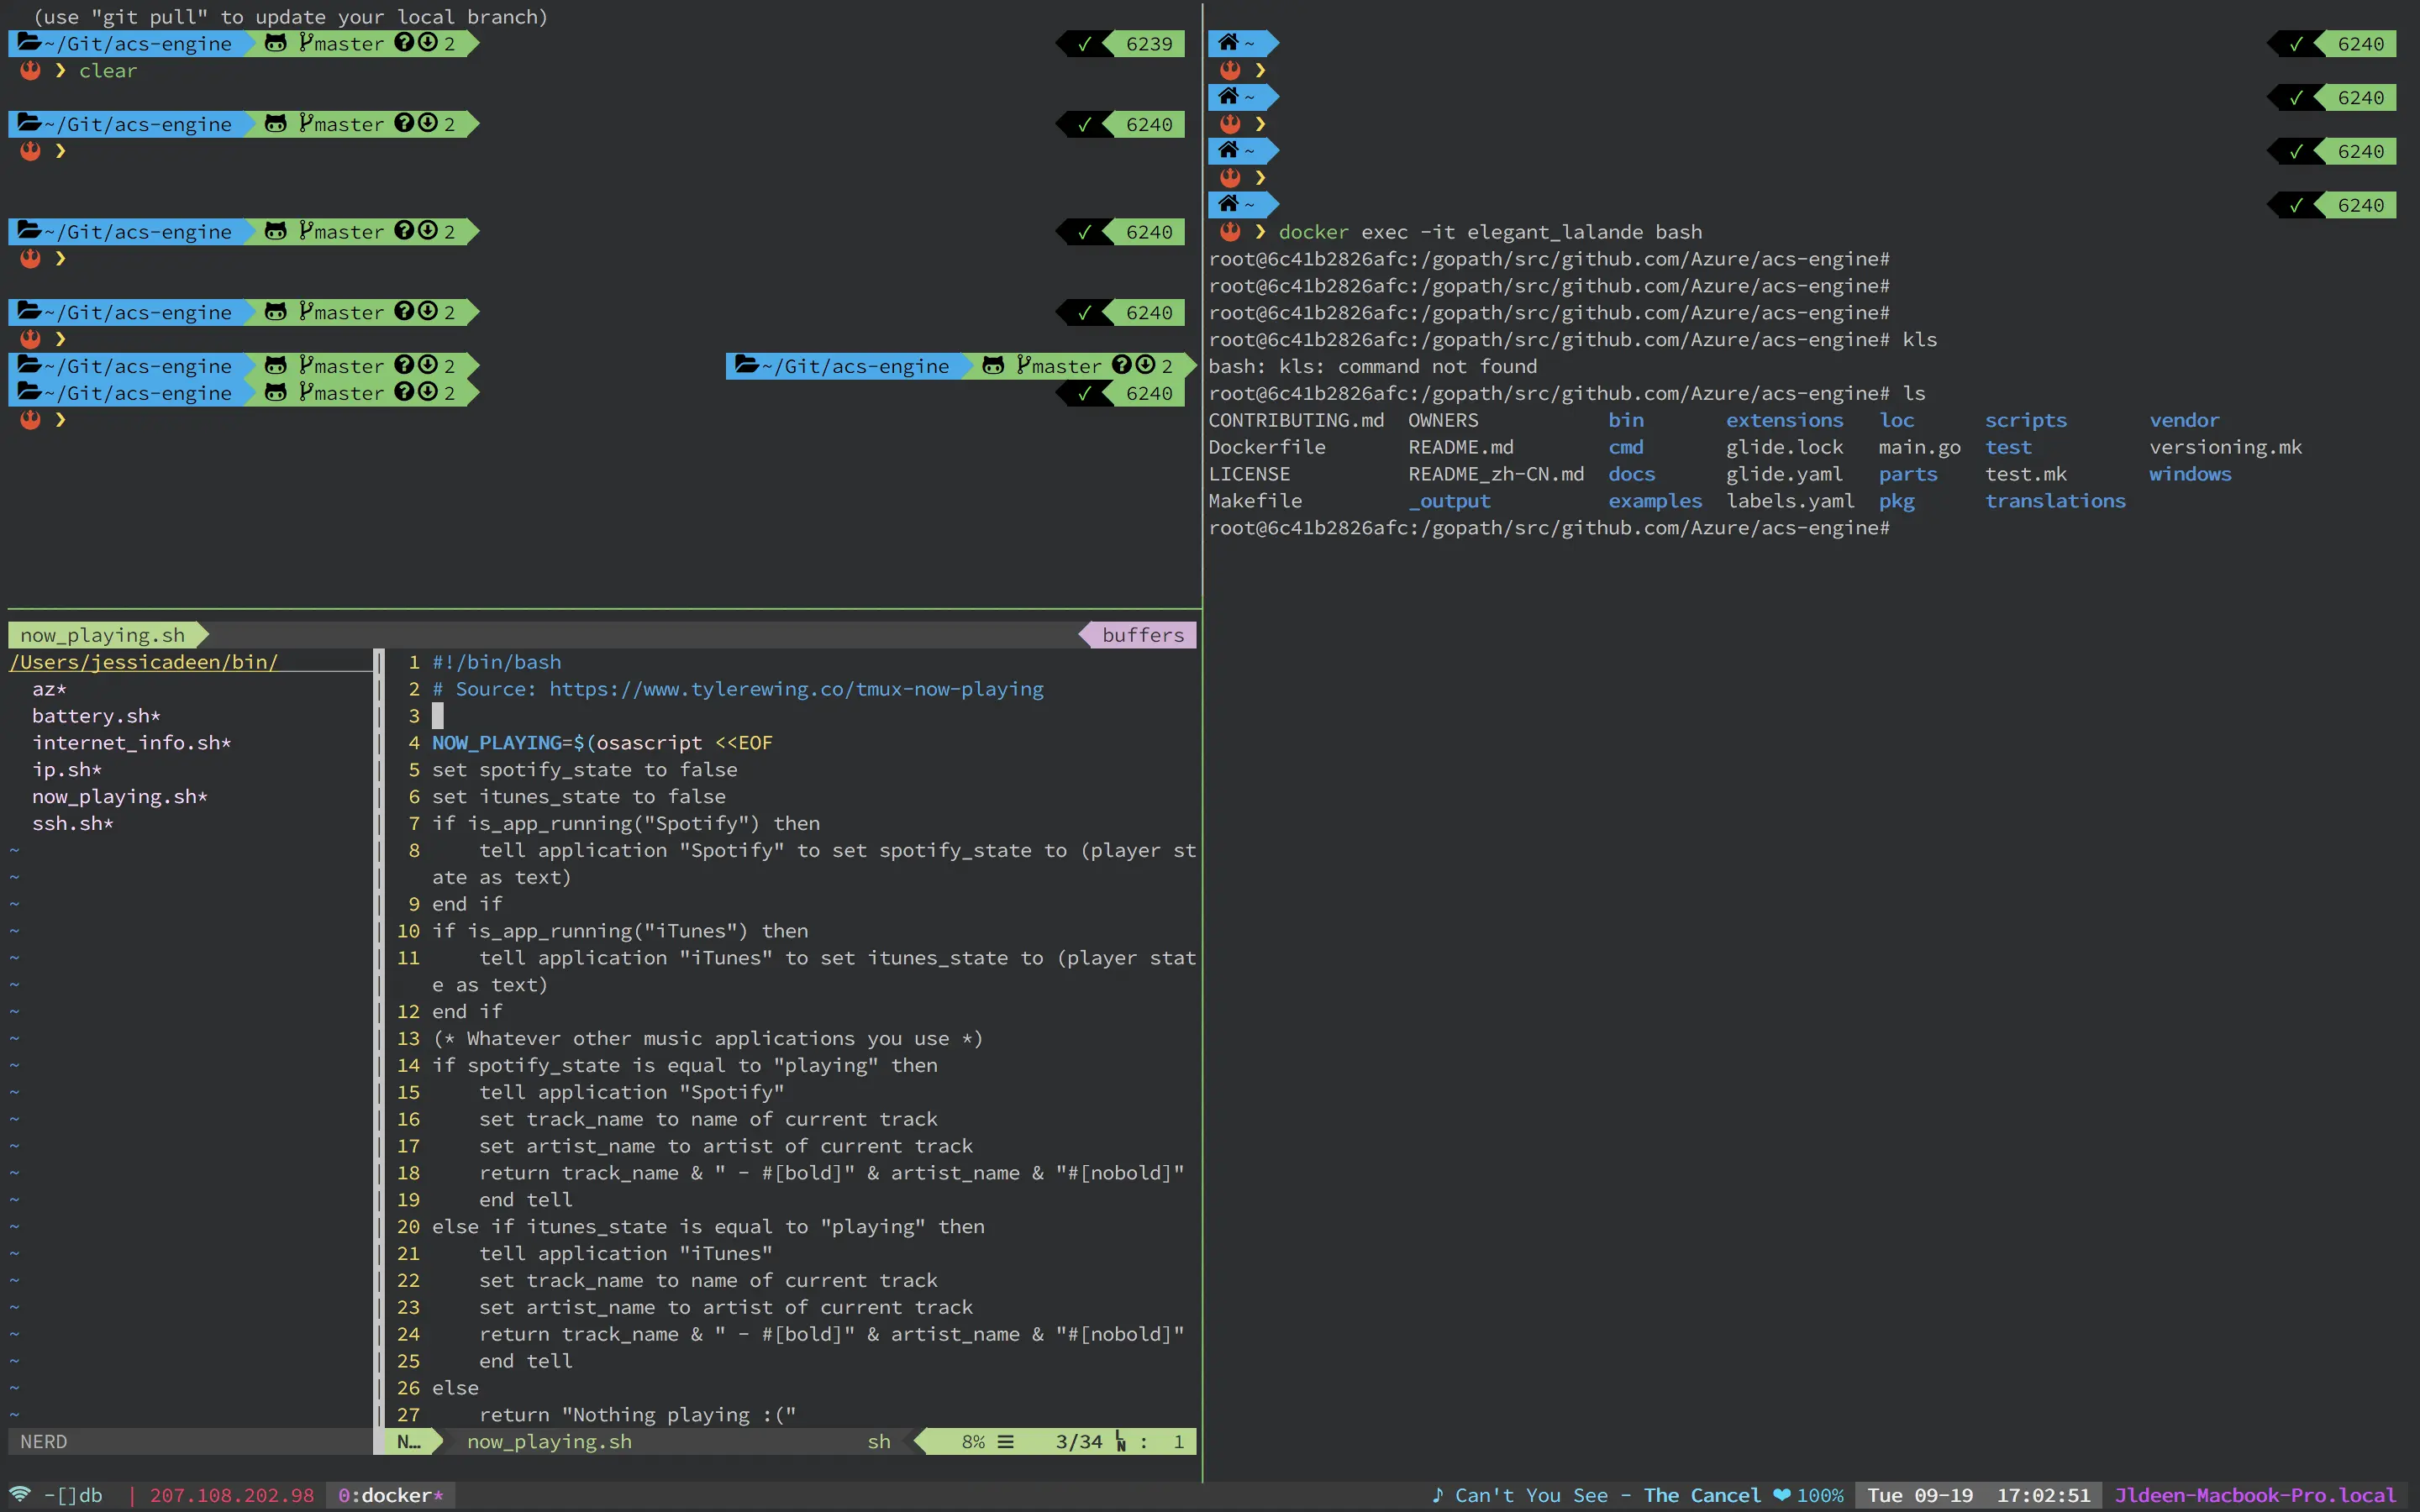
For quick visual reference, see my MacOS and WSL Terminal Emulated environments next to each other below.

Overall, I’m thrilled with the improvements WSL has made in the FCU. We are so much further ahead now than we were 18 months ago. I am able to nearly replicate my MacOS terminal entirely on my Window systems, which only allows for more productivity in development and operations… or DevOps!