
Today I’m super excited to announce that I pushed a pretty significant update to my dotfiles repo and bad ass terminal!
If you remember, my previous blog posts –Badass Terminal: FCU WSL Edition (oh-my-zsh, powerlevel9k, tmux, and more!) & macOS ohmyzsh + tmux + vim + iTerm2 + Powerlevel9k = Badass terminal blew up last year, and more recently, I thought – I should make this a pretty regular release.
At nearly every conference I speak I’m asked the same question – how do I get my terminal to look like yours? My previous posts walk through how to setup and configure your environments, but now there’s even greater functionality. Of course, these are my dotfiles and you do not have to use them. You could use the setup/configure scripts to simply install tools I use such as zsh, oh-my-zsh, powerlevel9k, tmux, vundle, nerdtree, etc., and configure your own, or you can use mine and modify as you see fit.
What does this new significant update include?
Responsive tmux
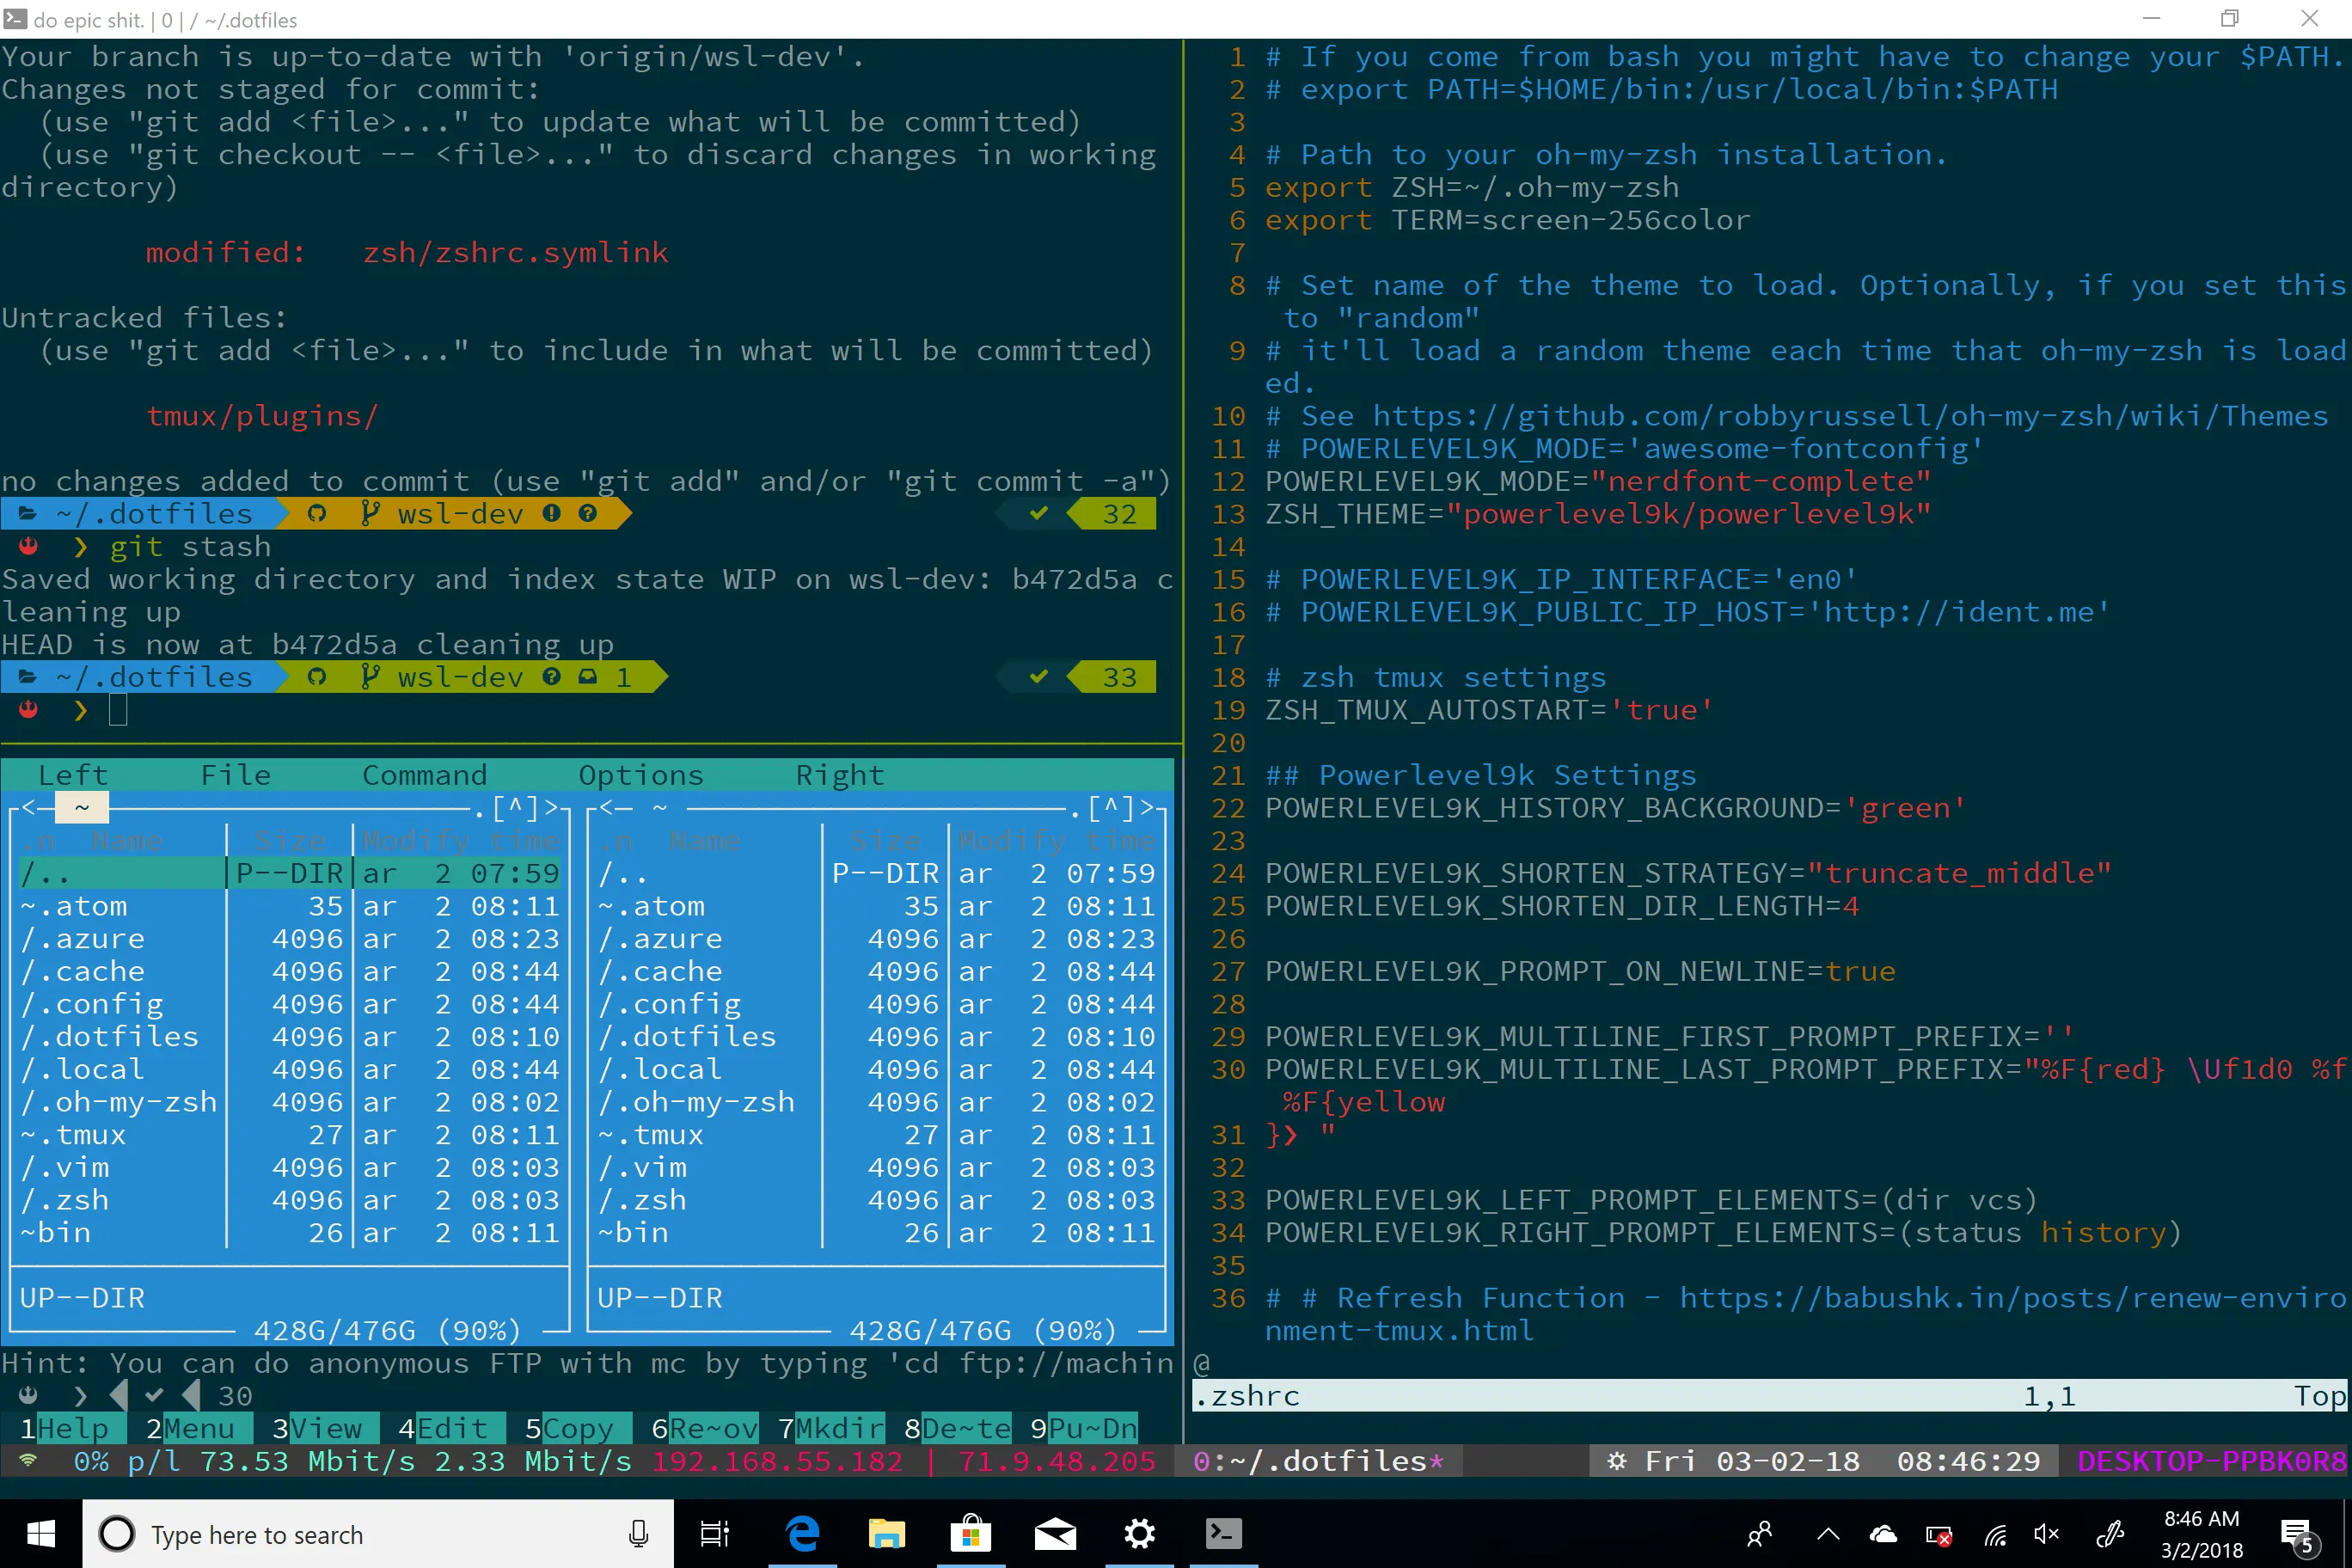
I made tmux responsive when you use my dotfiles. Previously, if the console window was less than a certain width, nothing would show because the amount of data I had in my .tmux.conf exceeded the width specified. Now, tmux will auto compensate for width and adjust automatically on the right-hand side. The smaller you make the window, the less data will appear on the right – I.E. Spotify info & battery info (on macOS), date, time will all start to disappear leaving just the hostname. The data on the left-hand side will remain unaffected for now.
PowerShell Optimized
When using my dotfiles with WSL you still need to use the wsl-terminal emulator I mentioned in my FCU WSL Edition post since the Windows Console VT still has trouble parsing the .sh files I use with tmux. With the help of Steven Murawski from The League, the install script now includes a check for admin rights, check for 7z install, configures PowerShell to use TLS 1.2 with Invoke-WebRequest, and creates a symlink instead of a shortcut. Overall, the code is cleaner and more explicit. Thanks Steven!
Formal support for macOS
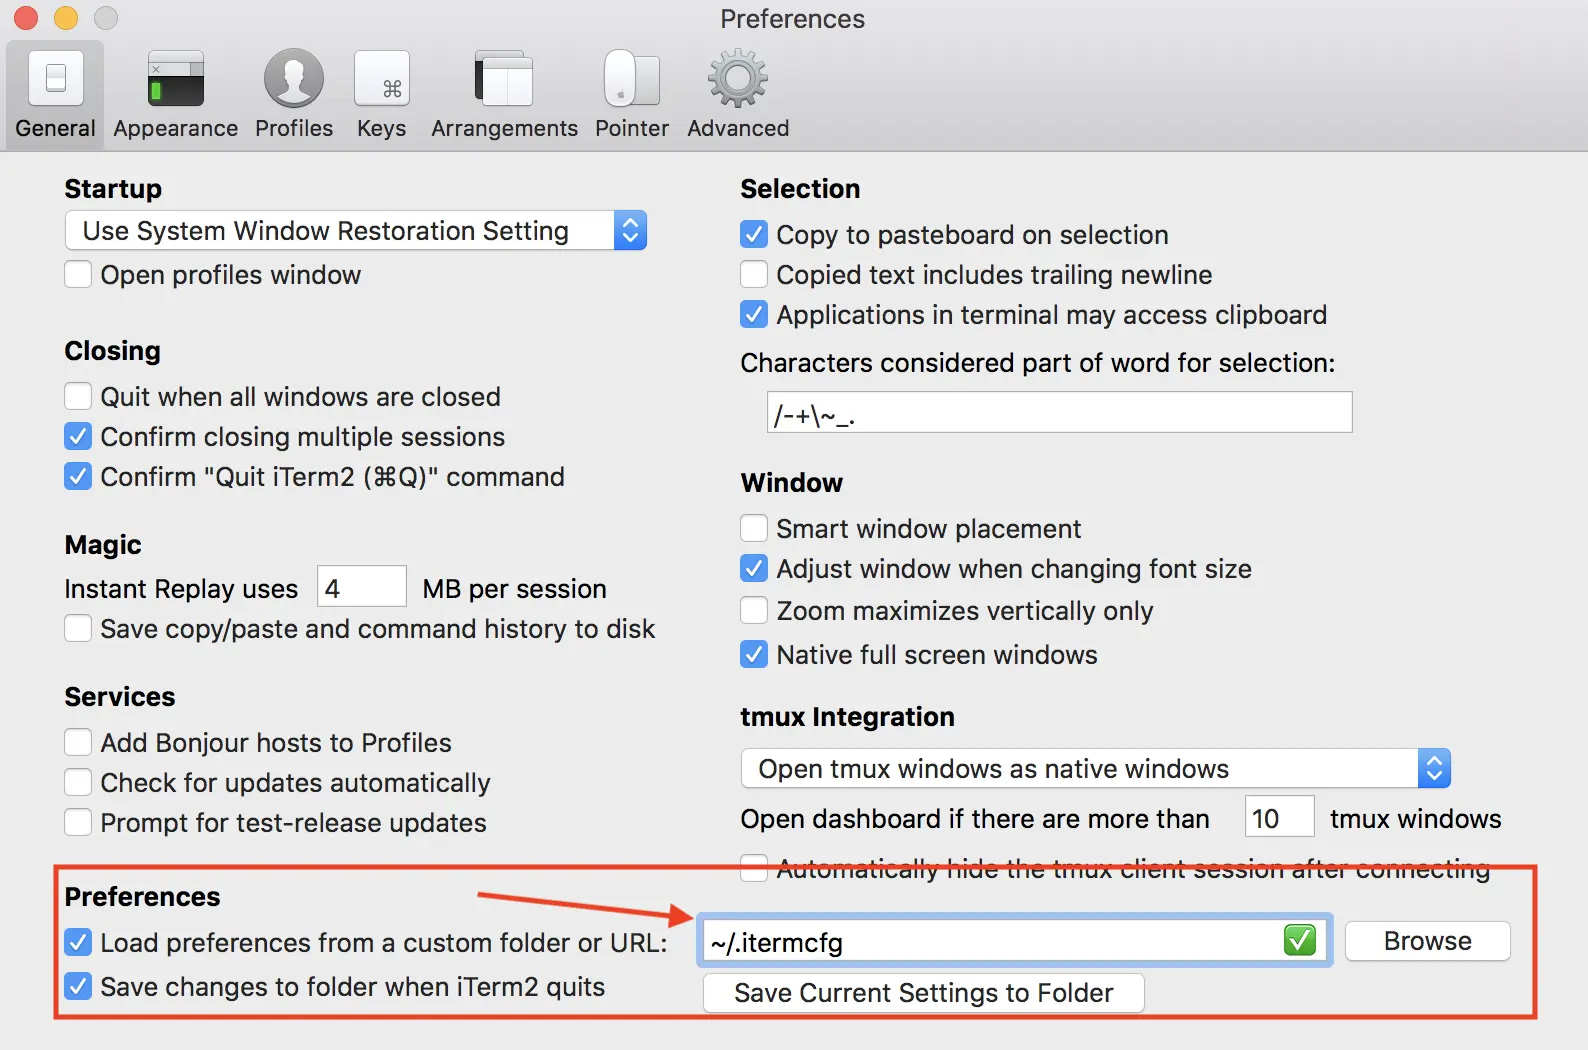
Previously, I had an unmanaged repo where I just pushed dotfiles, but there was no configure script like I had for WSL/Ubuntu. There is now a formal branch for macOS here. This formal branch uses a brewfile to install a suite of tools I find necessary for my environment, as well as all the standard configuration options I have in the wsl branch. I even exported my iterm2 configuration and added that to the repo. When using my dotfiles, you will have to manually select the symlinked .itermcfg from the iTerm2 preferences and enter the path: **~/.itermcfg. **Restart iTerm2 for changes to take effect.
Formal support for Ubuntu (16.04 and 17.10)
While others would use the WSL branch on full Ubuntu 16.04 and 17.10 installations, I never tested my configure.sh script for those environments. Now, in addition to formal testing, I have also optimized the configure and bootstrap scripts to include features specific to Ubuntu:
- Copies gnome.profile colors and configures terminal (if selected to use my dotfiles)
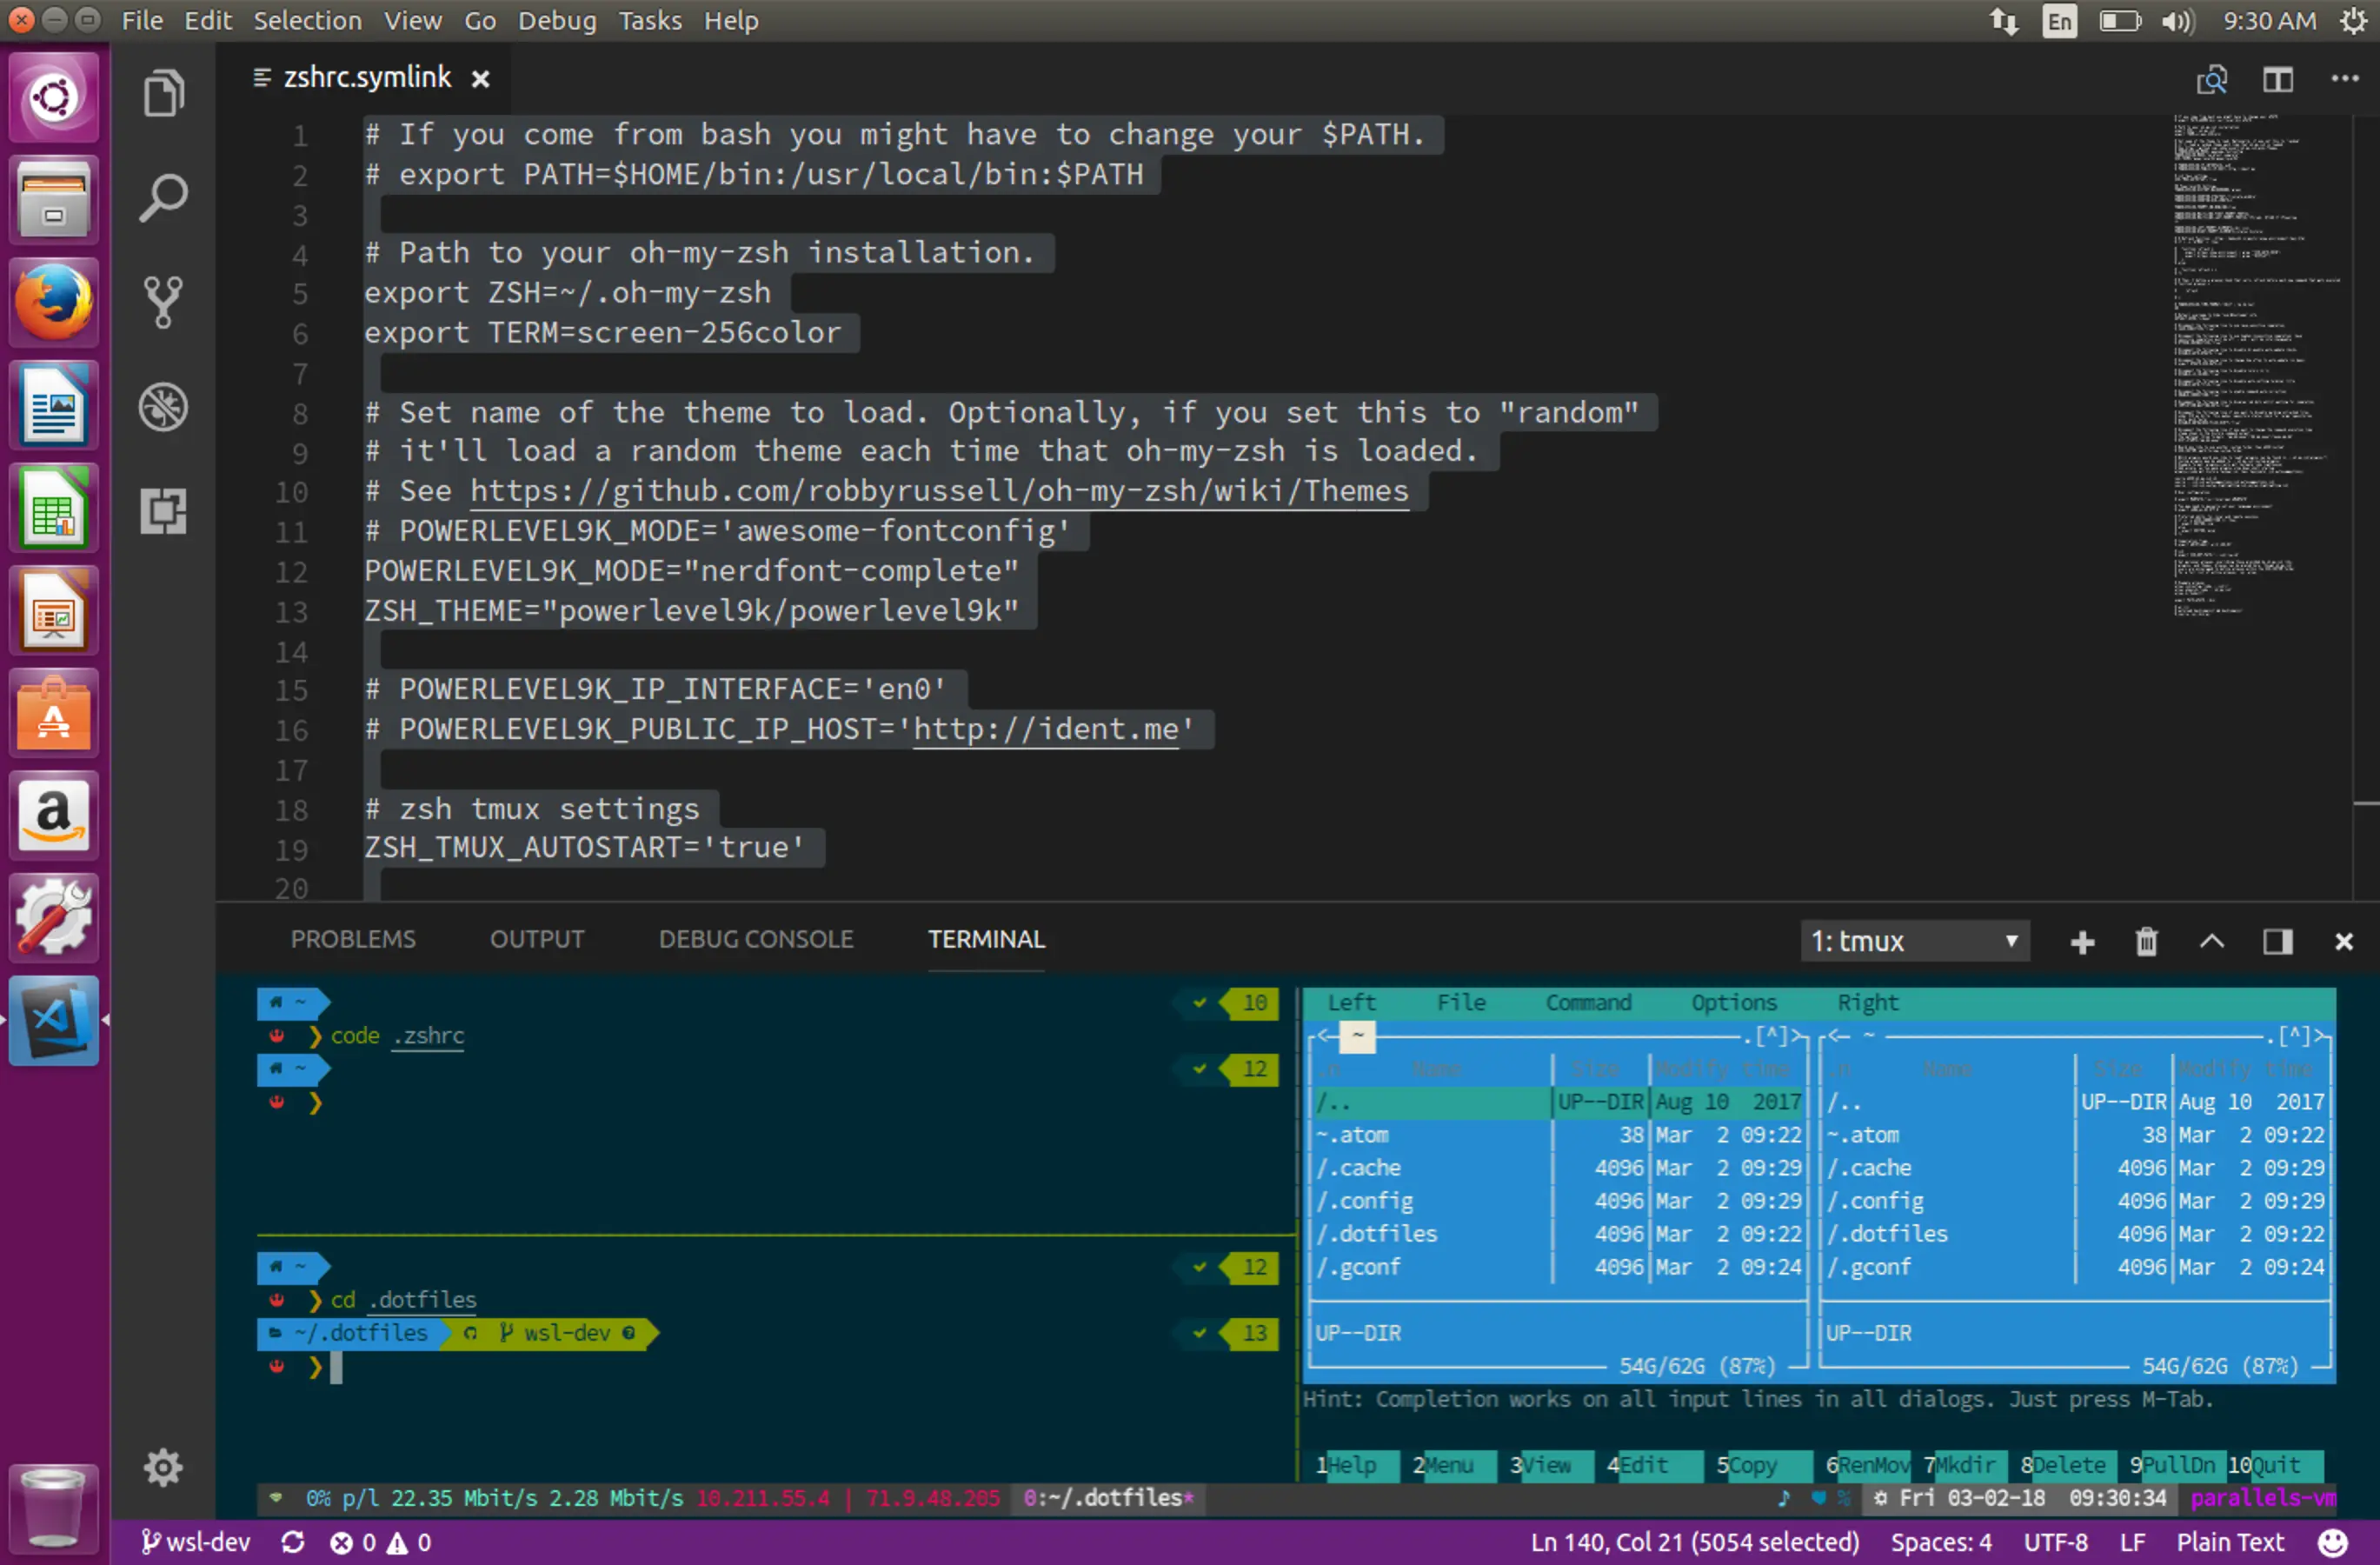
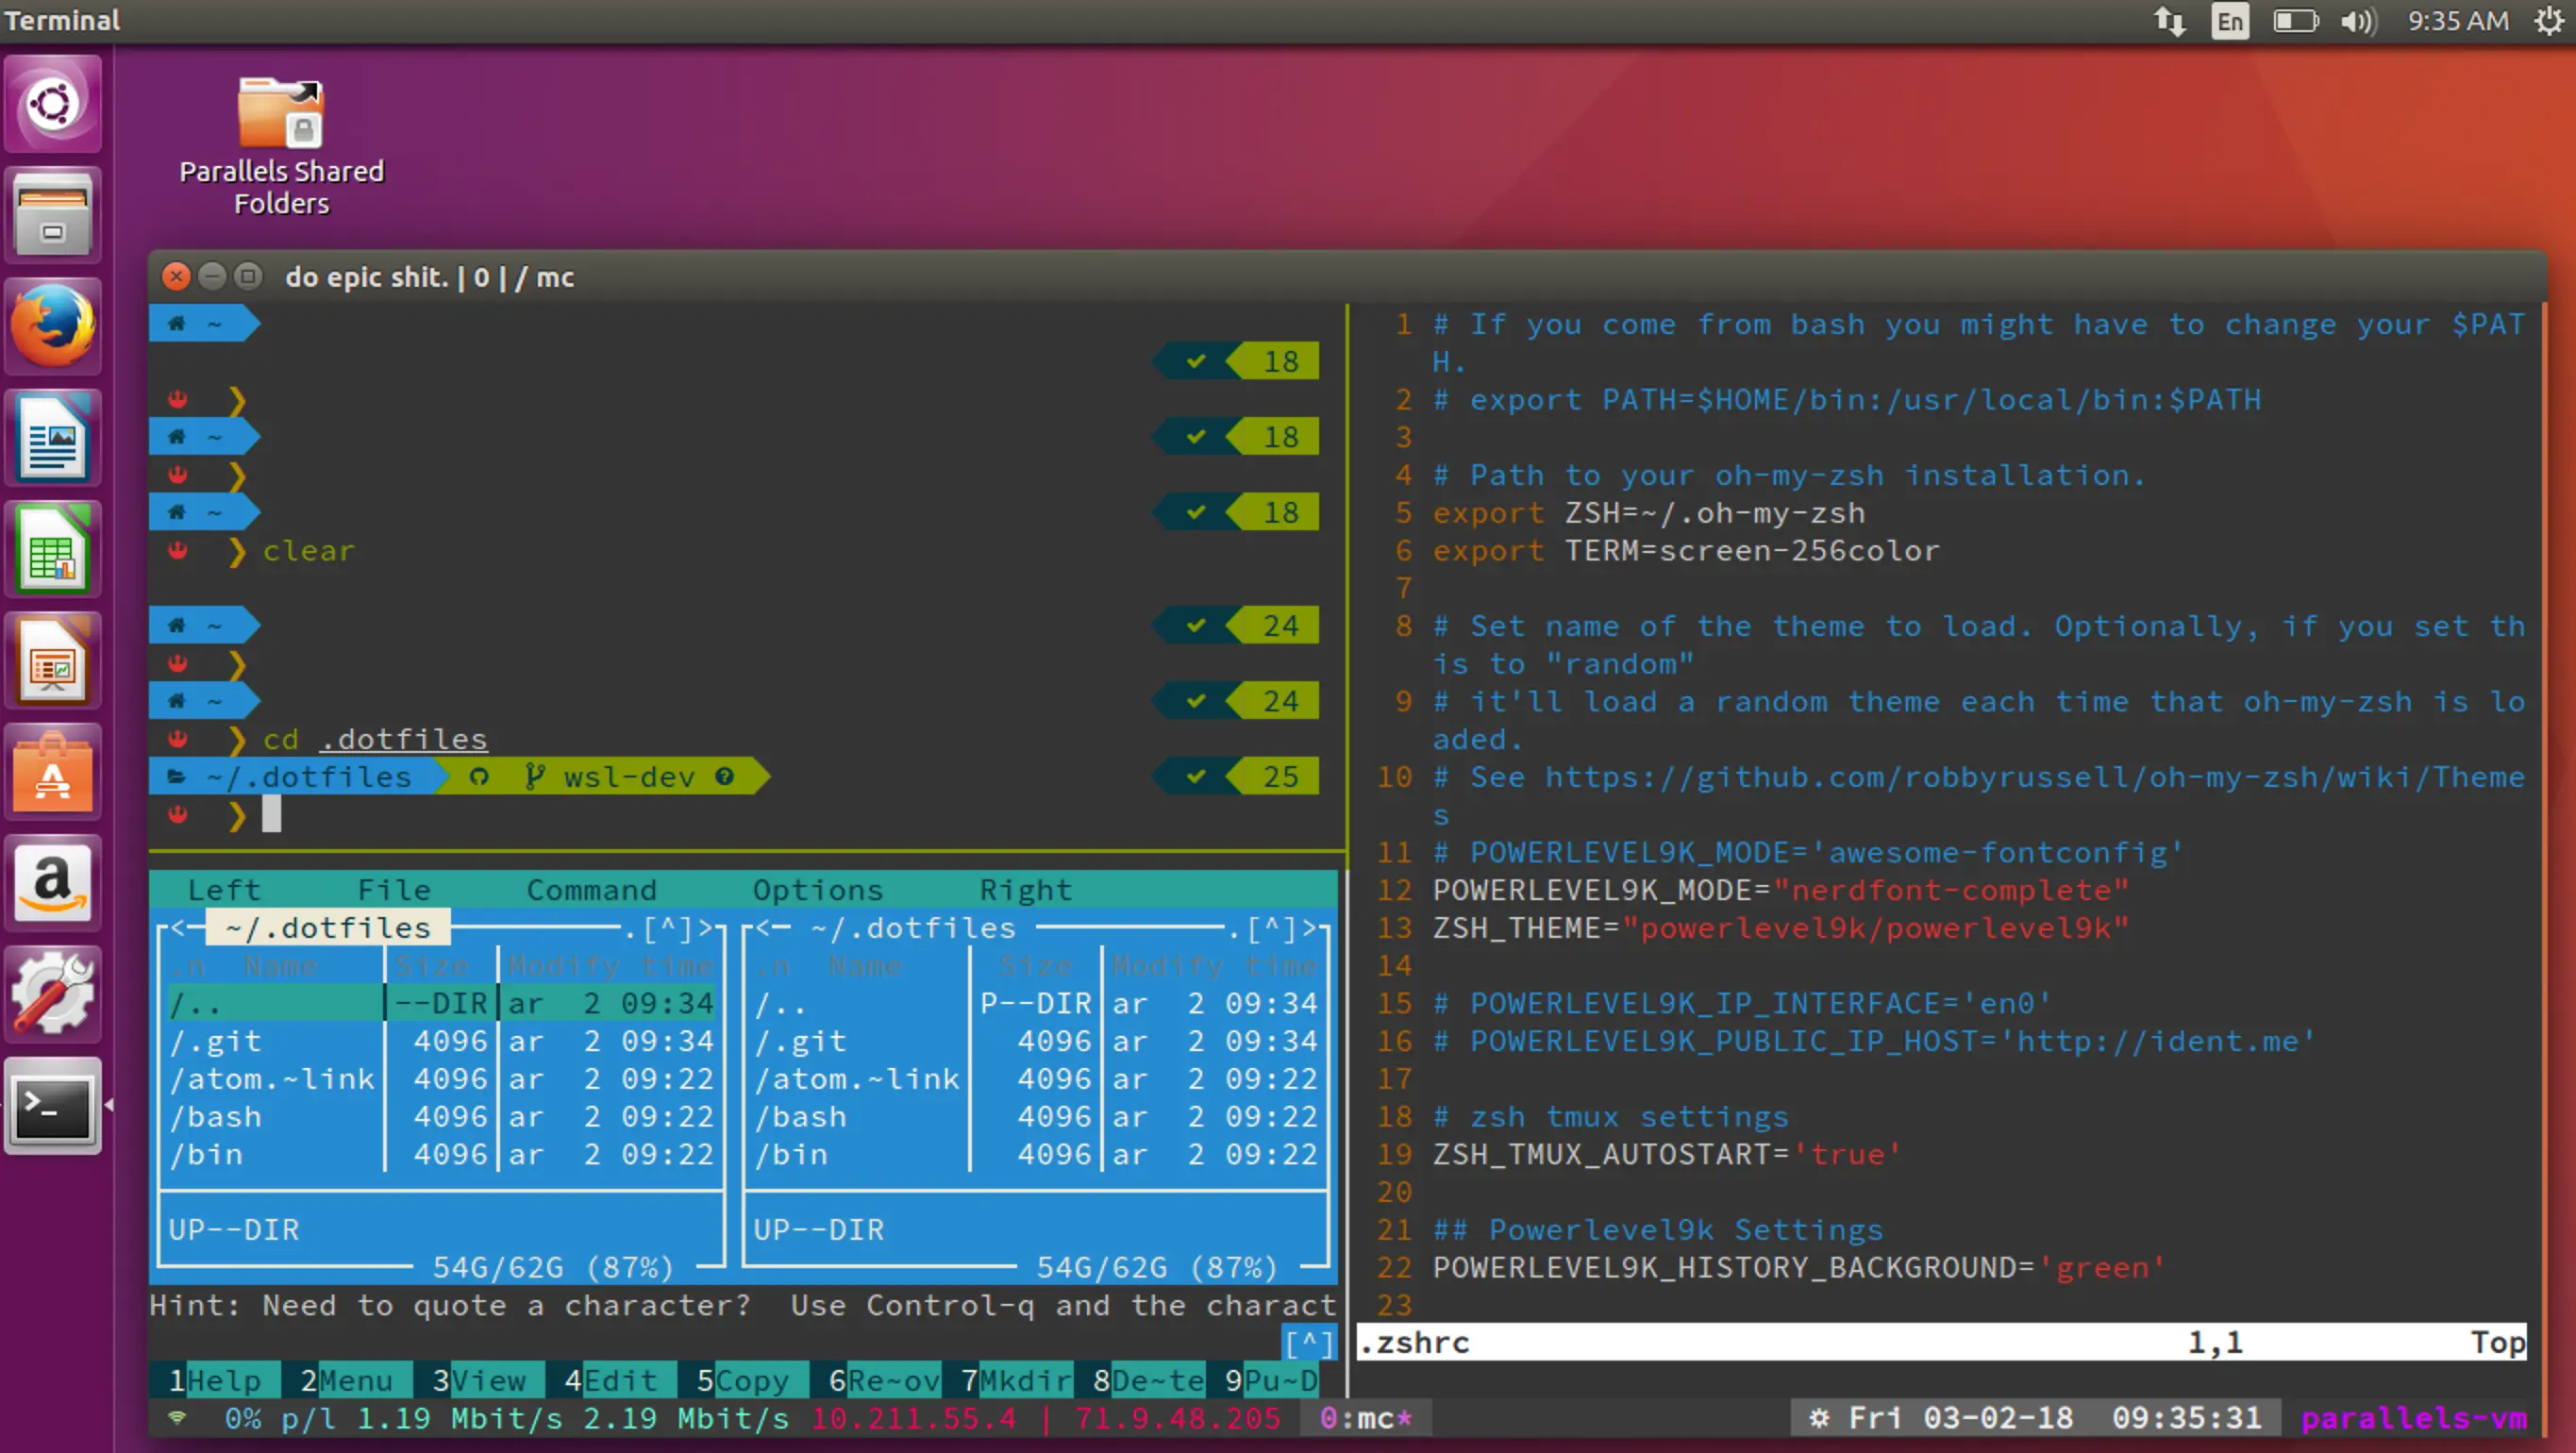
- Creates a symlink to the settings.json file in the dotfiles repo for VS Code (Solarized dark color scheme in VS Code on Ubuntu!)
Other general updates (WSL/Ubuntu/macOS):
- Adds in “k” alias for kubectl to .zshrc
- Added packet loss data in tmux status bar
- Added speedtest data (download and upload bandwidth info) in tmux status bar
- Updated how public IP address data is parsed in tmux status bar
- Updated az cli install
- Updated vim color scheme and added vim airline plugin
- New font added to repo (Source Code Pro Nerd Font Complete Mono)
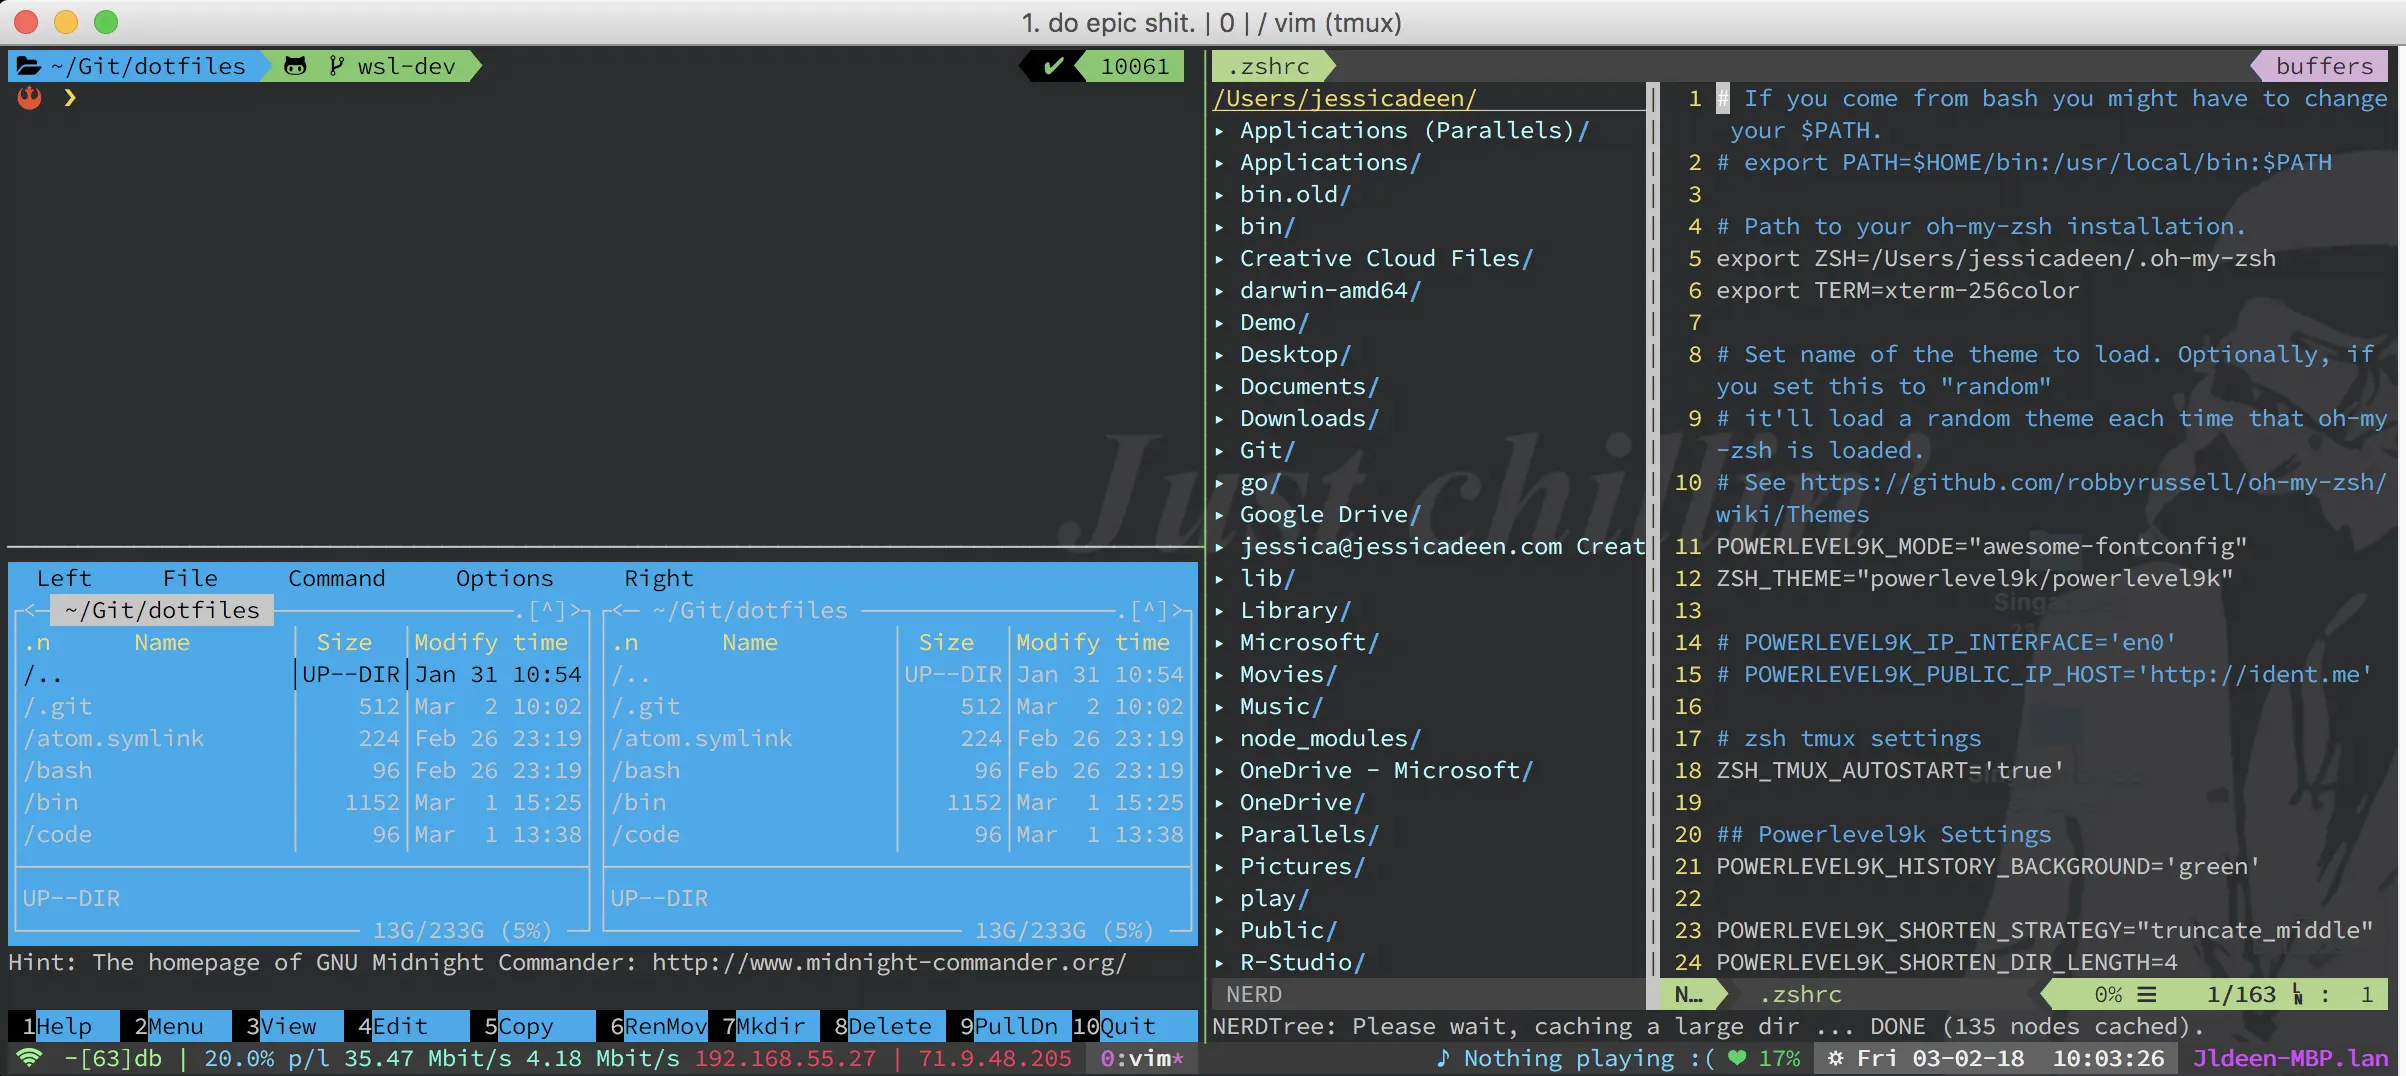
Here are pics of all 3 environments using my current dotfiles published today:

Things to note:
Fonts and Themes:
You still need to install a font to use some of the Unicode characters I have in my configuration. WSL Terminal Emulator, iTerm2 and Ubuntu/WSL support mono fonts so you can choose whichever patched mono font you want. I recommend picking one from Nerd Fonts. For more of a “how-to” please refer to the original FCU Badass Terminal blog post.
Overall, with each update, I’m loving WSL more and more. I was incredibly impressed when I discovered I could use the same configure.sh script interchangeably between WSL and a full blown Ubuntu 16.04/17.10 system and have the install work the same way. Full disclosure: I am using WSL as part of the Windows 10 Inside Preview Program, but I found so are most of you! As always, feedback is welcome and encouraged. And if you have any ideas of what could make these dotfiles even more badass, submit a PR!
NOTE: It was brought to my attention by Scott Rankin that there are some additional modifications required that are not explicitly mentioned here. If you’re using WSL and the WSL Terminal Emulator I mentioned, you might notice bash is still starting by default. This is actually related to how wsl-terminal configures their environment, as it does not appear to listen to the chsh command. To fix this, you will find a wsl-terminal.conf file in the /mnt/c/Users/[UserProfile]/wsl-terminal/etc directory. You need to comment out line 4 and uncomment line 6. You can see the file and the line where zsh is set as the main shell here: https://github.com/goreliu/wsl-terminal/blob/master/src/etc/wsl-terminal.conf#L6. After setting zsh as your default shell in the wsl-terminal.conf, restart it and you should see zsh as your default shell, and subsequently, all the other tools used in my dotfiles (presuming you opted to use them).