
Azure Static Web Apps and the Trailing Slash
I recently published a blog post on setting up Twitter Cards in Hugo and shared it on Twitter …
I know what you’re thinking, “I already know about the DevOps Project in Azure - that’s awesome!” Maybe you do (and maybe you don’t) but this post is not about the Azure DevOps project - it’s a post about how easy it is to get started with DevOps when all you have is your code.
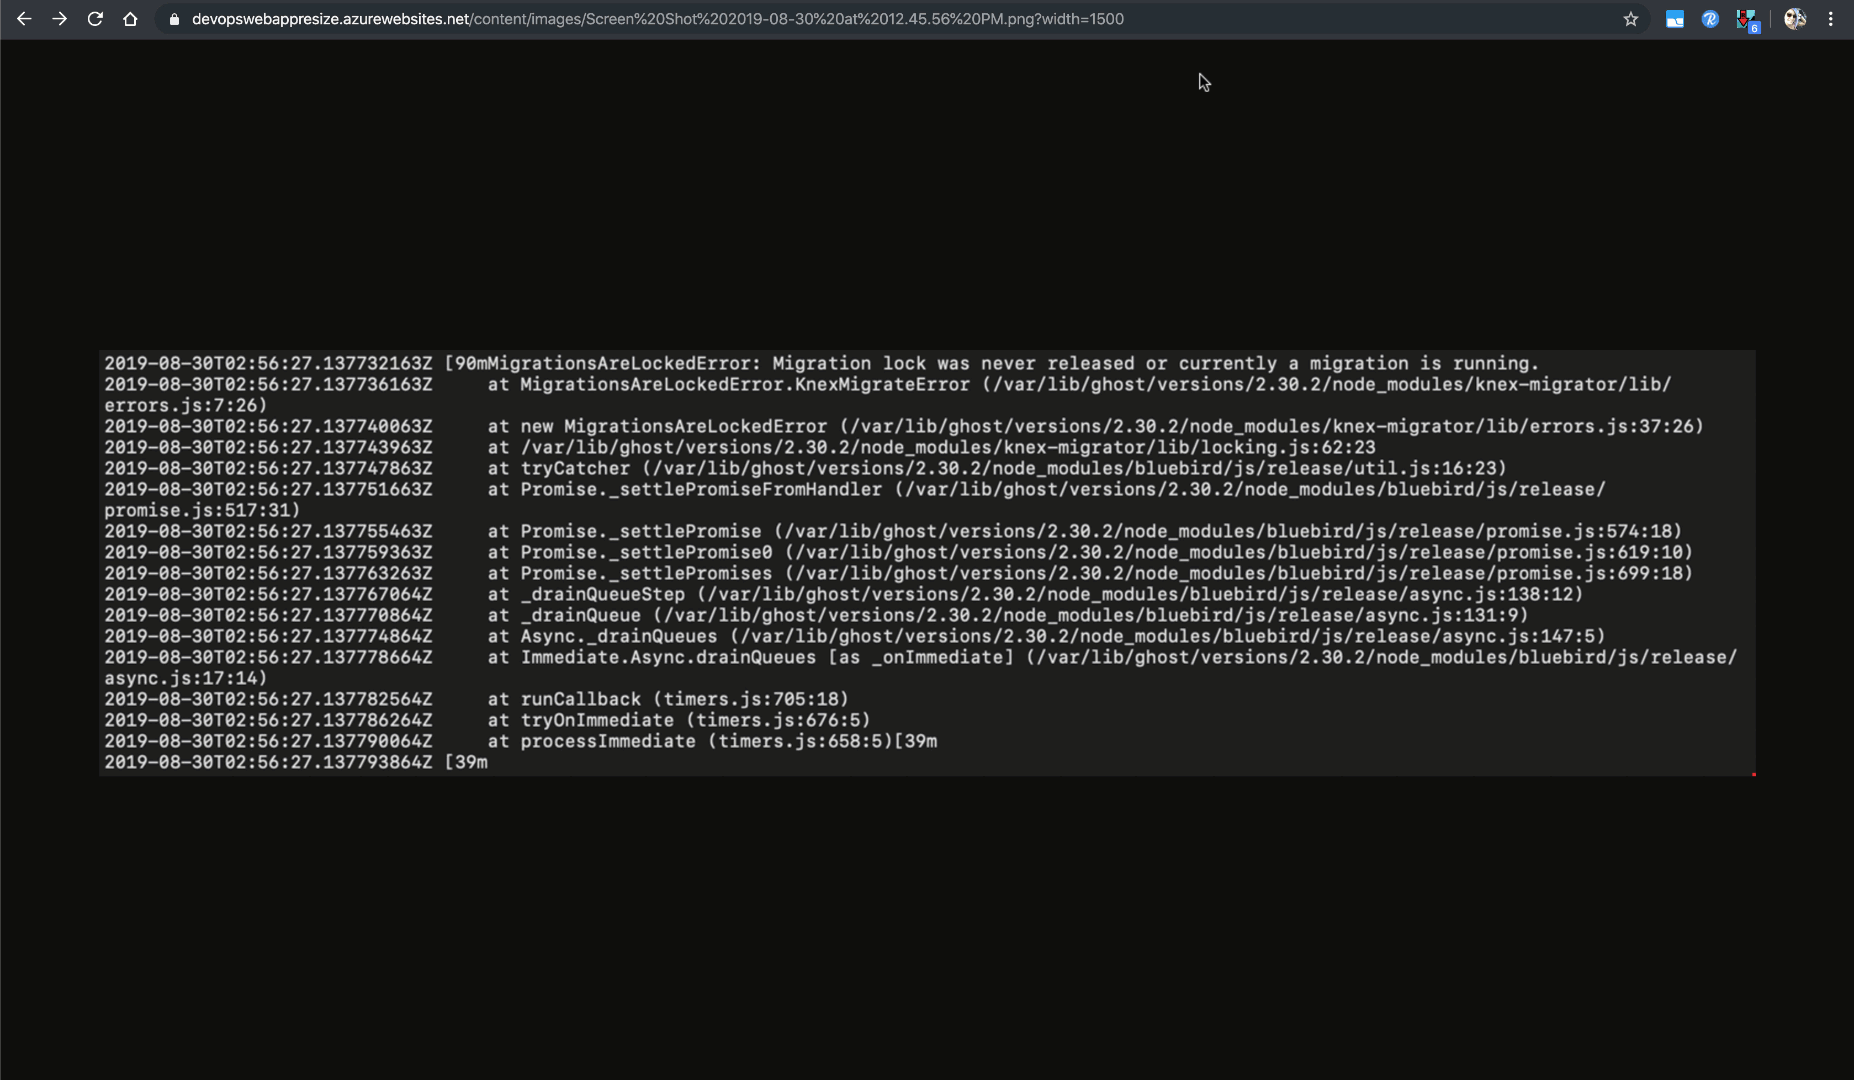
I recently set out on a mission to optimize images when using Ghost + Azure Storage since Ghost, as of the date of this post, does not support image optimization with 3rd party storage adapters. I do have an update coming to my npm Ghost-Azurestorage adpater to solve this probblem as part of the adapter itself, but in my research I came across an ASP.NET (not .NET Core) Image Resizer that was awesome… only I run this blog in a linux container within an Azure Web App. I thought about running the Image Resizer as an Azure Function but as of Azure Functions 2.0 only .NET Core is supported. My next thought was to test the Image Resizer as a Windows Web App using the free service plan. This post is not about the Image Resizer itself (that will be a future post), but I will use the Image Resizer code as demo code for this post.
Once I have your app ready to be deployed (I just updated the web.confg file with my Azure Storage Connection String on a private repo version of our demo code and in a future post will walk through using Azure Keyvault instead), you’ll head on over to the Azure Portal to setup a Windows Web App.
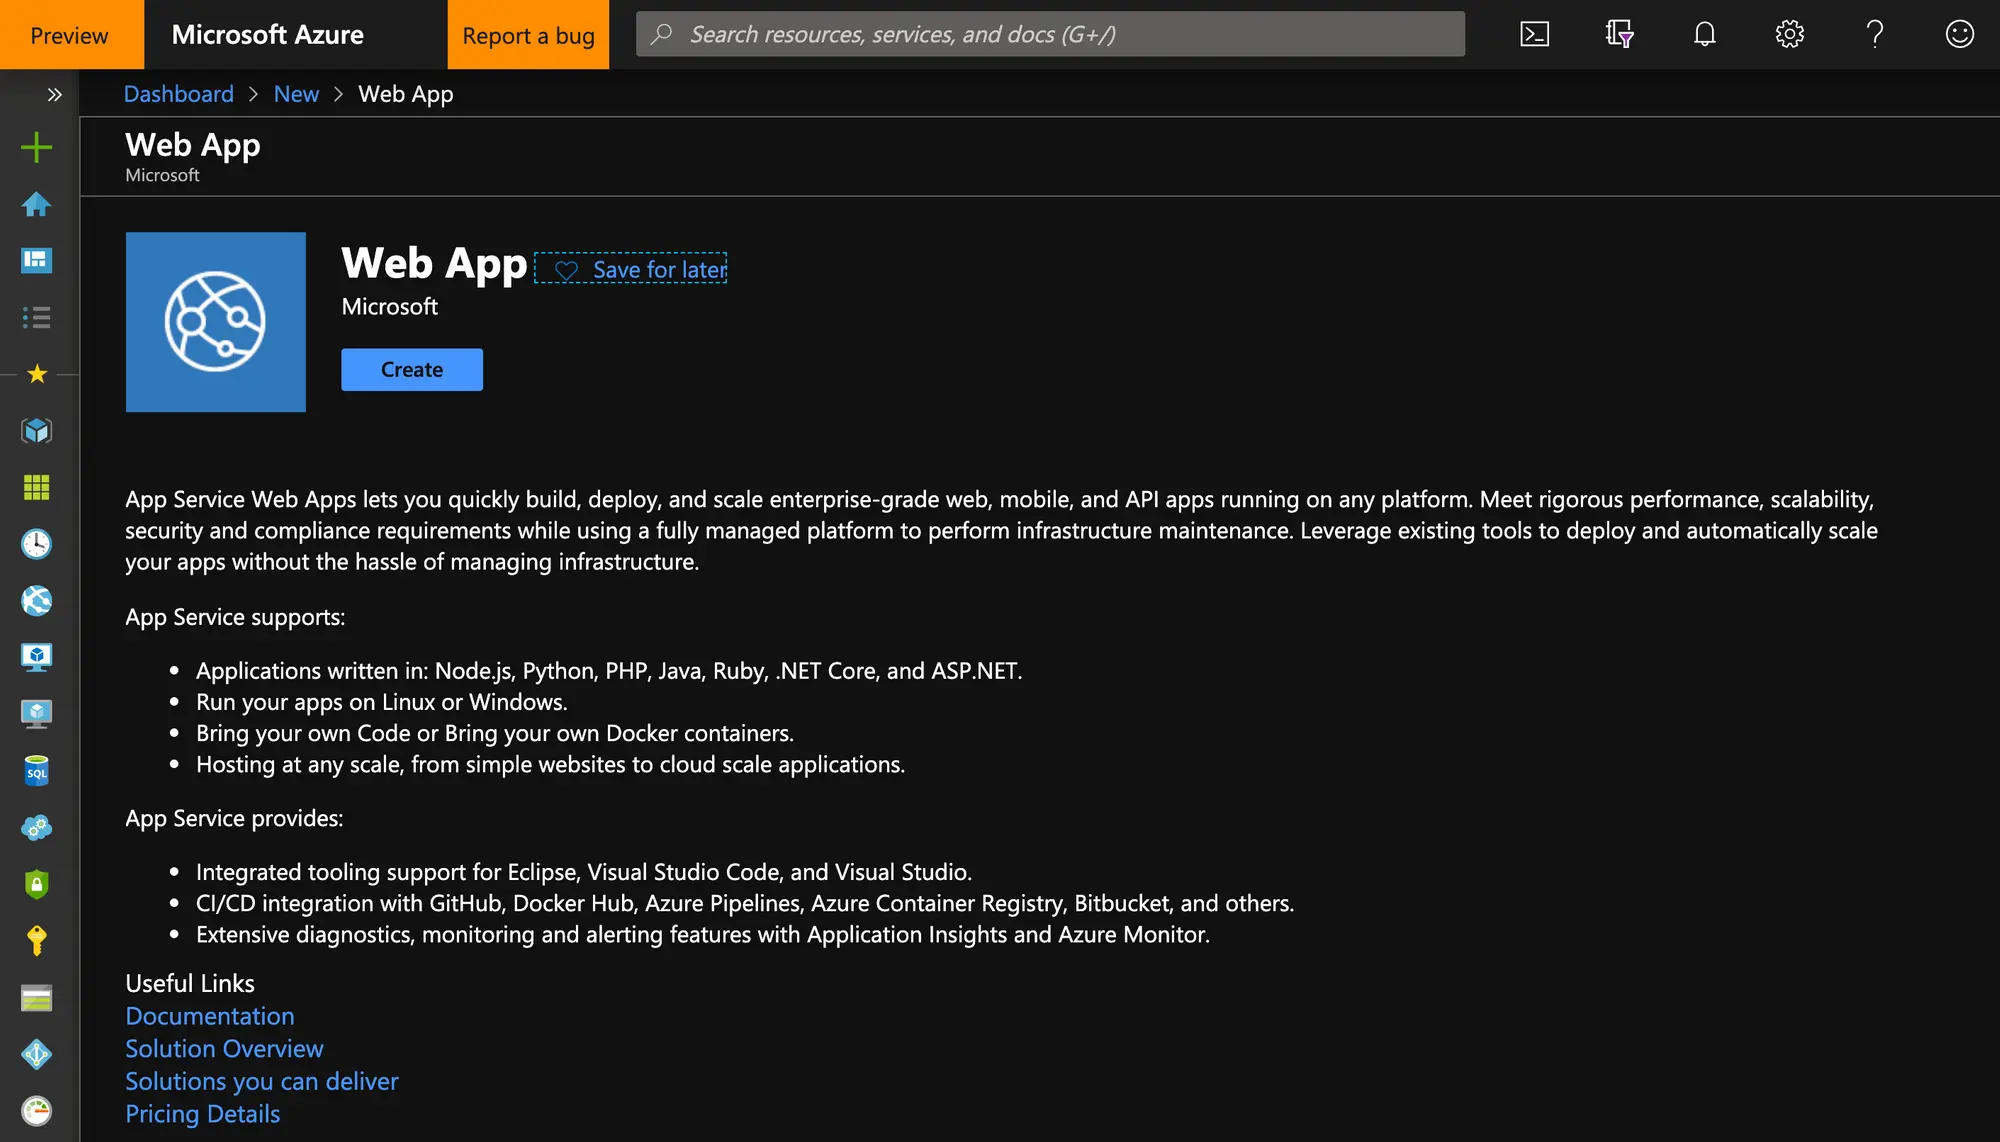
From within the portal, you’ll click the “+” sign in the top left corner, typed, web app, and hit enter. You should see the Azure Web App creation page pop up, and when you do, hit create.
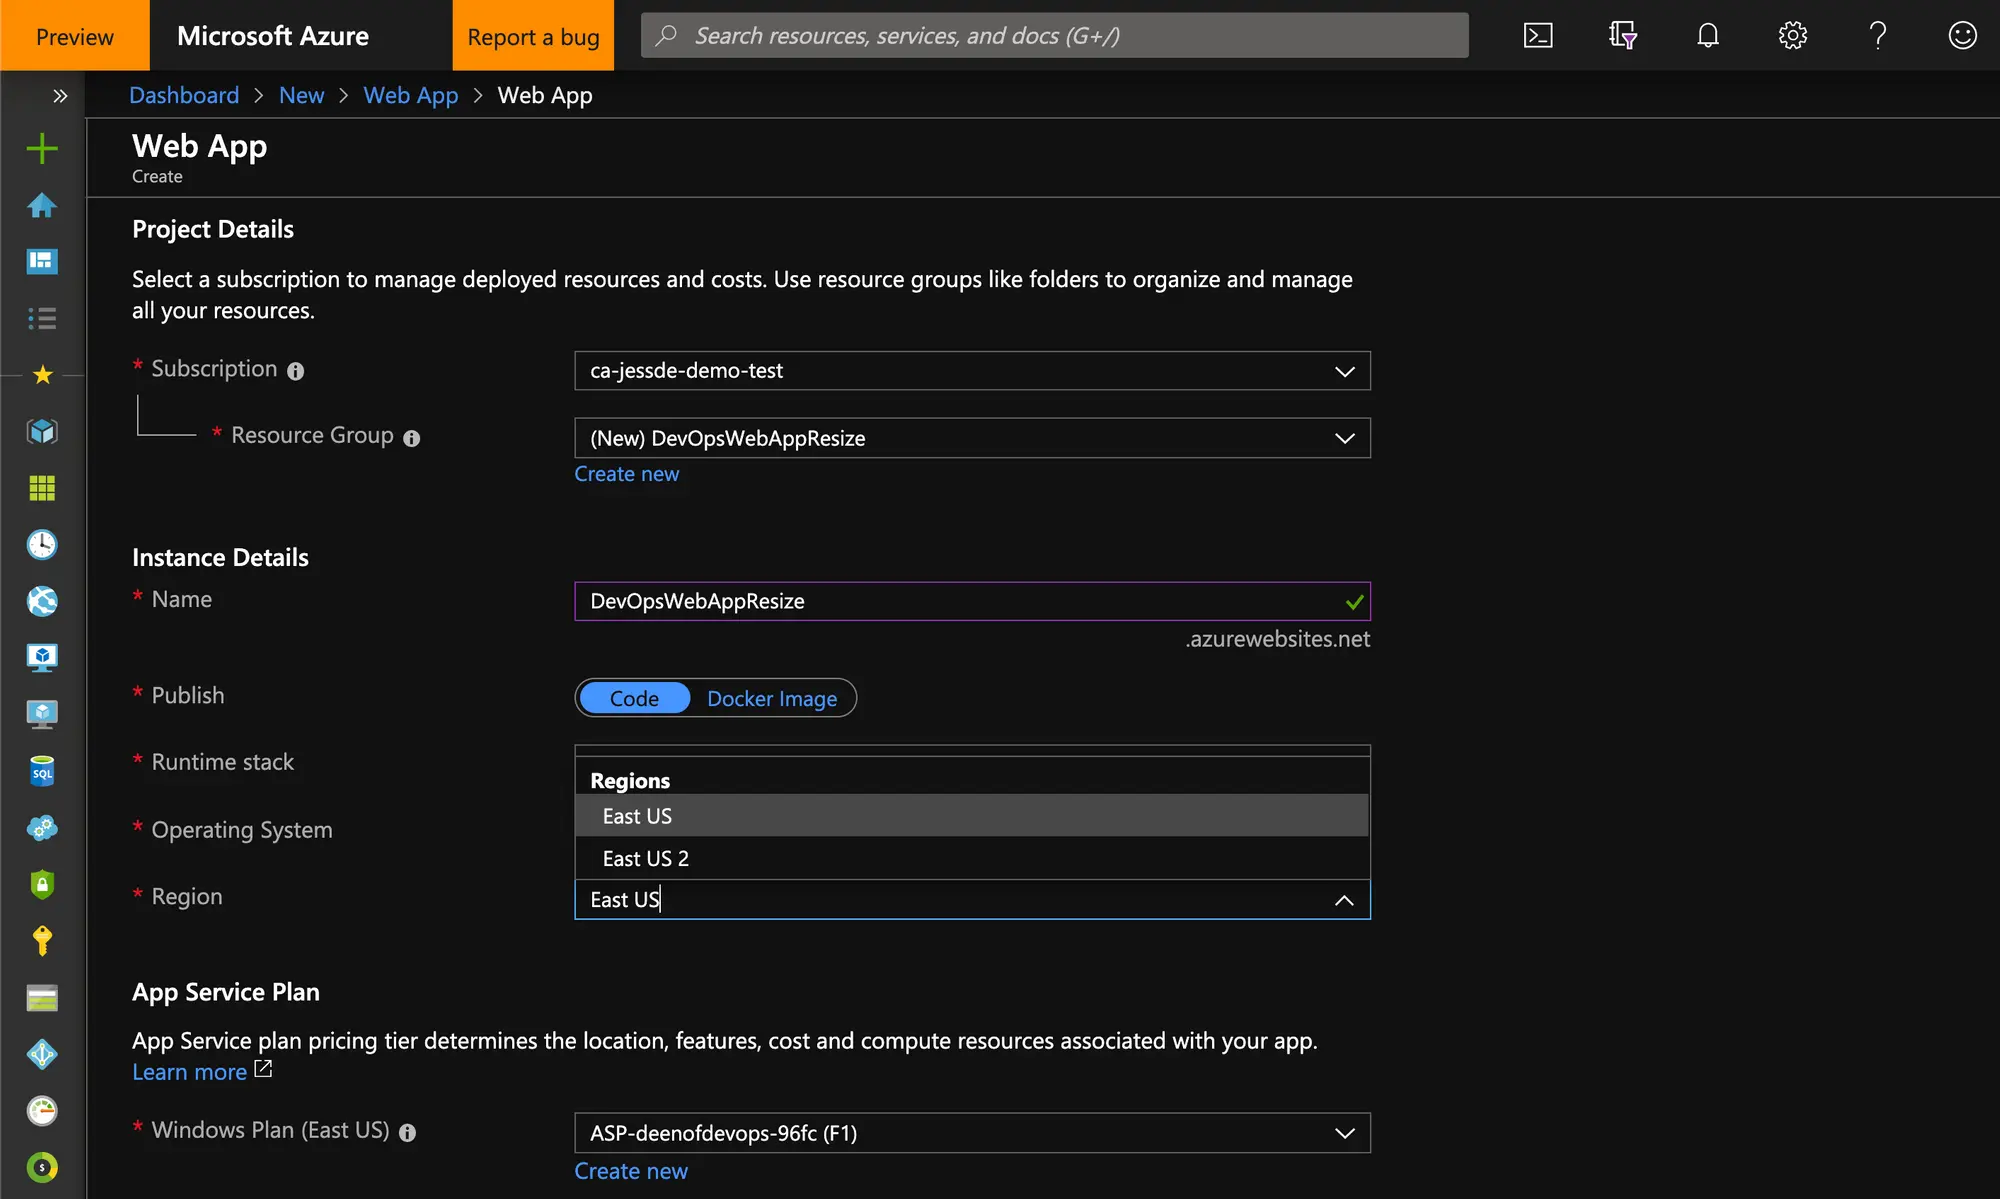
From there, you’ll just need to fill in a few key details - your resource group, app name, runtime stack, location, for your AppServicePlan, you can select the F1 Free Sku just as I did in the below example. From there, hit Review and Create.
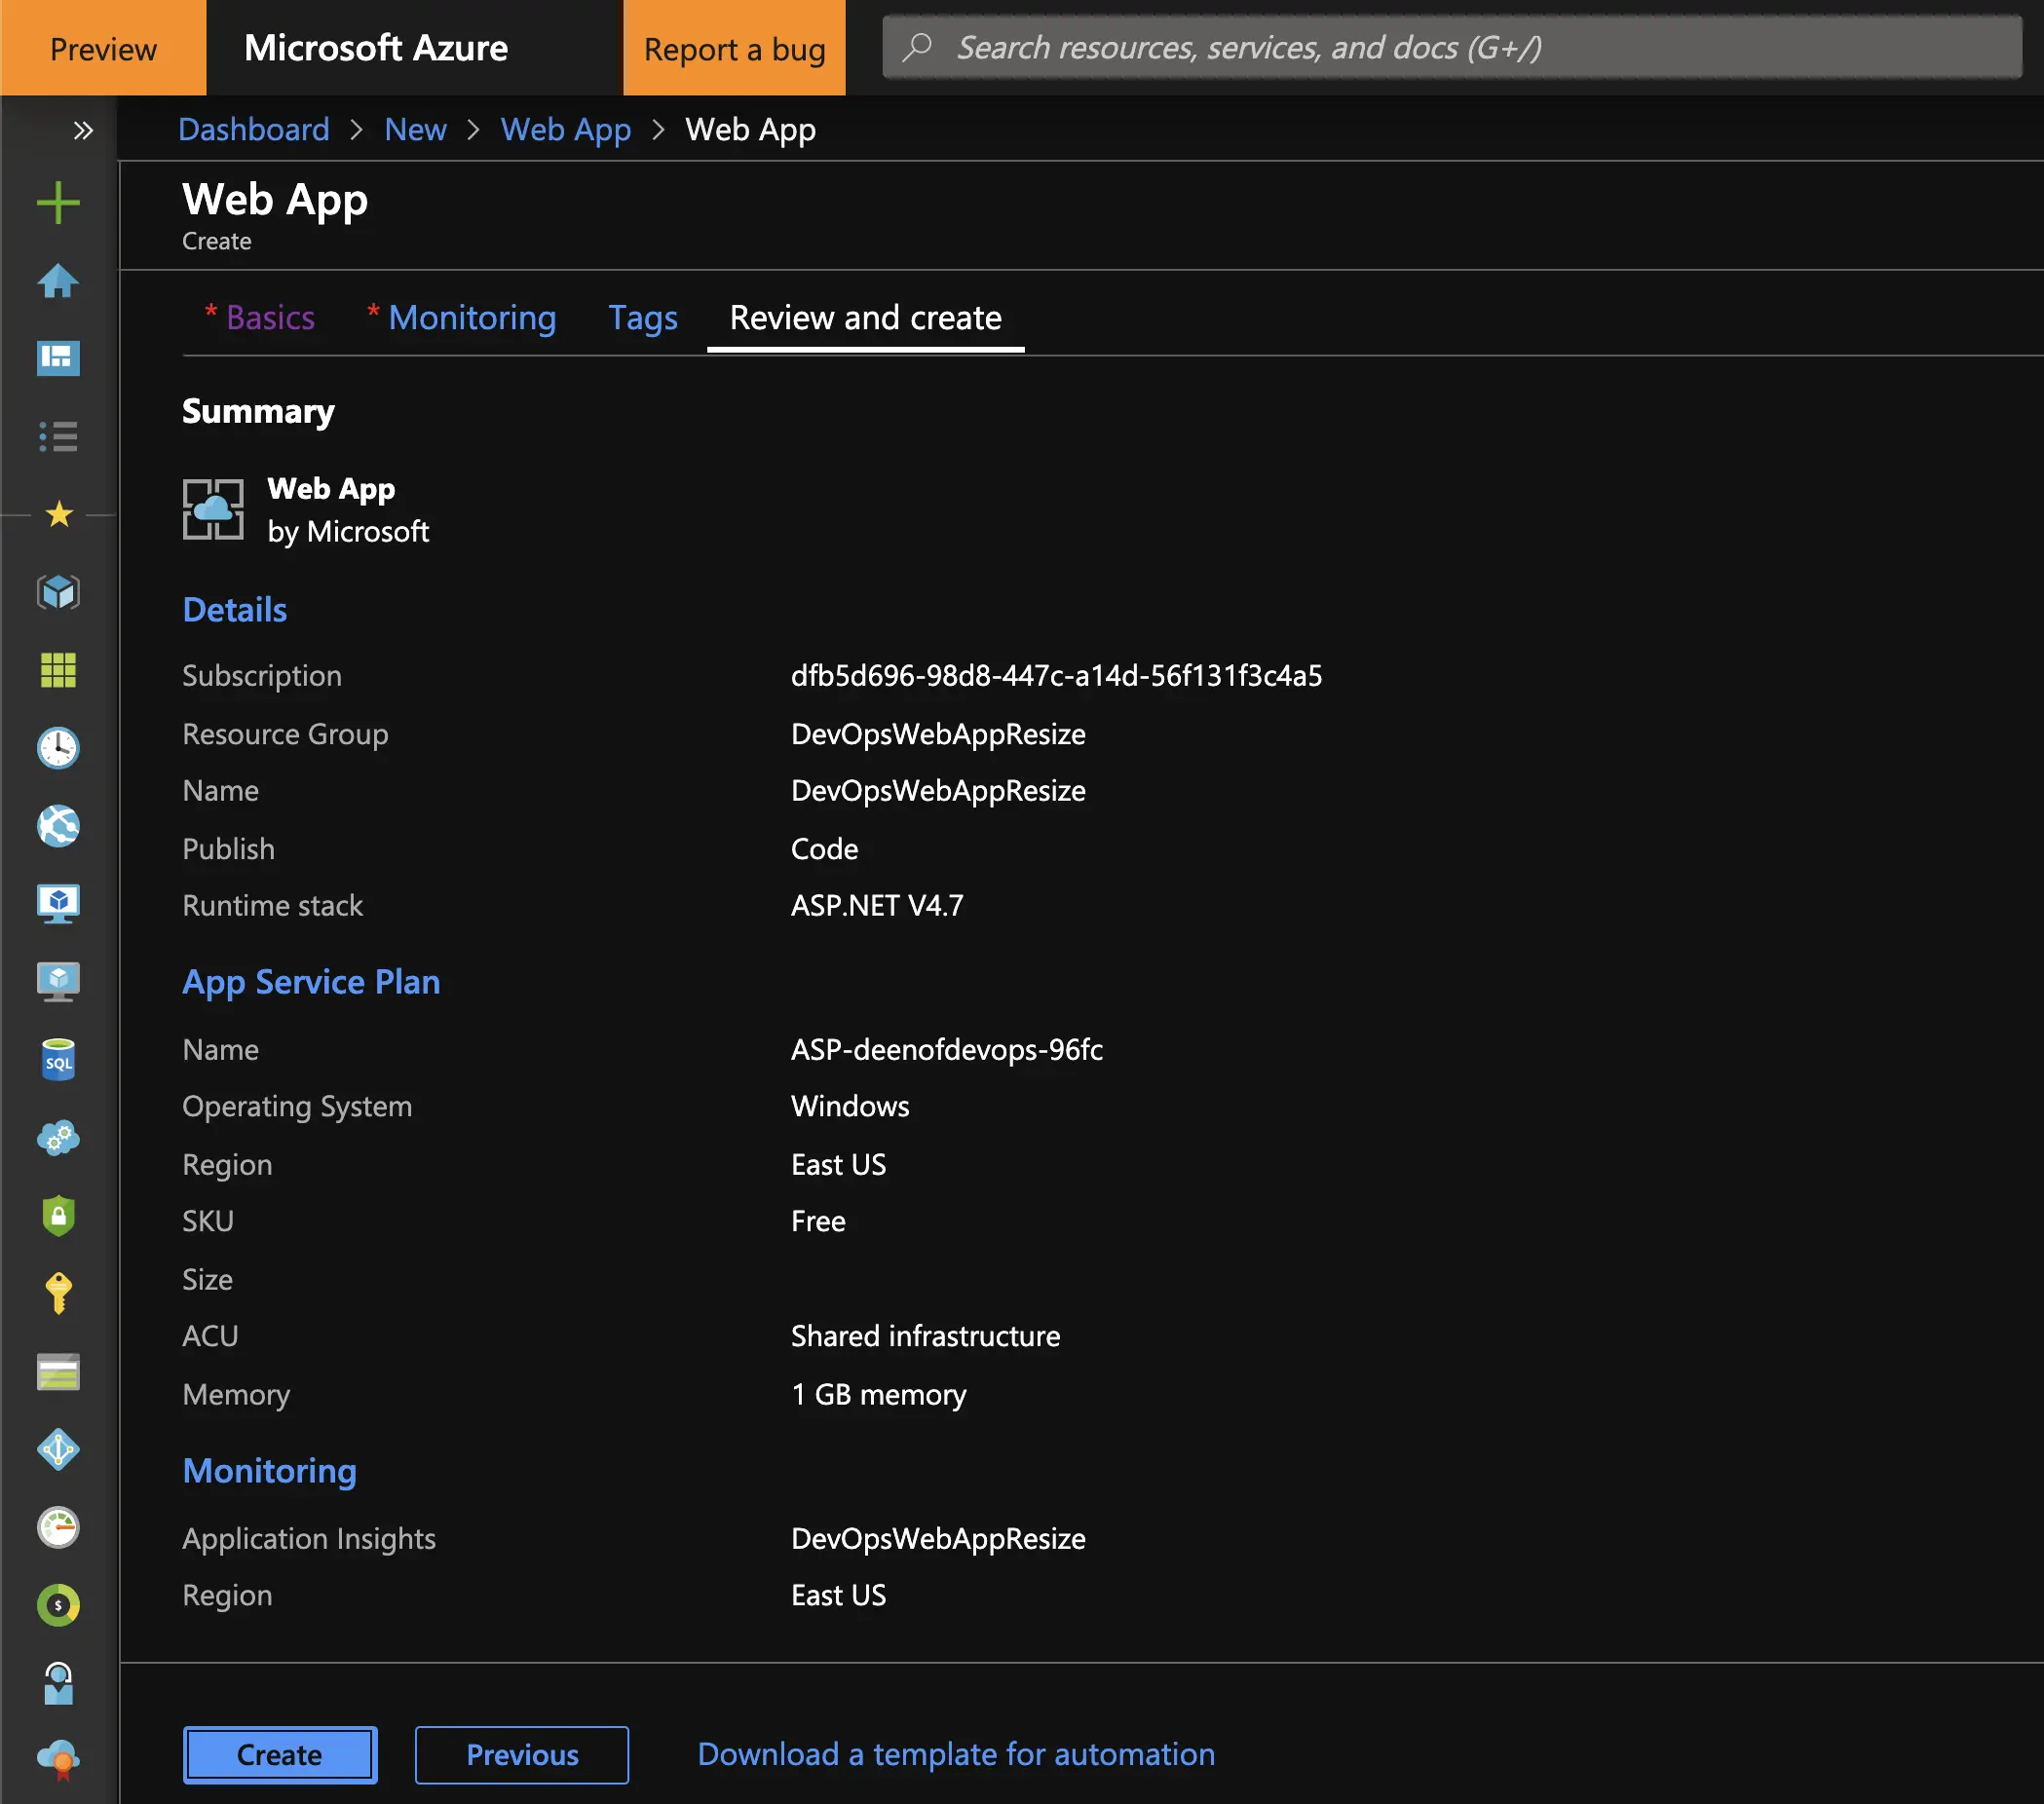
You’ll get a brief summary page and then you can confirm your new Web App settings and create your app by clicking the official Create button. Here’s an example:
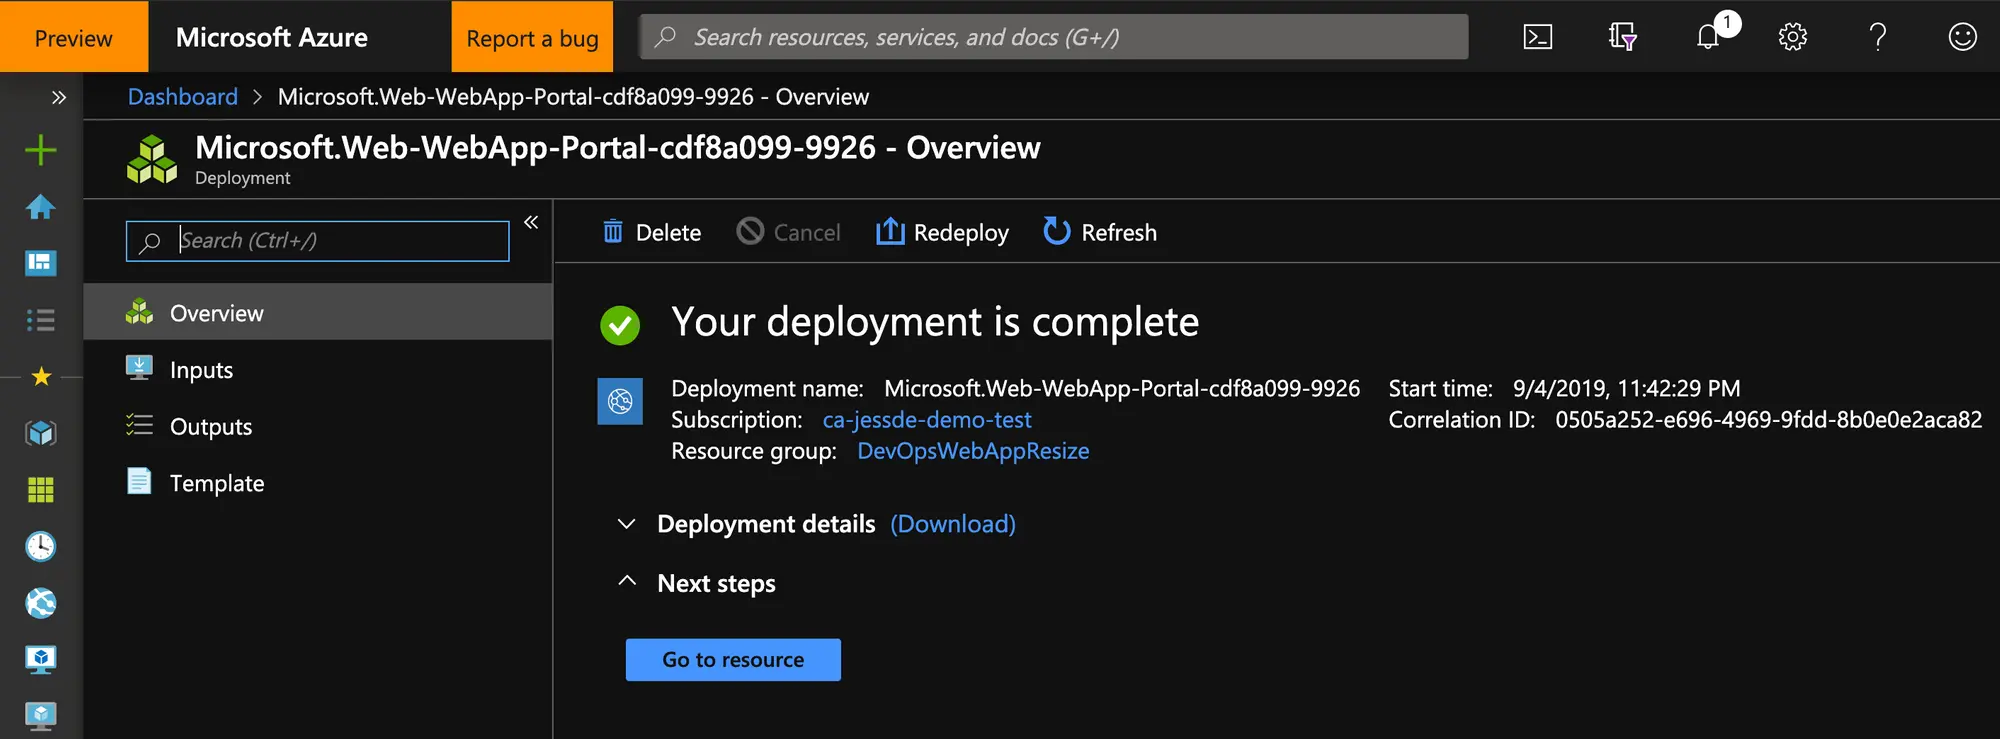
Your deployment will take a few minutes (mine took as long as writing this sentence did) and then after, you’ll have a shiny new empty Windows Web App. Simply navigate to the resource by clicking the Go to resource button.
First, I hope Lynyrd Skynyrd’s song, “Gimme Three Steps” popped into your head too…
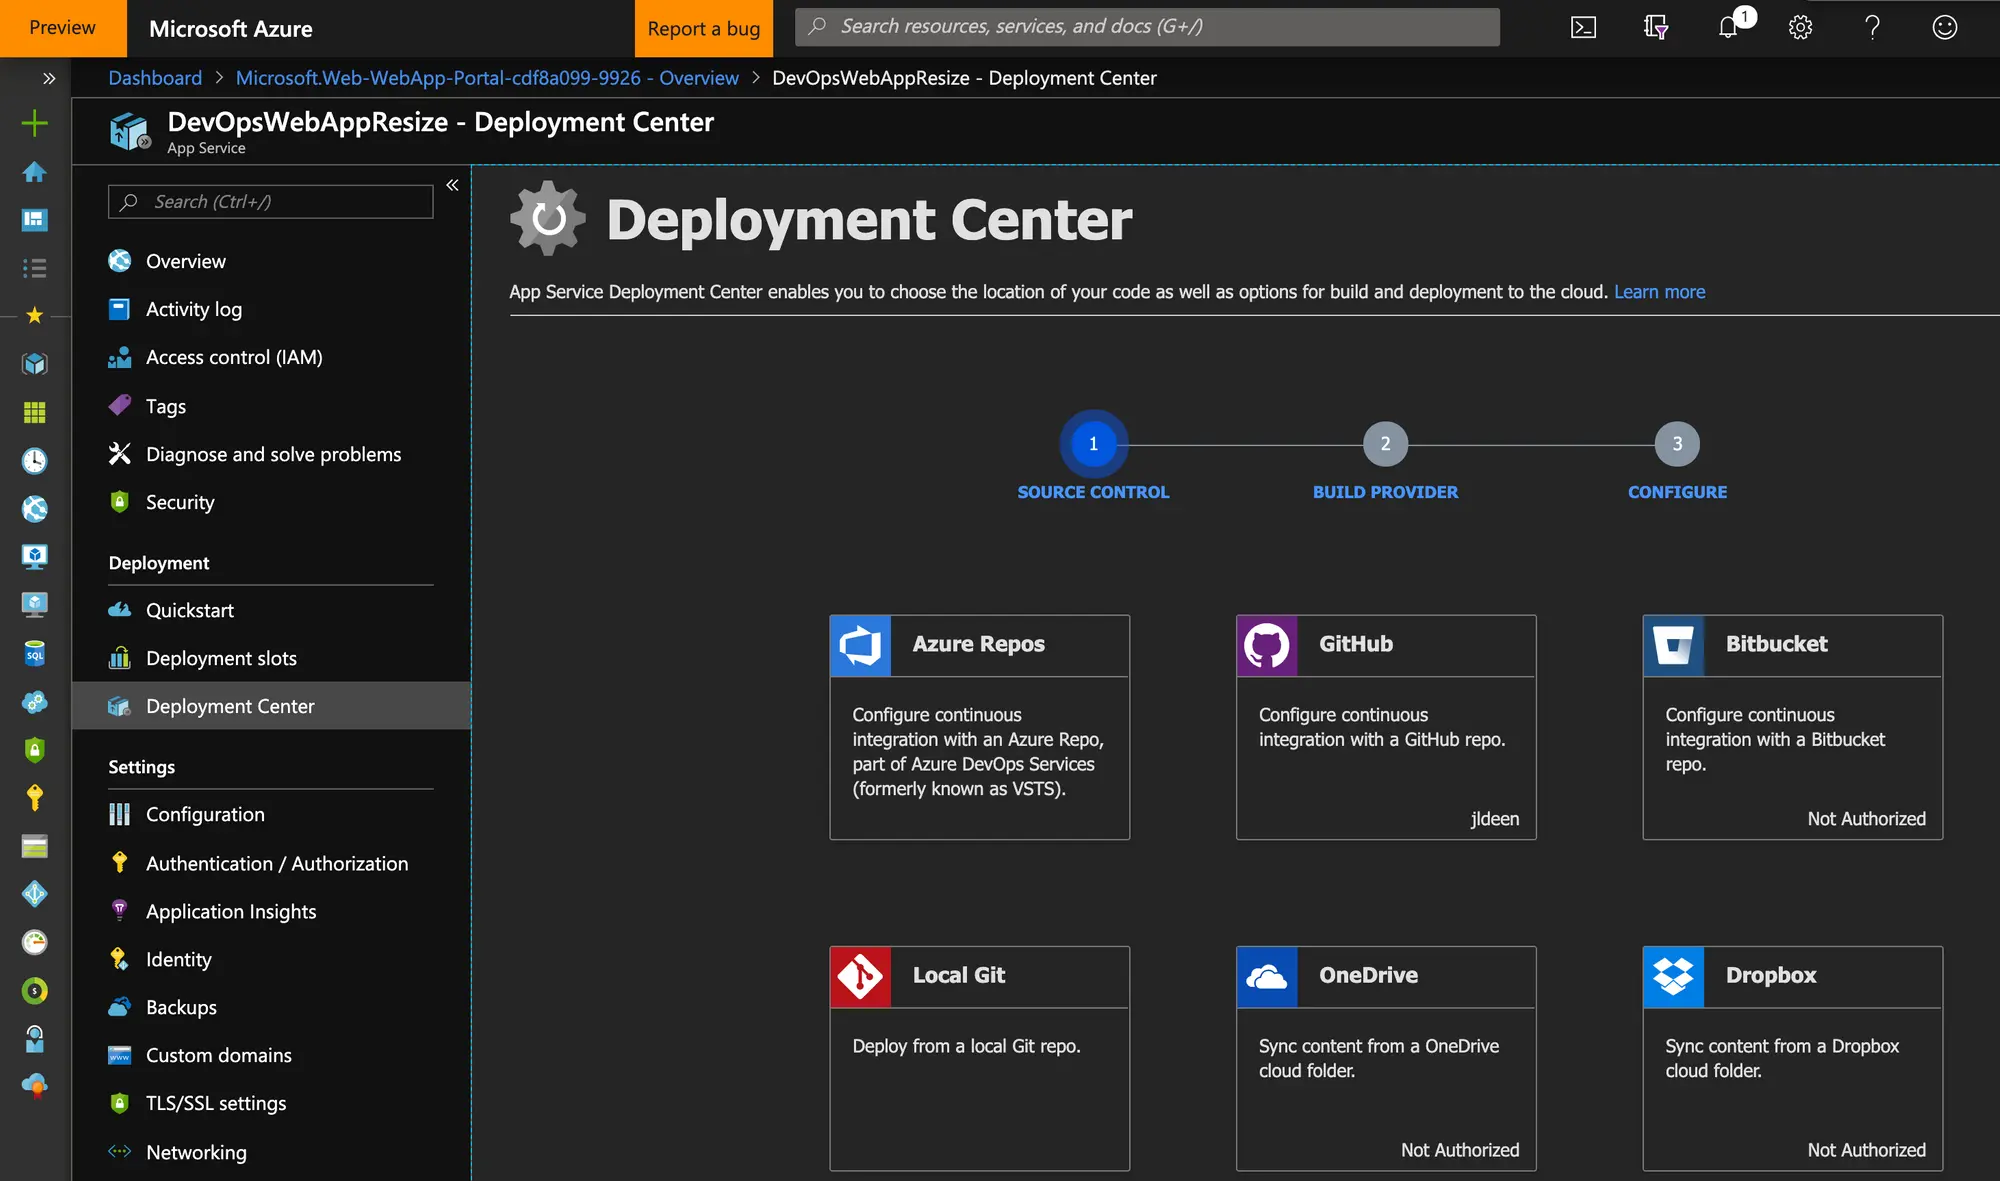
Anyway, after you opted to view your newly created resource, you’ll see a dashboard for it. On the left hand side of the dashboard you should see a Deployment section with 3 options:
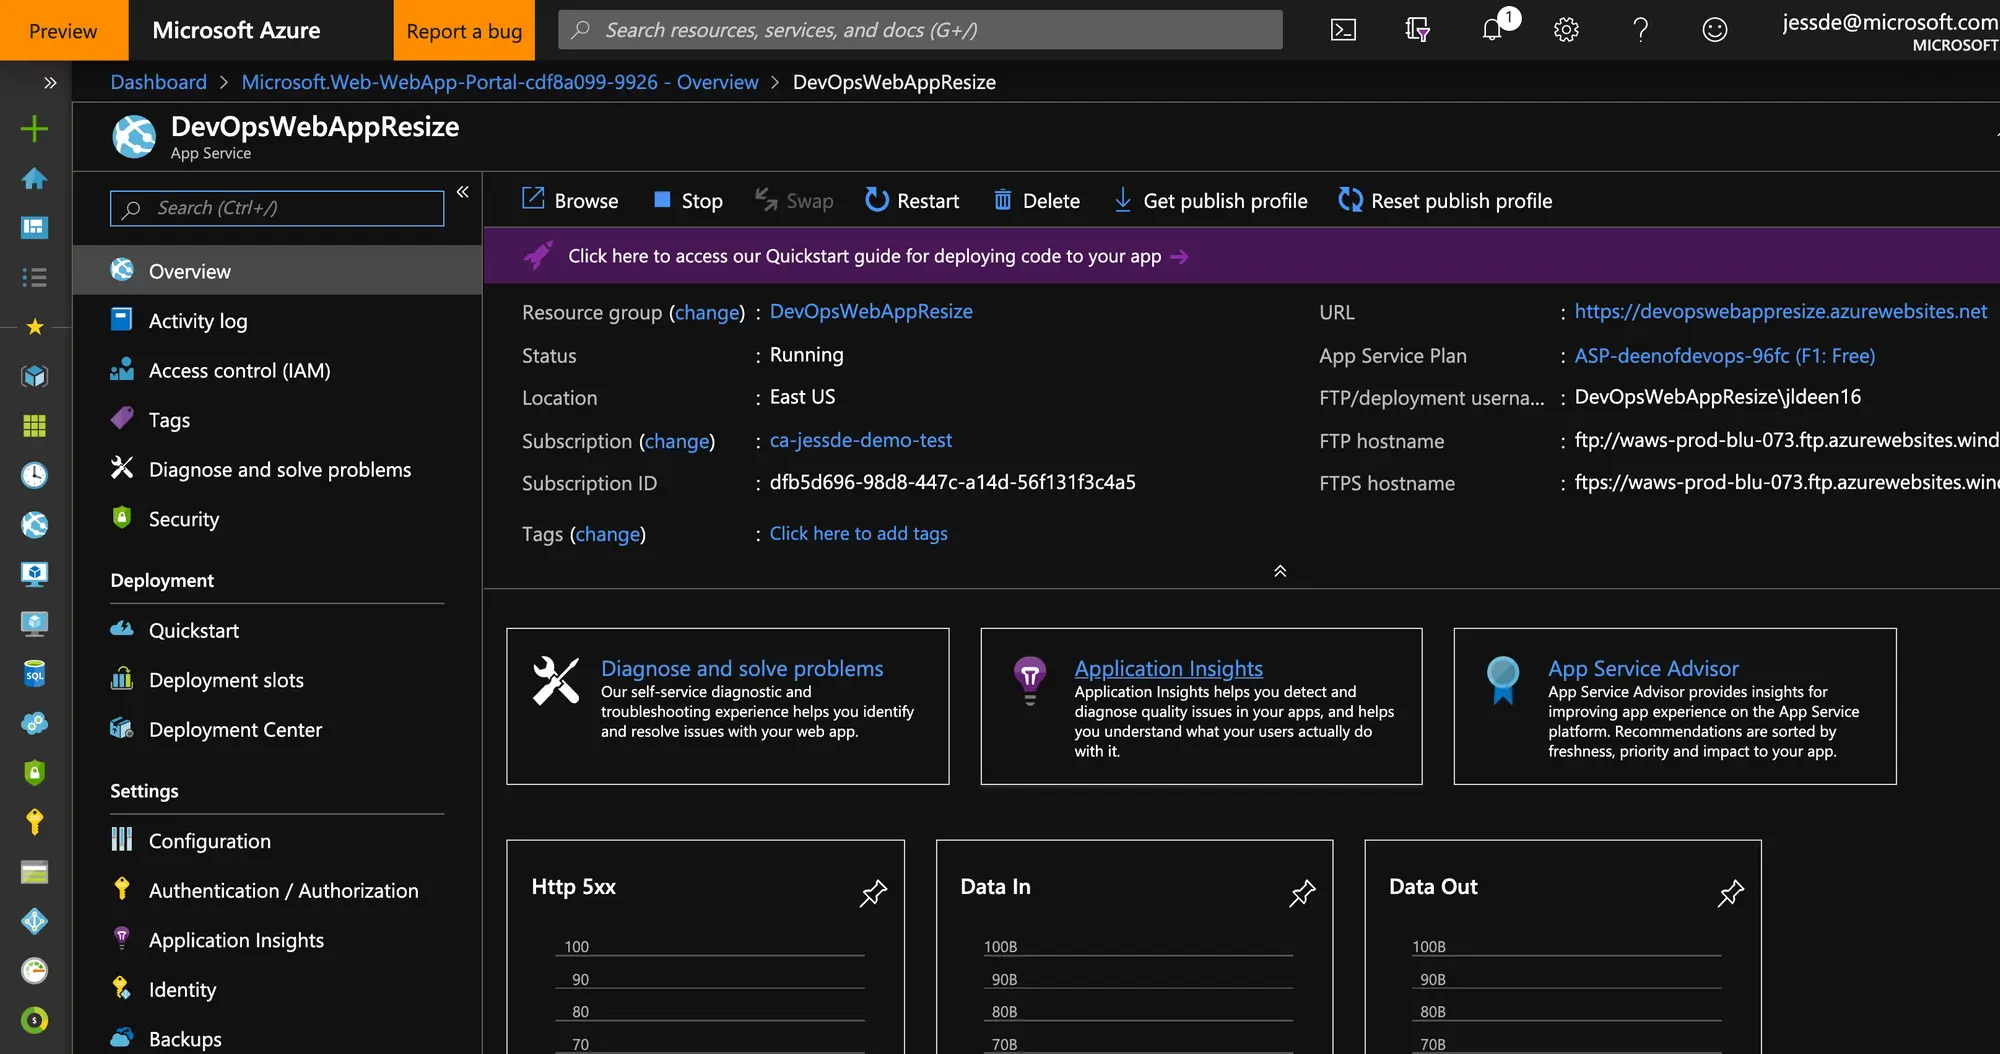
Click on Deployment Center and you’ll notice this is no “Right click, publish” (Damian Brady says friends don’t let friends do that), nor is this a “Deploy from Git directly to this Web App” (That’s the same as right click, publish in my book). The first thing we have to do is select where our code lives and 8 options are available (Azure Repos, GitHub, BitBucket, Local Git, OneDrive, Dropbox, External Git and FTP).

I chose GitHub since that’s where all my code lives and then I hit “Continue.”
Note: You may have to authorize a connection to GitHub if you have not done so previously.
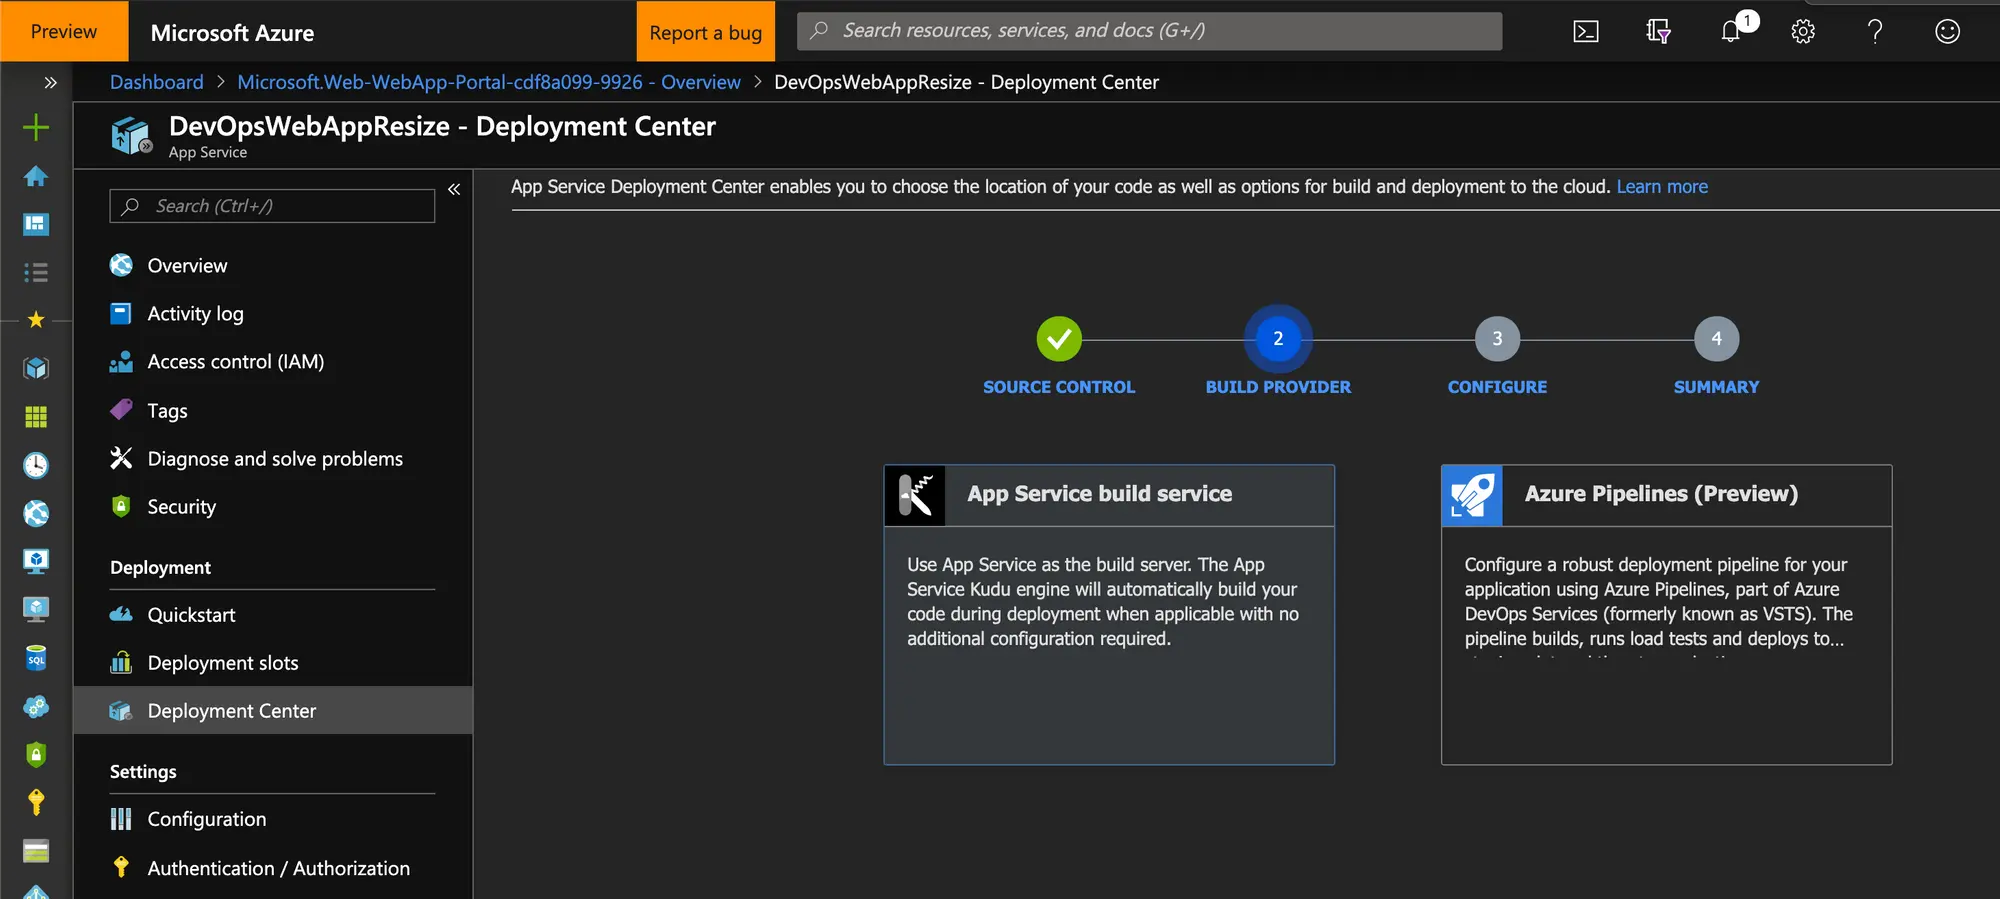
The next screen (Step 2) gives you two options for “Build Provider”: App Service build service and Azure Pipelines. Select Azure Piplines and hit “Continue.”
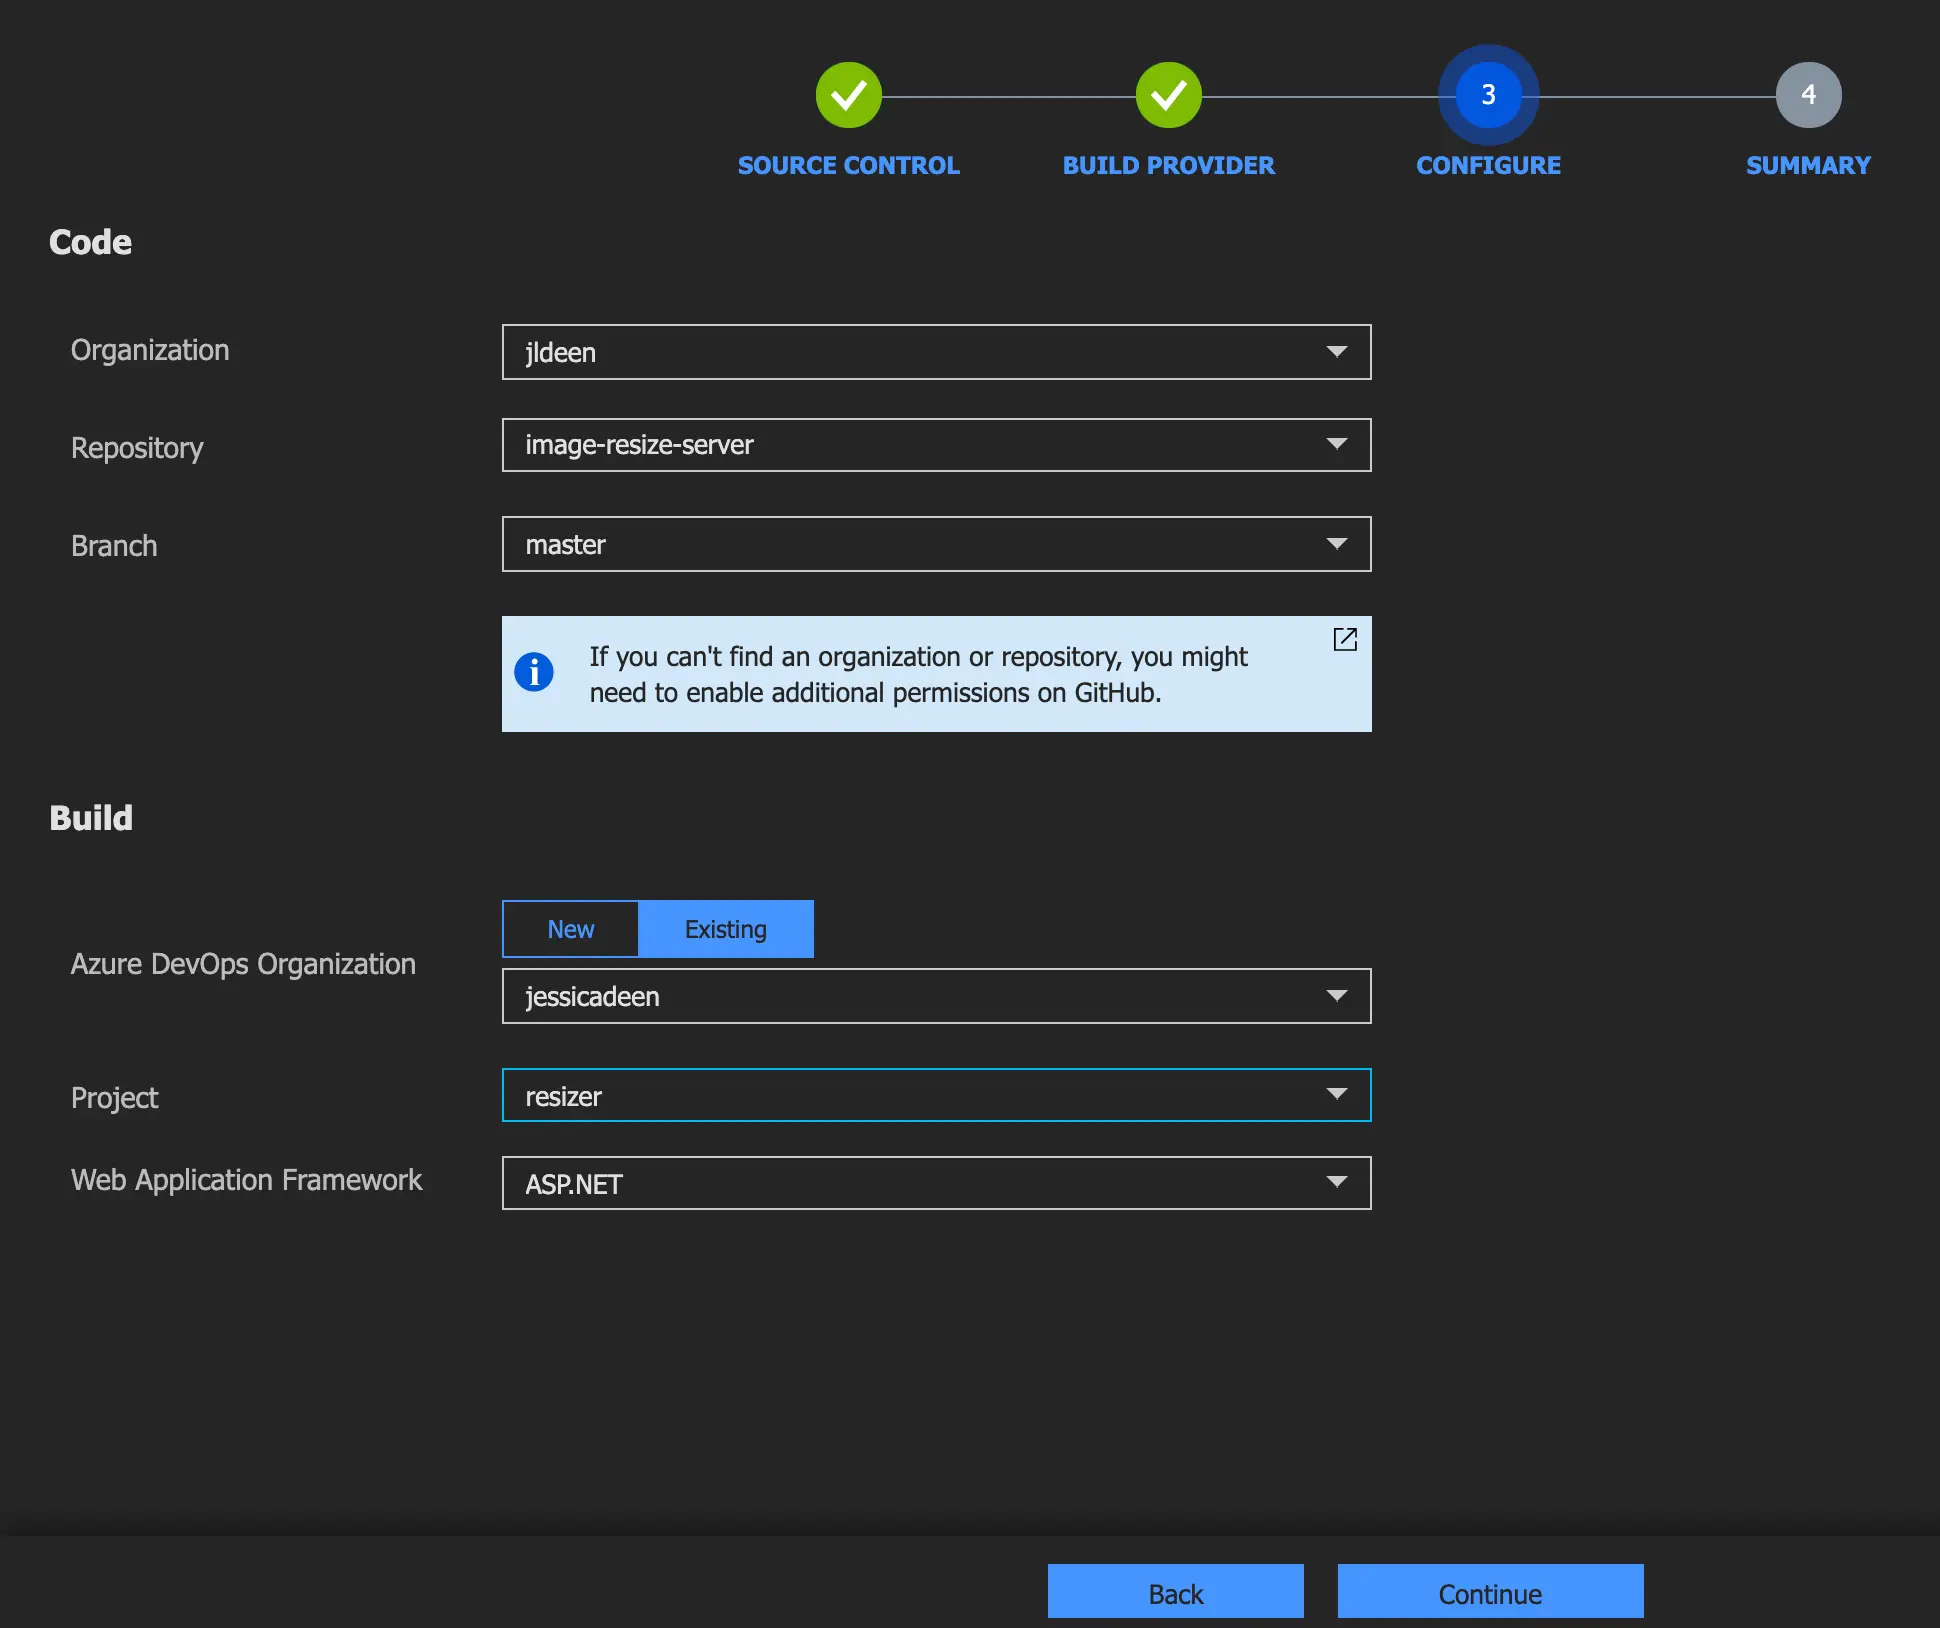
Step 3’s screen has you select options relevant to your code and Azure Pipelines. You’ll have to select your GitHub organization, repository, and branch, as well as your Azure Pipelines organization, project and web application framework.
Note: If you don’t have an Azure Pipelines organization, you can create one from this step, too.
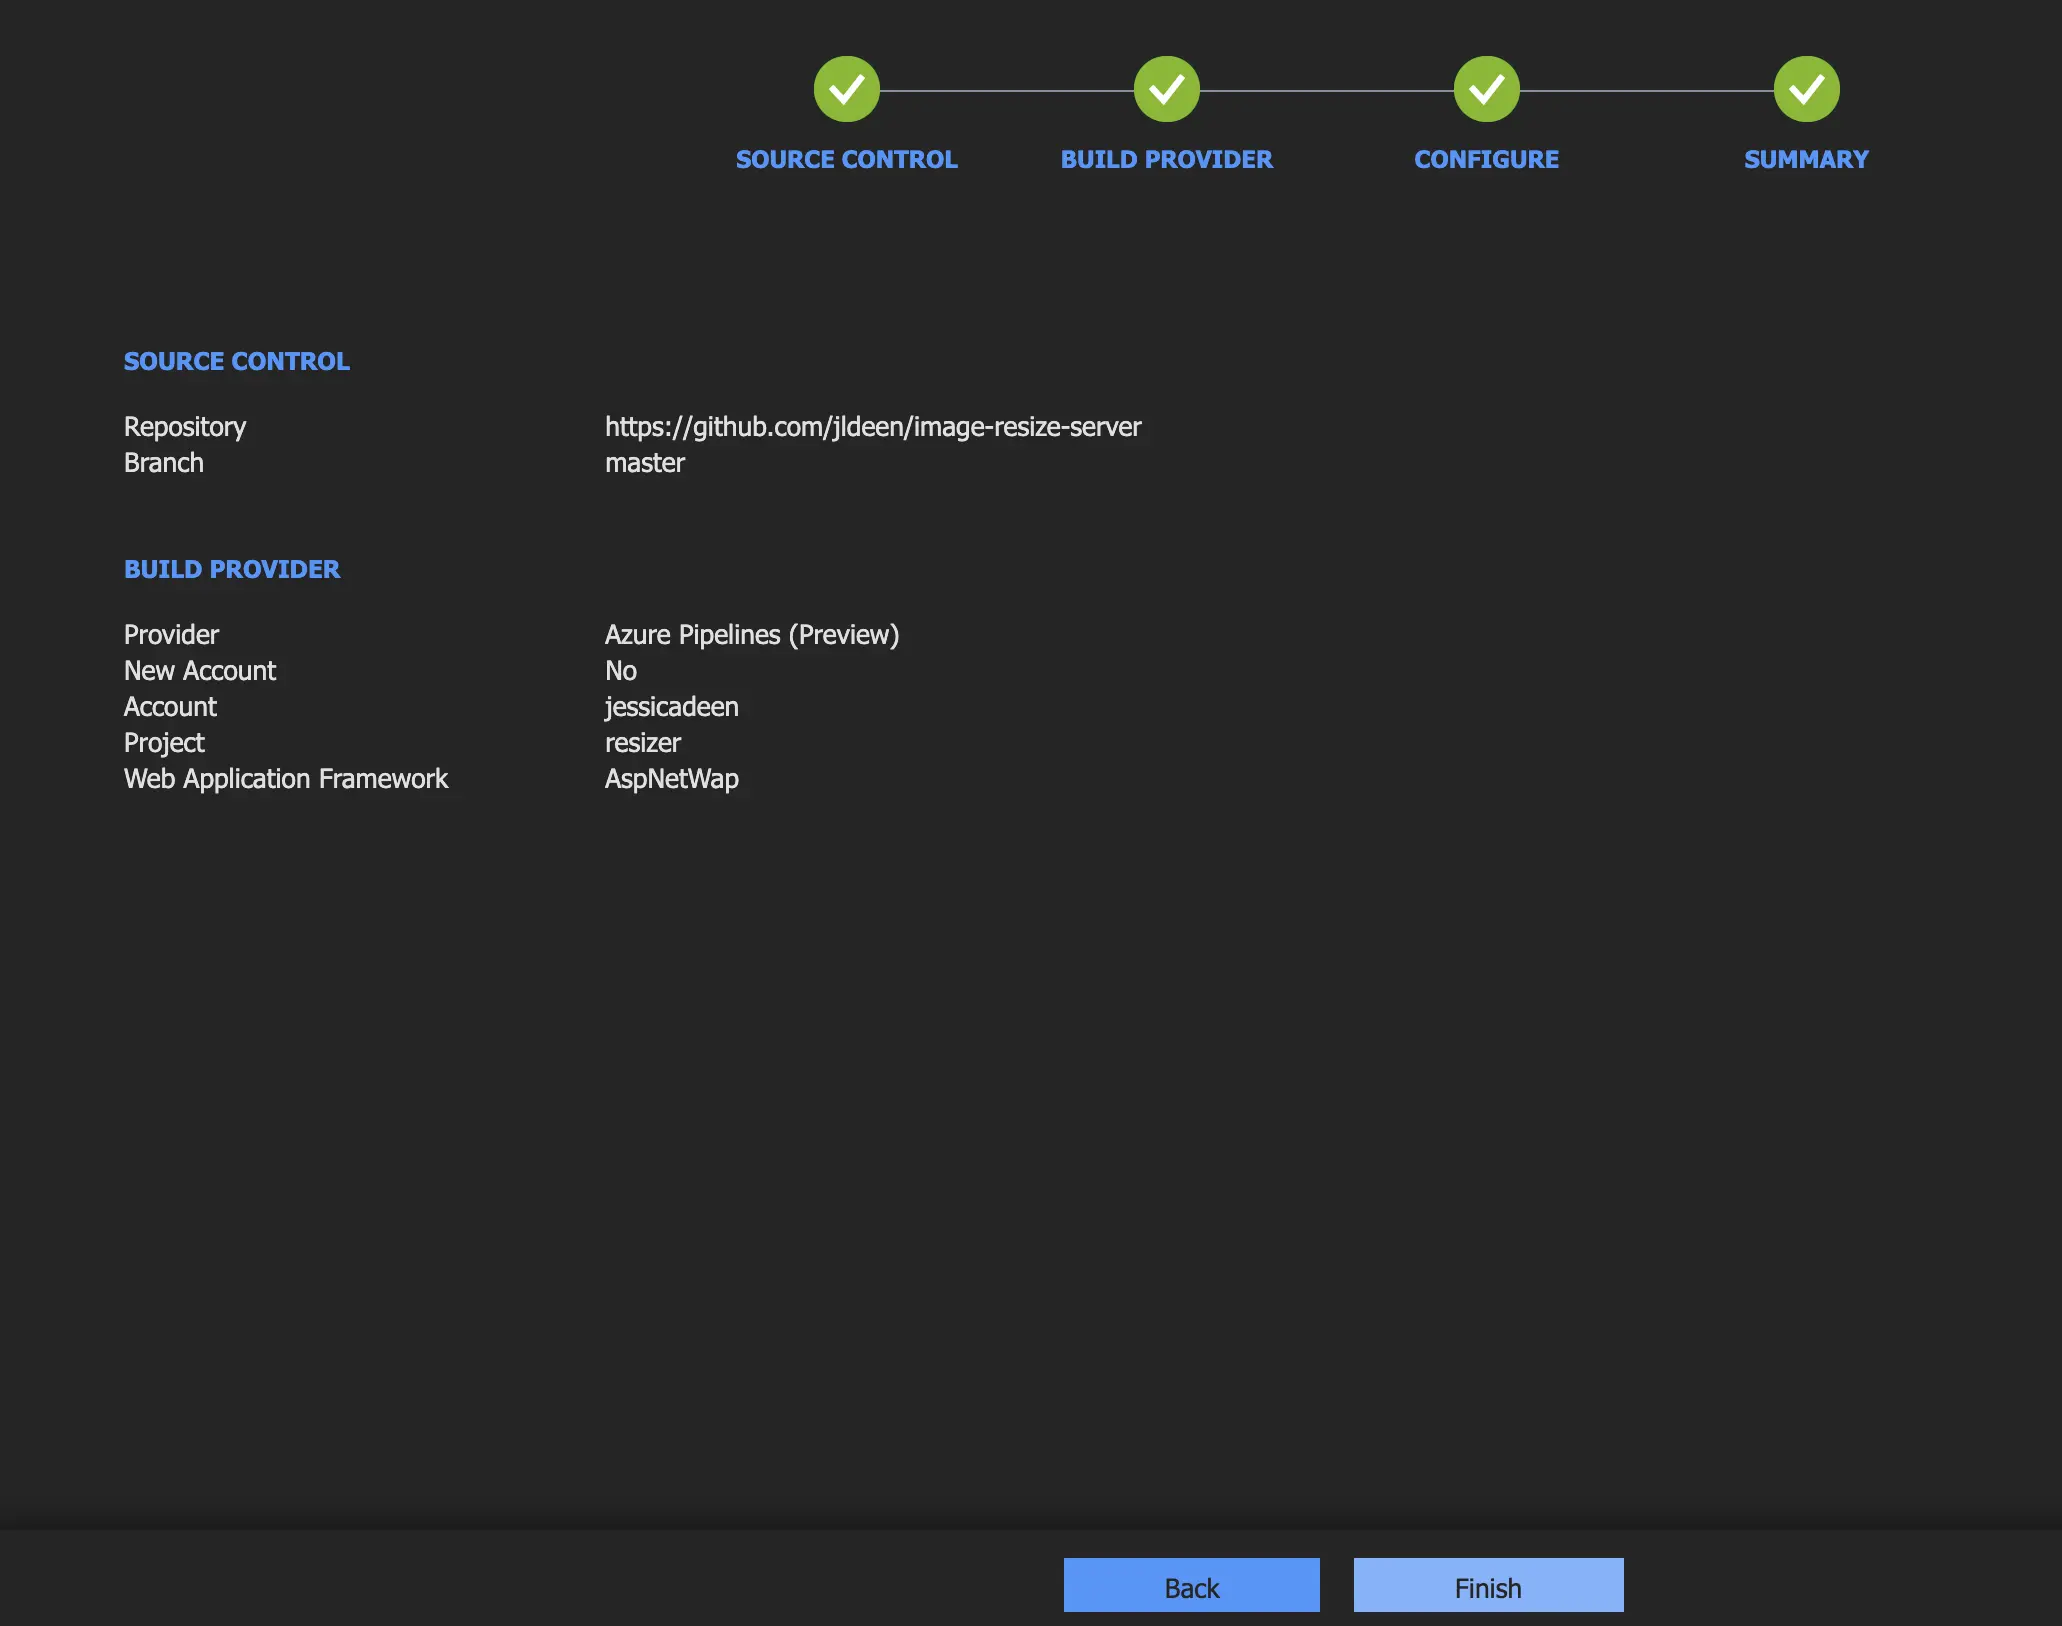
Click “Continue” to see the final summary page where you just have to click “Finish” to create your pipeline.
This will take a few minutes (mine took aout 5 minutes with a page refresh thrown in) so now might be a good time to grab coffee/tea/water/whiskey/etc. Stay hydrated, folks!

Once your deployment completes you’ll see a summary page with deep links over to your build, release and successful Azure Pipelines and Deployment.
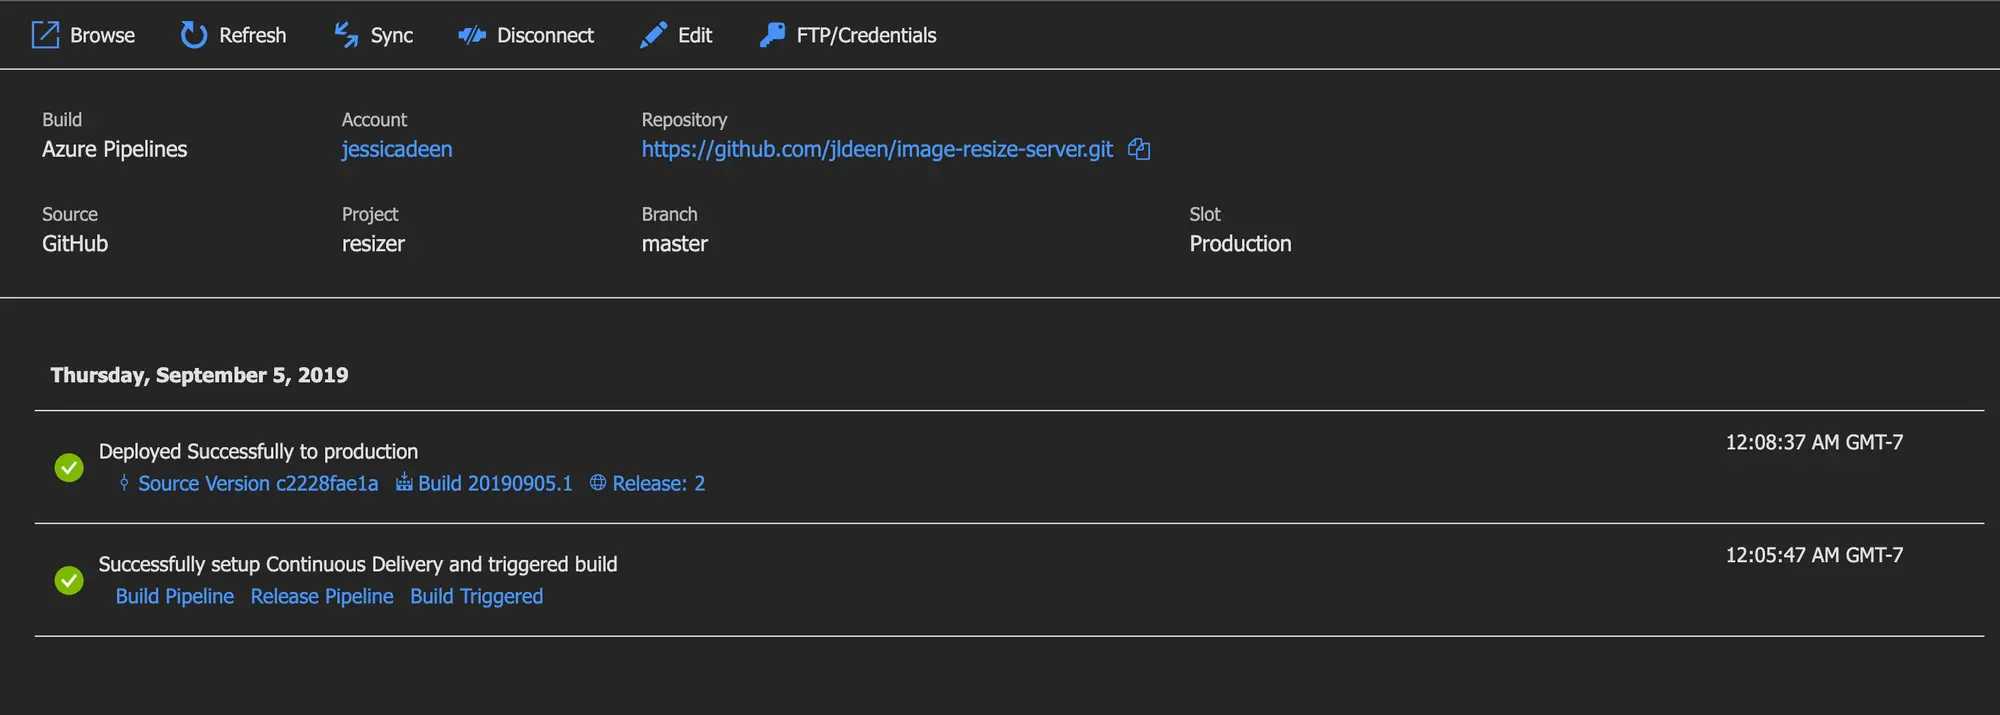
When you click those links, you’ll see your completed pipeline with tasks that make sense for the runtime stack and deployment location.
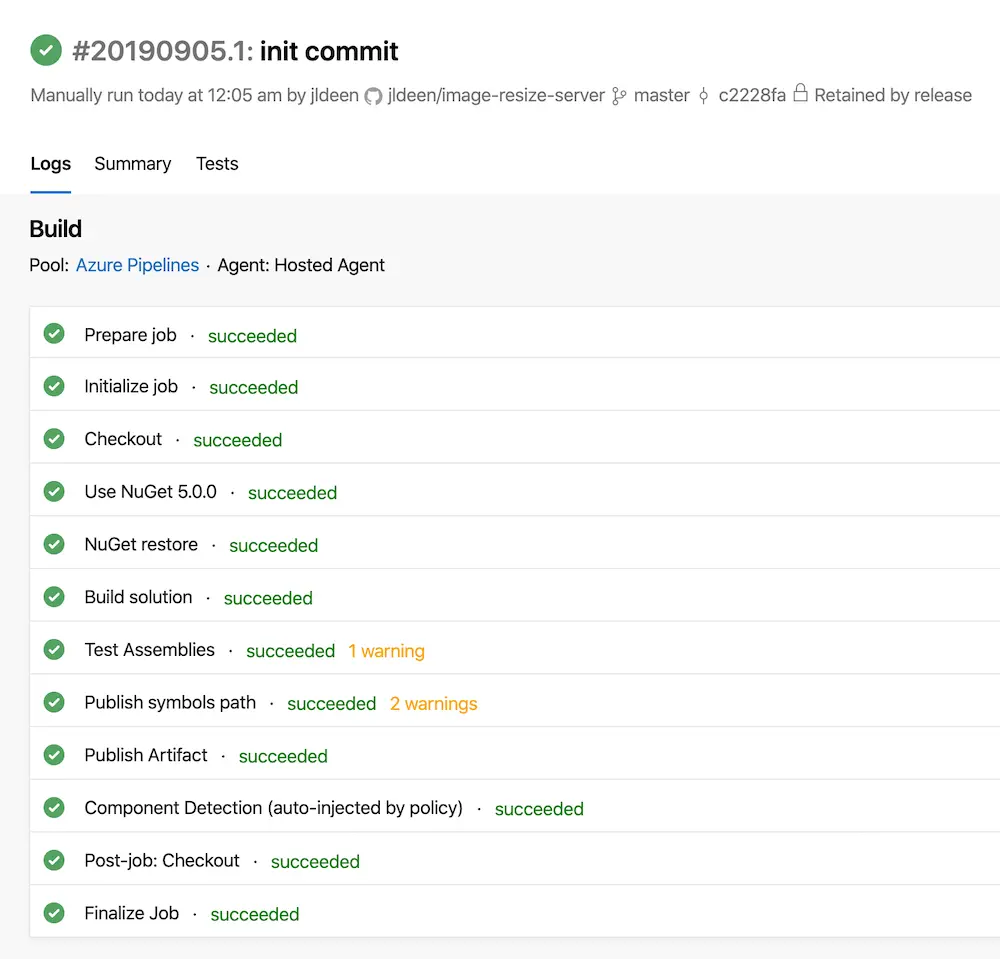
For example, when I clicked the build link, I was able to see my Azure Pipelines CI page with a successful build.

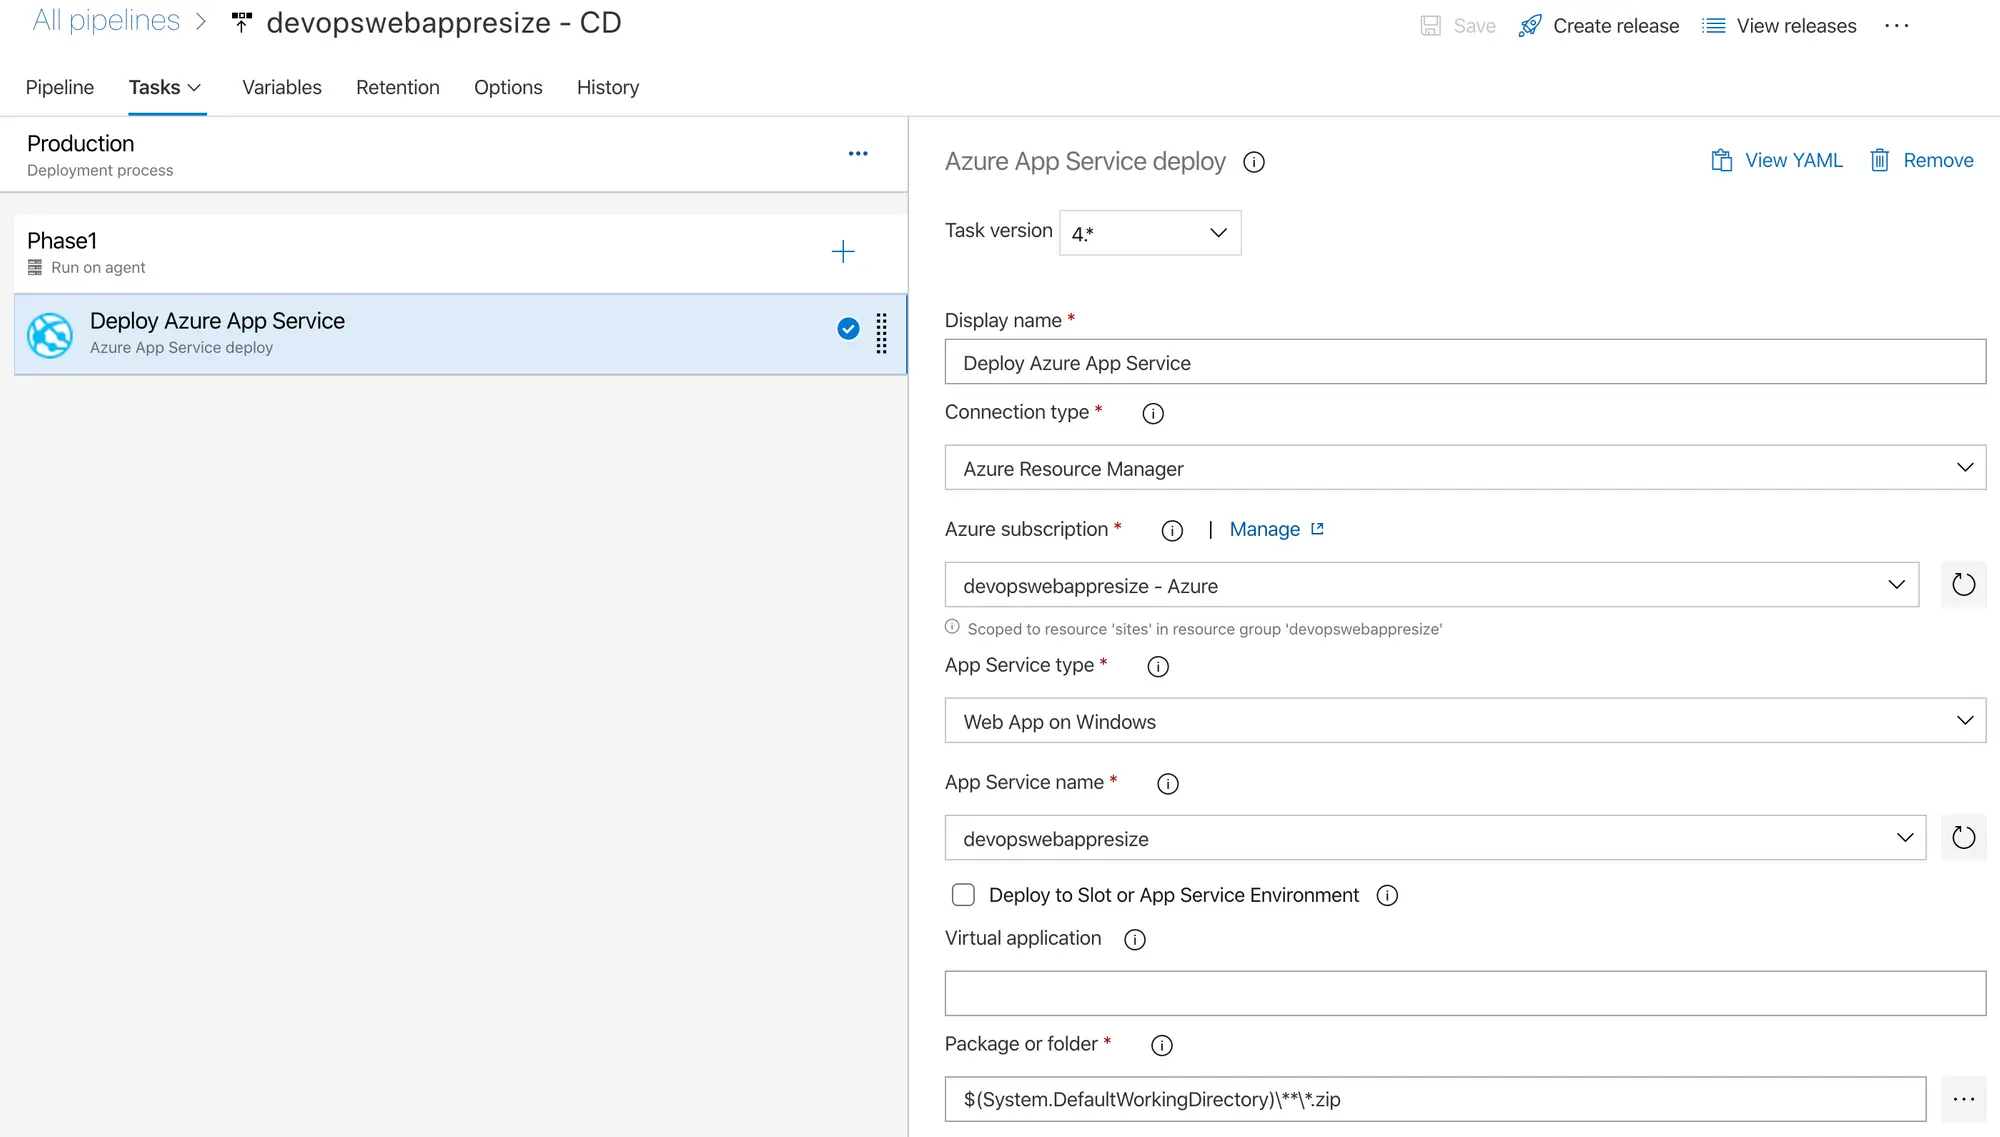
And when I clicked edit, I saw the tasks that were preselected and preconfigured for my app.

My first build was successful (whew) and here’s an example of what that looks like:
My release pipeline looks the same - configured with tasks (one task) that made sense for my scenario.
And, again “whew”, my release pipeline was successful.

Finally, my image resizer was up and running without any manual work done by me to create the pipeline. Now, off course the pipeline created is just a framework - it’s by no means ready for production (even though the release stage is labeled production) and it will need to be modified… but it’s a great start with low barrier to entry.
Here’s an example of the Image Resizer in action:
Oh and did I mention the web site created even comes with an SSL certificate?
I recently published a blog post on setting up Twitter Cards in Hugo and shared it on Twitter …

We’ve all been there. You do everything correct - you set your container to run as non …
This post will walk you through the key things you should know when running a 64 bit node …