
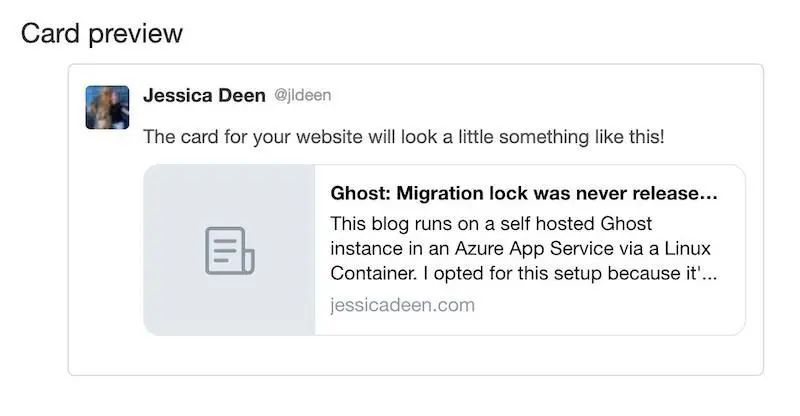
I’ve blogged quite a few times on how I built this blog and little things I’ve learned along the way. More recently I discovered my blog posts wouldn’t show up with a featured image on Twitter, which bothered me greatly. The post link, description, etc., all showed up fine, and the image even displayed properly on other platforms like Facebook and LinkedIn, but Twitter was having trouble. For those who don’t know, Twitter does have a super helpful “Card-Validator” here and when I used it with direct links (or short links) to my posts, I’d see a card like this:
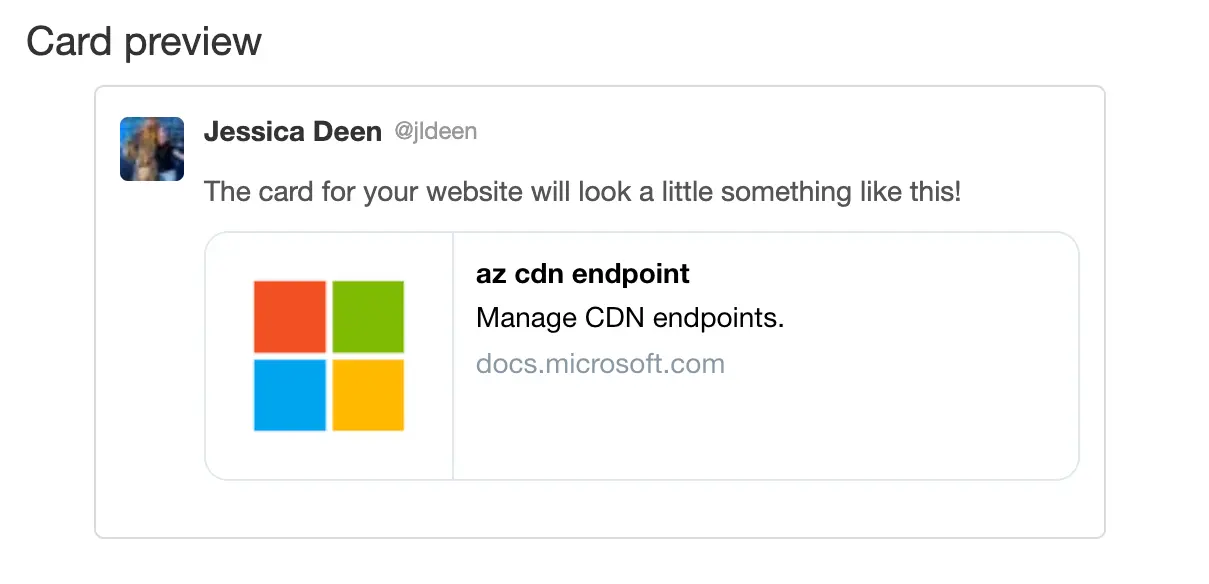
As you can see, it doesn’t look very enticing. I was expecting a card more like this:
I tried a few different things, including adding a robots.txt to my themes/casper-2.11.1 folder as per Ghost’s documentation; when you do this, you’ll override the basic Ghost defaults which looks something like this:
User-agent: *
Sitemap: https://<website-url-here>/sitemap.xml
Disallow: /ghost/
Disallow: /p/
I copied the above defaults to my clipboard, created a blank robots.txt in my Casper theme’s root directory, pasted it in, and added the following lines to the top:
User-agent: Twitterbot
Disallow:
My full robots.txt now looks like this:
User-agent: Twitterbot
Disallow:

User-agent: *
Sitemap: https://<website-url-here>/sitemap.xml
Disallow: /ghost/
Disallow: /p/
Only, in my case, that still didn’t resolve the issue and allow a pretty Twitter Card. I use CloudFlare for my my DNS and standard website CDN, but my images are stored in Azure storage and actually go through an Azure CDN backed by a Custom HTTPS domain. I discovered my Azure CDN wasn’t allowing images to display, but without the Azure CDN custom domain (when using the *.azureedge.net domain), things would work as expected. Then I thought I’d add a robots.txt to my Azure Storage blob to explicitly allow the Twitterbot User-agent by doing the following:
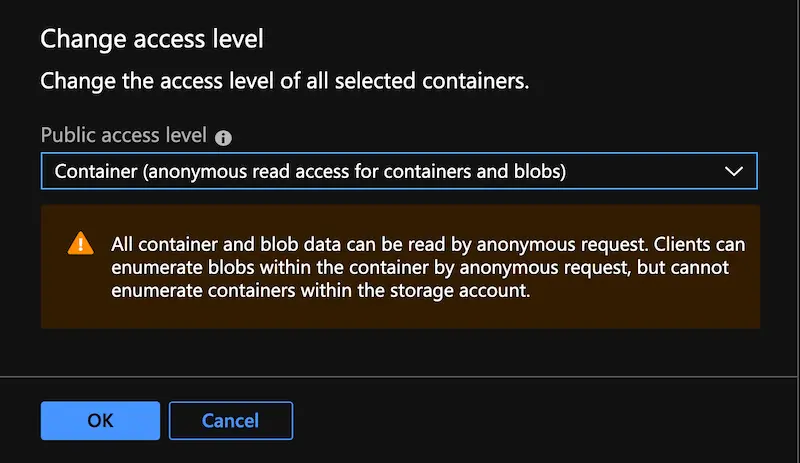
- Create a new container named
$rootin your storage account and set the public access level tocontainer. This will become a special container that will serve as a default container for your entire storage account. Any blobs in this container may be accessed without referencing the container name, and that’s exactly what we need.
- Create a
robots.txtfile with the following and upload it to the newly created$rootcontainer.
User-agent: Twitterbot
Disallow:
- Navigate to the Azure Storage account URL or CDN profile endpoint/custom HTTPS root domain and append with
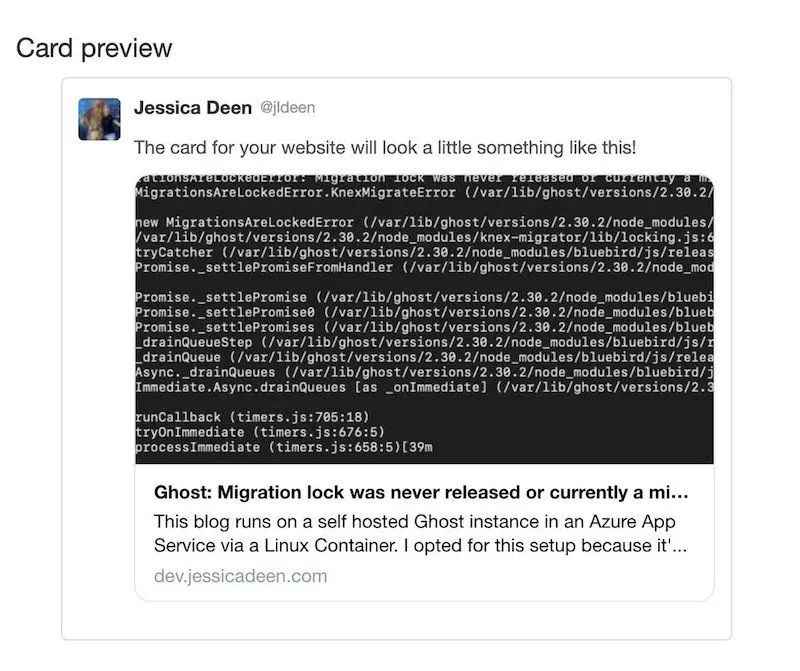
/robots.txtand see the newly createdrobots.txtfile. Here’s an example of mine:

With all that done, you’d think performing the above steps would work…
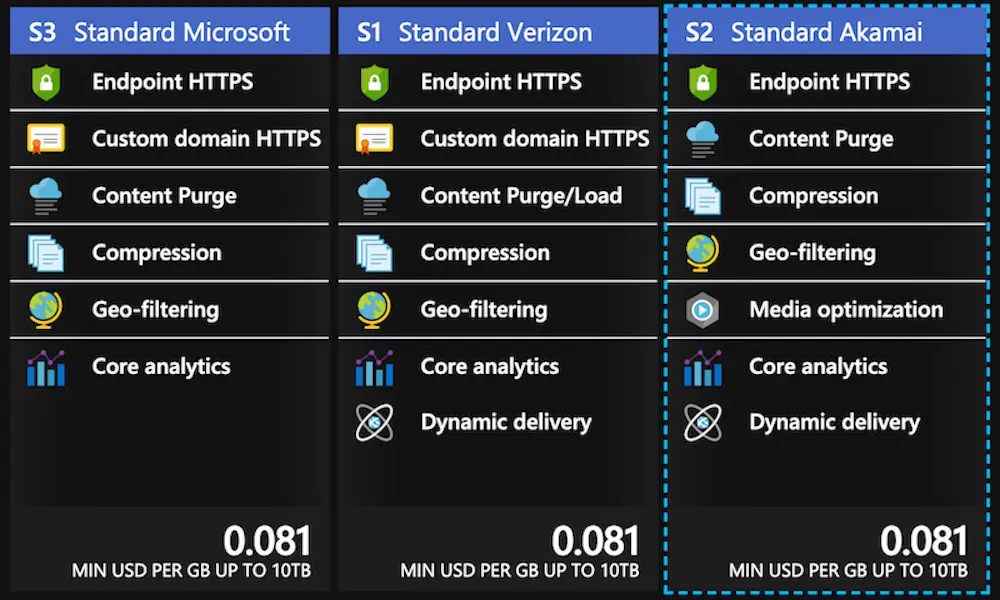
To finally resolve the issue, I had to create a second CDN to temporarily serve my images with the new settings, delete my old CDN, recreate (and wait for DNS propogation for my custom HTTPS domain). I previously used the Standard Microsoft CDN option, but switched to a Standard Akamai CDN options for the same price since I get more with Akamai inlcuding media optimization, dynamic delivery, and custom domain HTTPS support (even though it’s not listed in the below graphic). The full comparrison sheet is here.
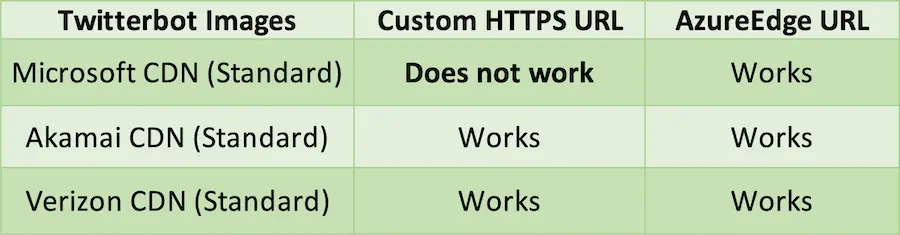
I decided to test the different CDN options available at the time of this article. Note: This test was conducted with Azure Storage - I did not test other potential origin types.
I learned the Microsoft Standard CDN will not allow the Twitterbot to display the twitter:image object appropriately when using a Custom HTTPS URL (i.e. cdn.jessicadeen.com), but it does work with the generic provided *.azureedge.com URL. This intrigued me so I tested the 3 standard CDNS and whether the Twitterbot image works (displays as expected) when using the generic URL and when using a Custom HTTPS URL. I created the below table to show my findings - as you can see all Custom HTTPS CDN URLs work with the Twitterbot except Microsoft’s Standard CDN offering.
While there is a quickstart guide on docs.microsoft.com on how to create the CDN Profile, endpoint, and custom HTTPS resource from the Azure Portal, I wrote the following script to streamline the process (and because I’m pro #noclickyclicky):
There is one caveat to the above script - you will have to manually select the kind of Optimization you want since as of the time of this writing (Sept 2019) there isn’t support from Azure CLI for modifying optimization via command line. I also believe you can only select/change the optimization for the Standard Akamai SKU.
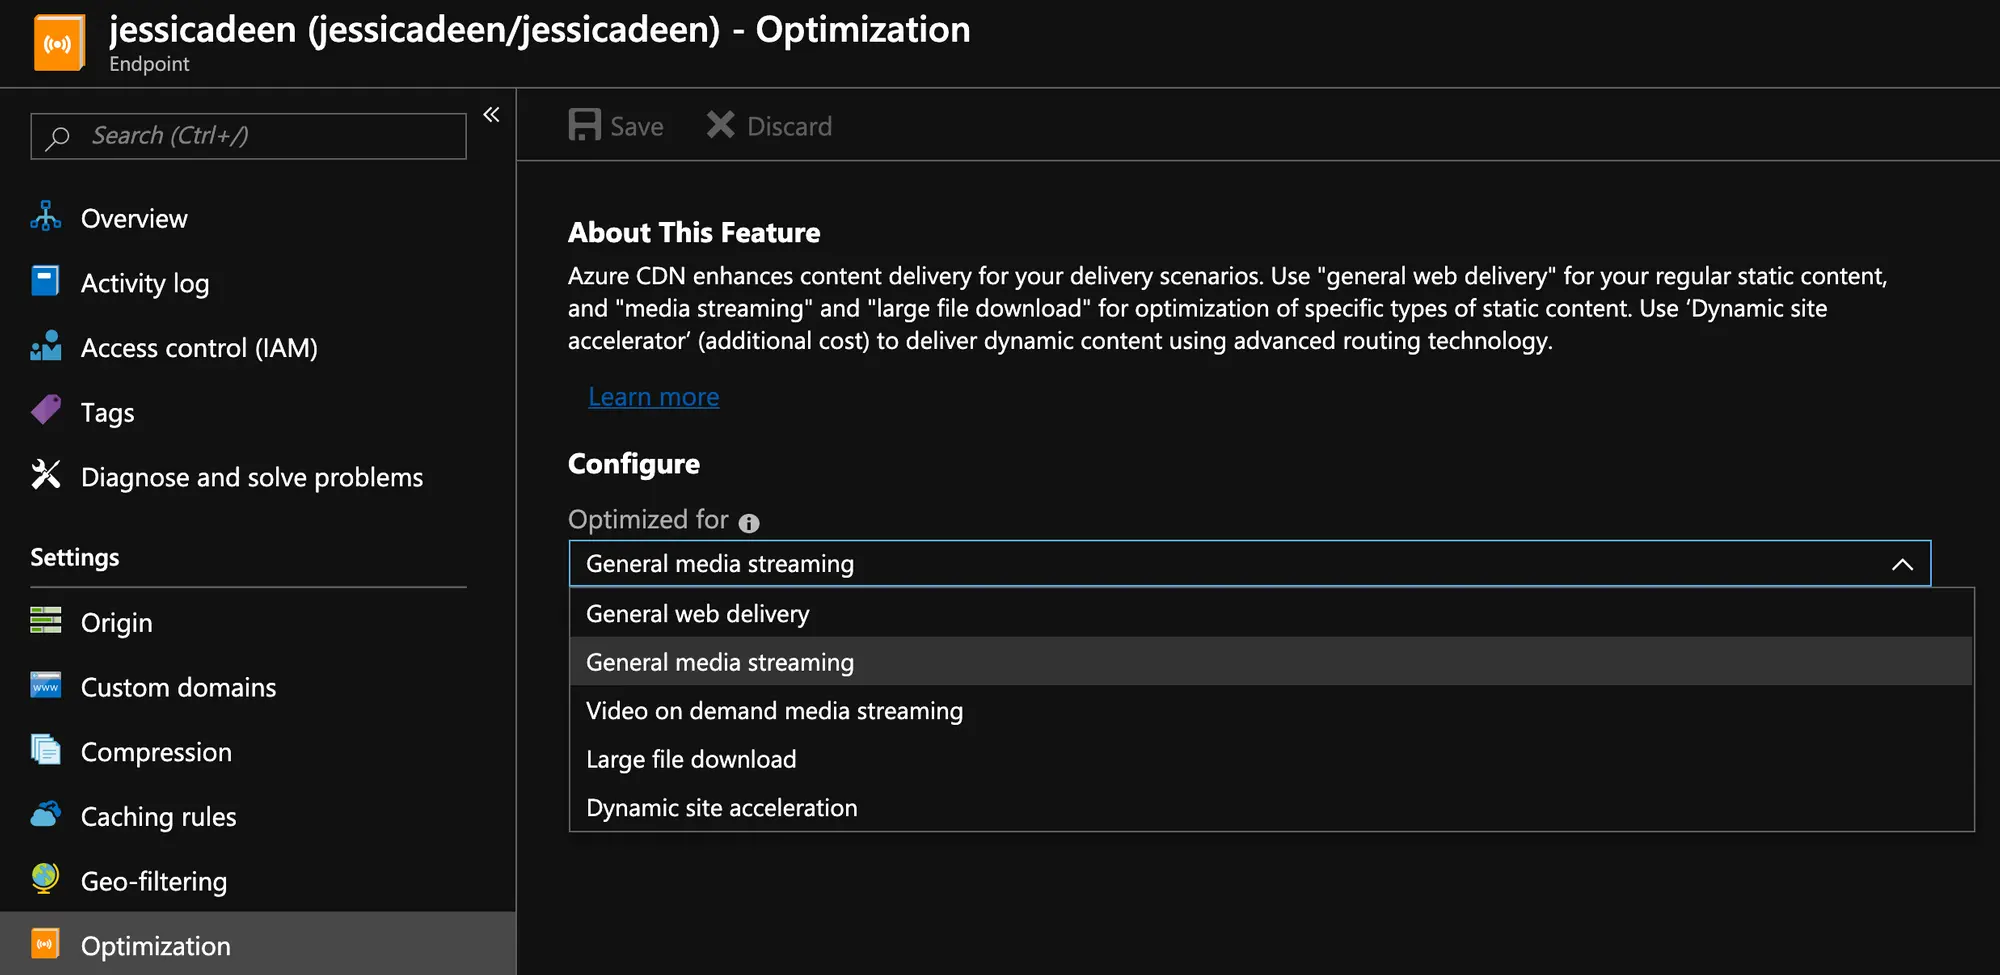
It’s pretty simple to make this manual change - navigate to your Azure Portal, find the resource group where you deployed your CDN Profile and Endpoint, drill down into your Endpoint resource and on the left hand side you’ll see something that says, “Optimization” and click it. From there you can configure the kind of content you want your CDN optimized for - I went with General Media Streaming. You can see an example below:
That’s it - you’ll now have an Azure CDN backing your Azure Storage and Twitter Images should show up on your Twitter Cards!