

This overdue post comes at the request from a few people on Twitter after I tweeted out a picture of my office/desk setup at time of this posting.
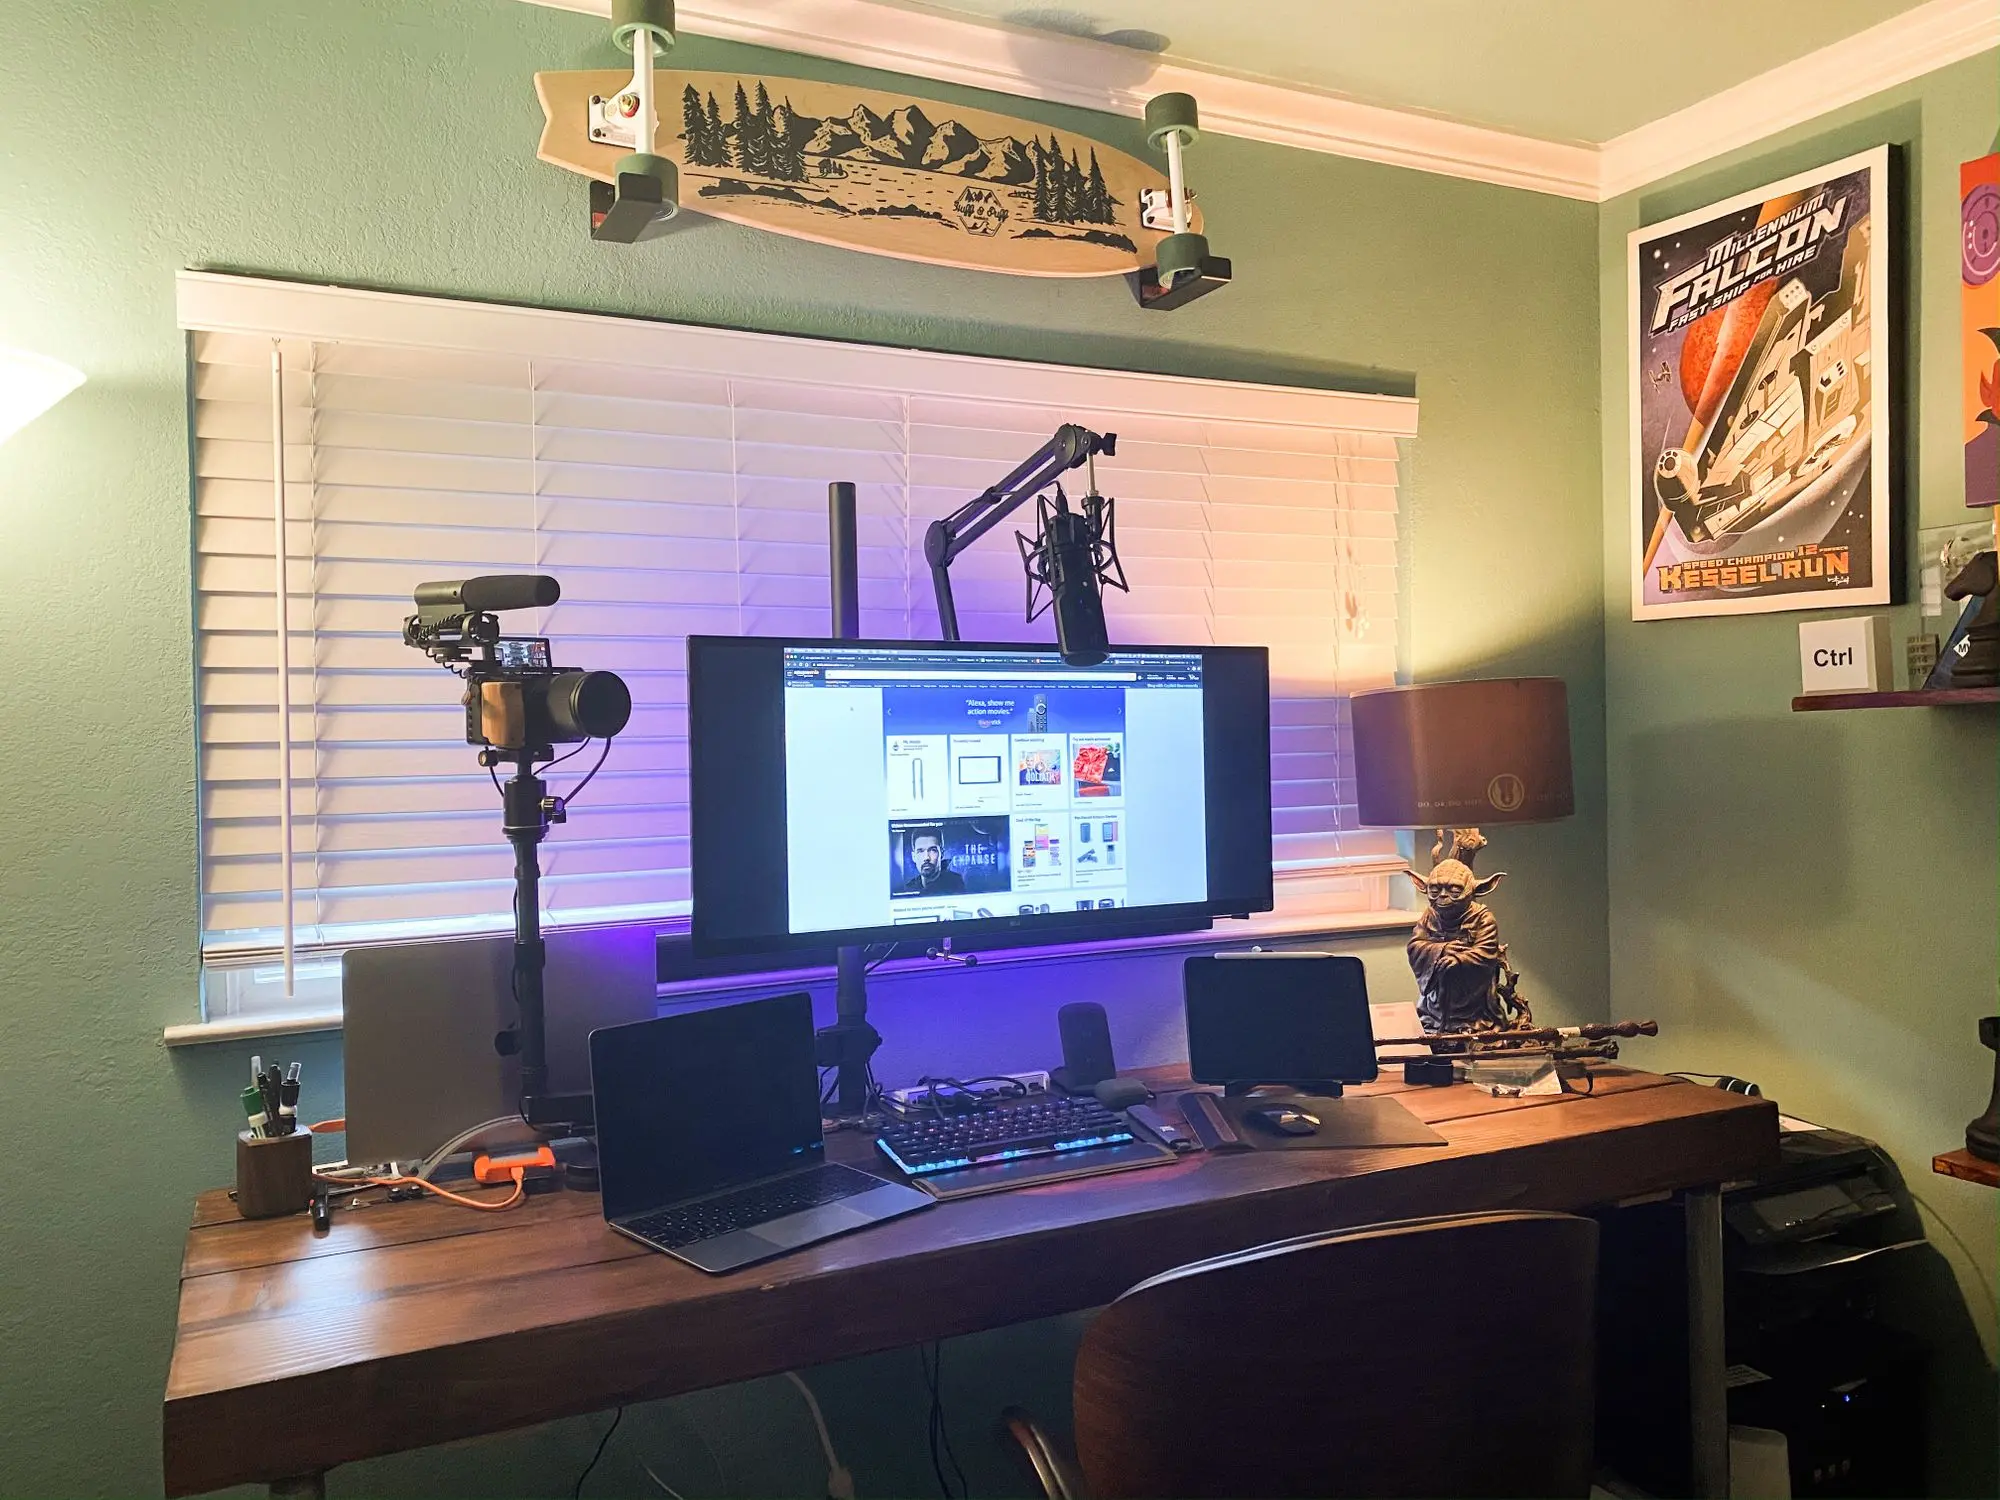
This post will break down what I’m currently using in my home office, where I do all my work when not on an airplane.
Desk
The desk is built out of (4) 6 x 4 x 8ft solid wood planks (cut to 6 ft each) and 1 1/4" galvanized steel plumbing pipe connected using tee supports and flanges. I purchased all the hardware from my local Home Depot along with a Ryobi Orbital Sander and then I bought a Porter Cable 6-amp hand planer from Amazon. I sized the legs to a height I could stand at and work comfortably, while still using a barstool with back support if I needed to sit for a bit. In the future I do plan to order these motorized legs to allow for greater flexibility.
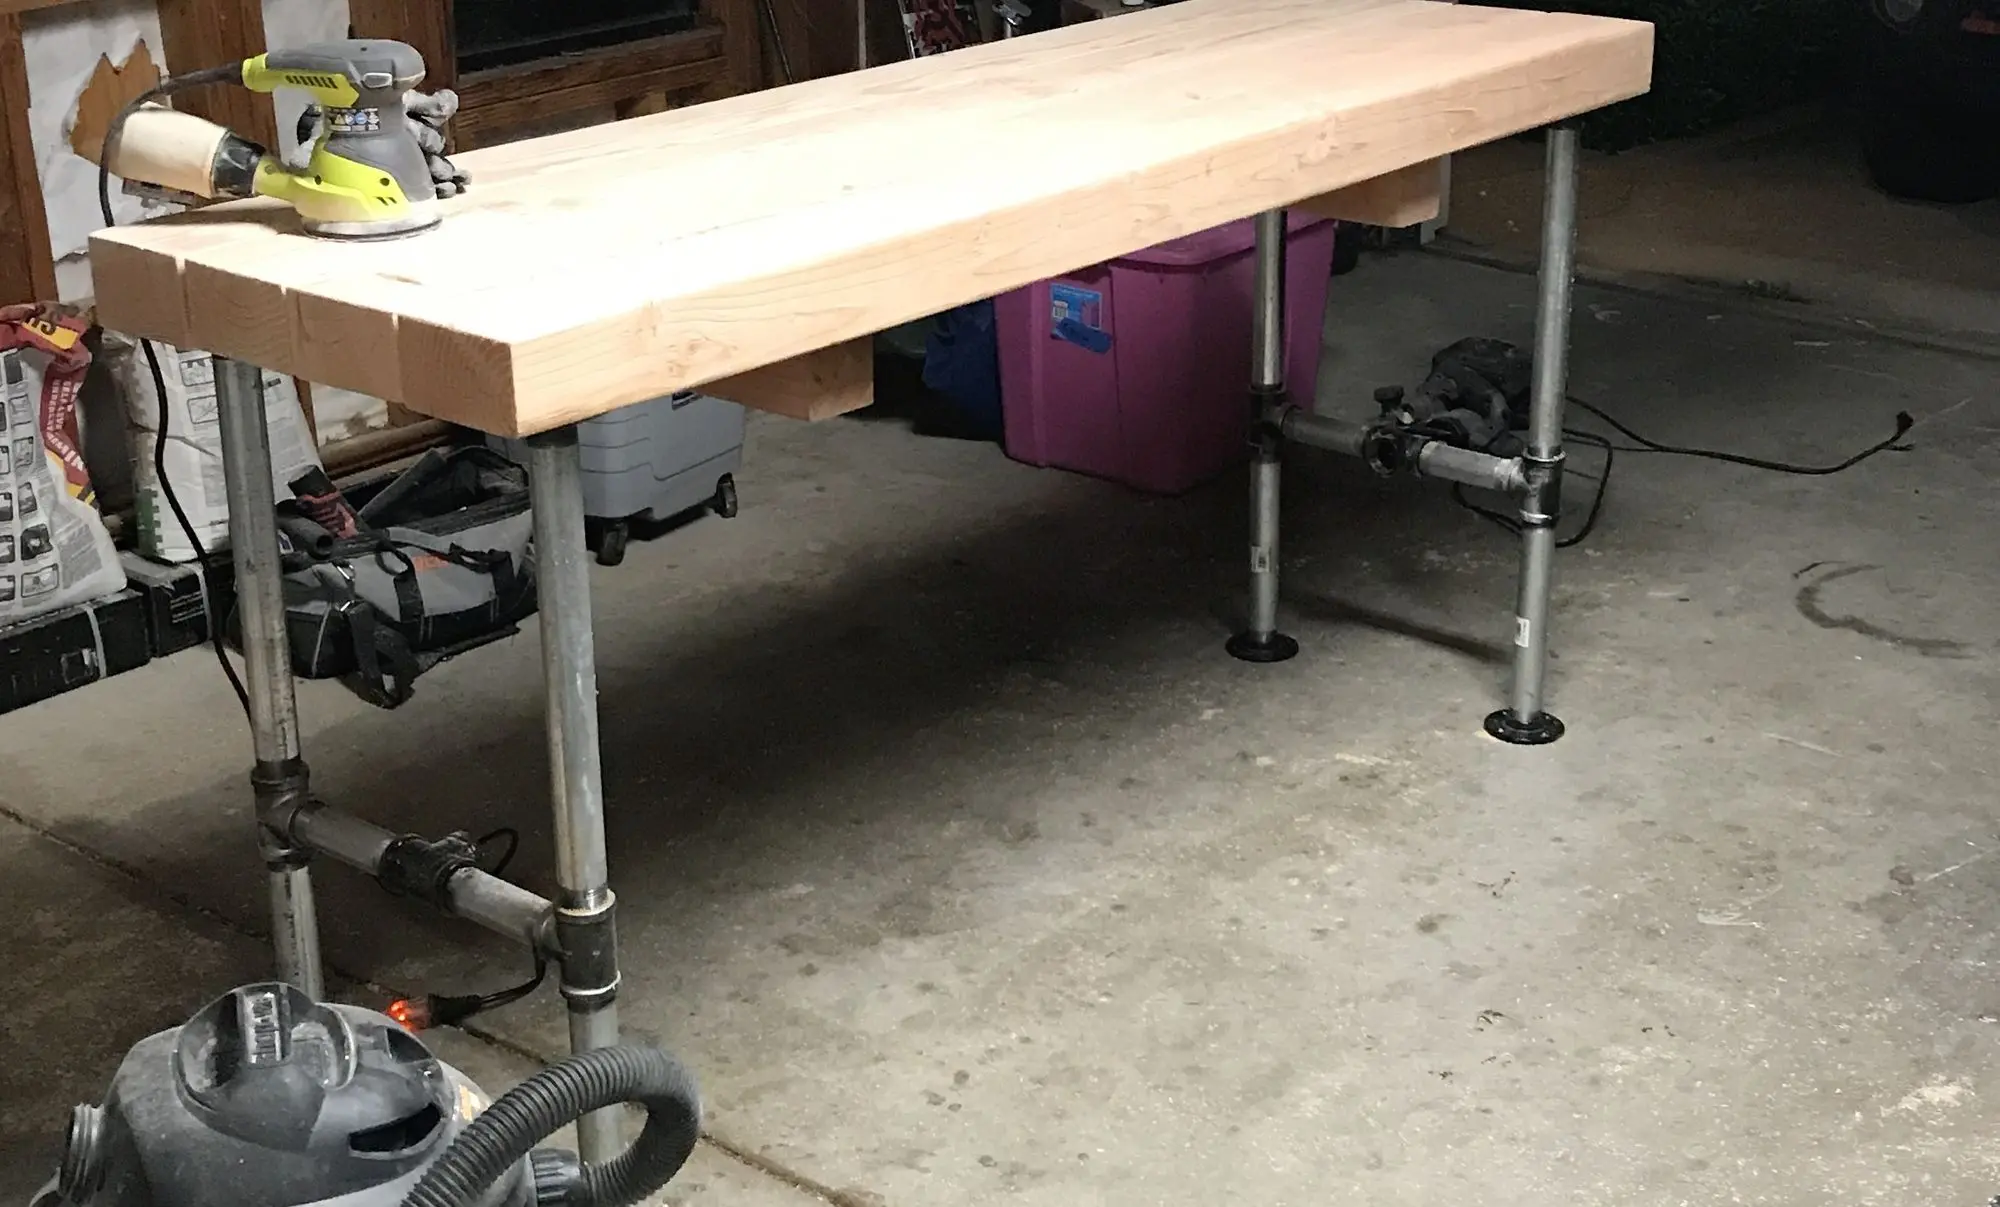
This was one of my first creations I built back in April of 2017. I planed, sanded, and stained the wood using American Walnut with polyeurethane all-in-one. Looking back on it, if I were to make this again today, I would possibly consider thiner wood for reasons I’ll explain below. I also would apply stain and poly separately to allow for greater control of shine. The planks are connected to each other using (3) 1/2" boards screwed into each plank with 2" screws every 2ft or so (I just made it even).
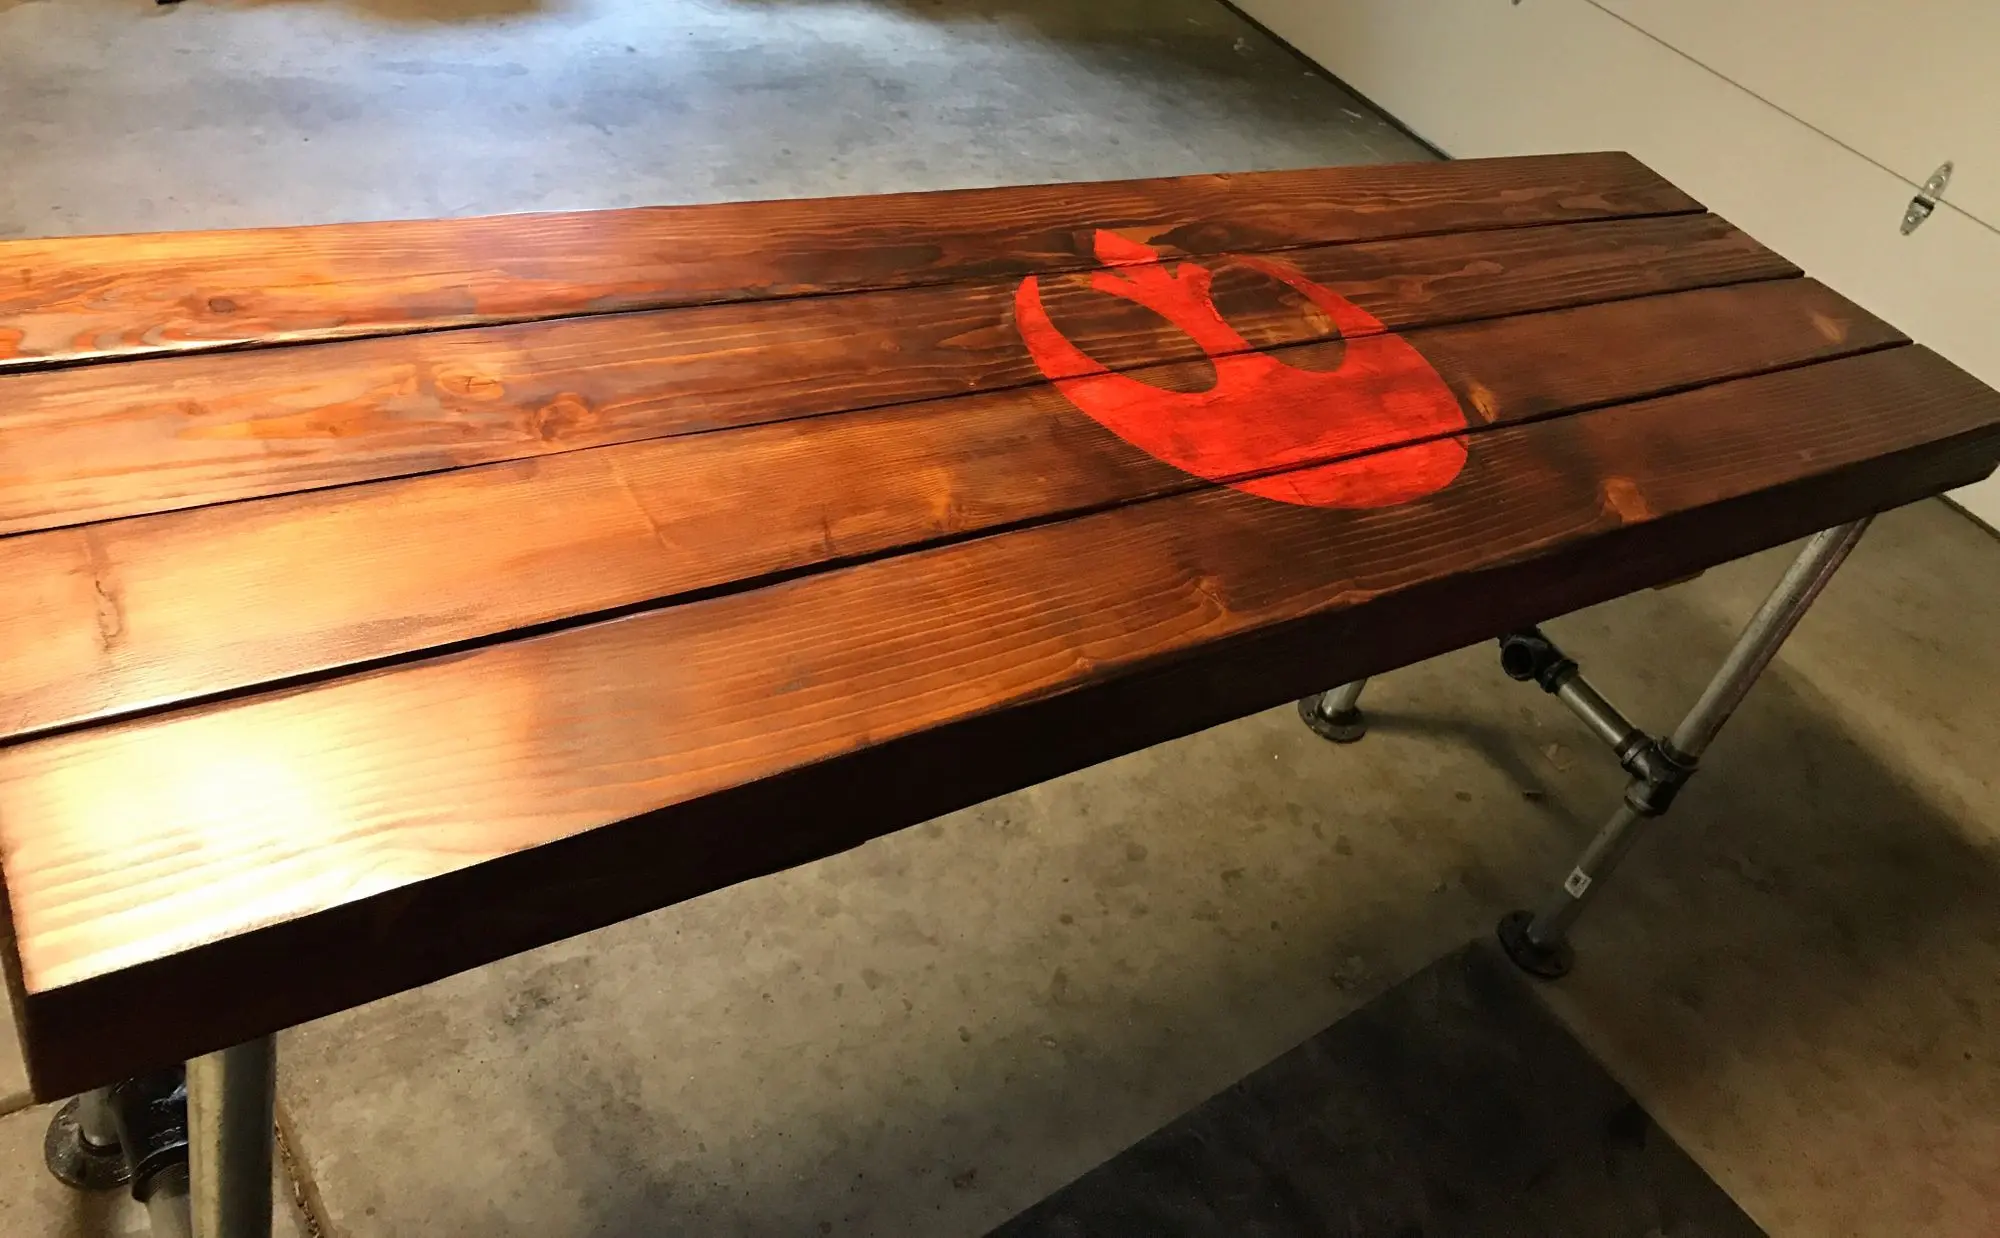
After the stain and poly, I ordered a 16x16" Rebel Alliance Stencil on Etsy and painted it on using red paint. I couldn’t find the same stencil I used nearly 3 years ago, but I did find this one, if you’re interested. I then lightly sanded it and applyed a spray sealer. This gave my RA symbol a distressed look.
In the 3 years I’ve been using this desk, it’s proven to be a solid (and heavy) piece of furniture. While it’s been awhile since I built it, I believe the materials, as well as tools like the orbital sander and electric planer, brought my cost to around $400 or so.
Estimated cost: $400
Monitor
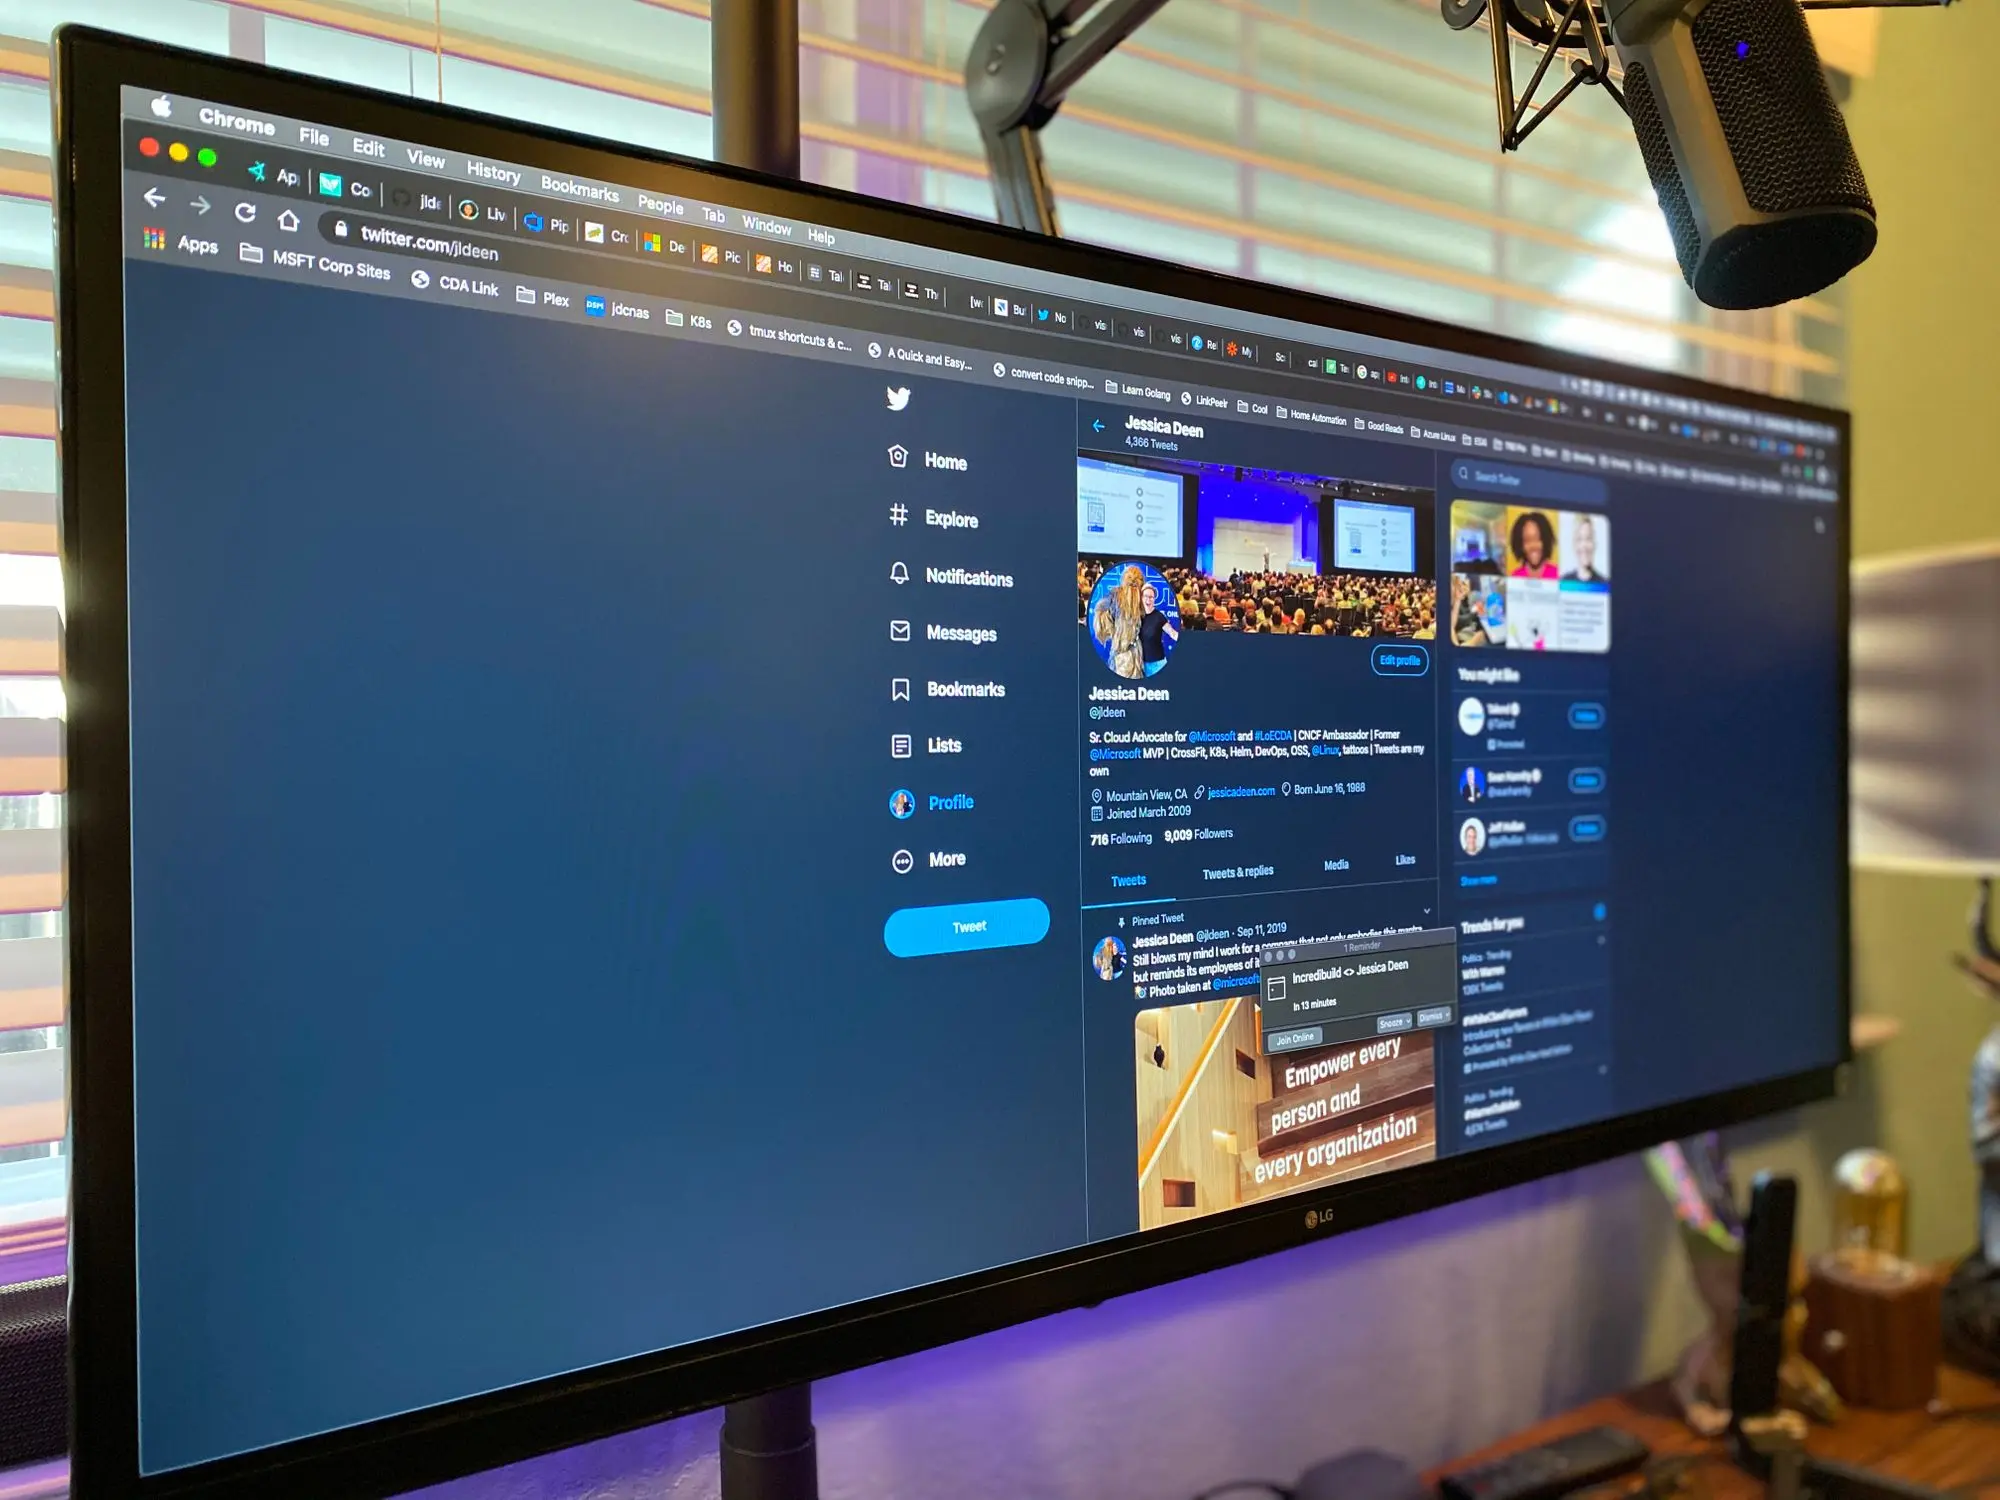
I’m using an LG 34” (34UM61-P) Monitor I bought from Costco on sale about a year and a half ago. I don’t remember the exact price, but I’d estimate it was less than $200 because I wouldn’t have bought it otherwise.
It works well for my purposes, but I’m also not a fanatic when it comes to desktop screens. I was on the road for much of last year (175,000 miles) so I really only use this monitor when I’m home. Then again, now with the Coronavirus and WFH guidance for Microsoft Seattle and Silicon Valley, I will be using it much more.
Reviews online suggest strong backbleed, but again, I use it for coding really so it’s great. My one complaint is it has a 21:9 aspect ratio, which means I have to downscale to 16:9 for recording. If I don’t, the video renders fonts super tiny and makes things hard to read for coding videos. To switch between resolutions on my MacBook Pro (running 10.15) I use SwitchResX, which I bought for less than $16 USD (price is in Euros).
Since the monitor is almost 2 years old, the closest version I could find is the LG 34" WL600-B for $299, so $100 more than my memory and personal Costco experience serves.
Thus, I’ll estimate this section to cost around: $316
Keyboard
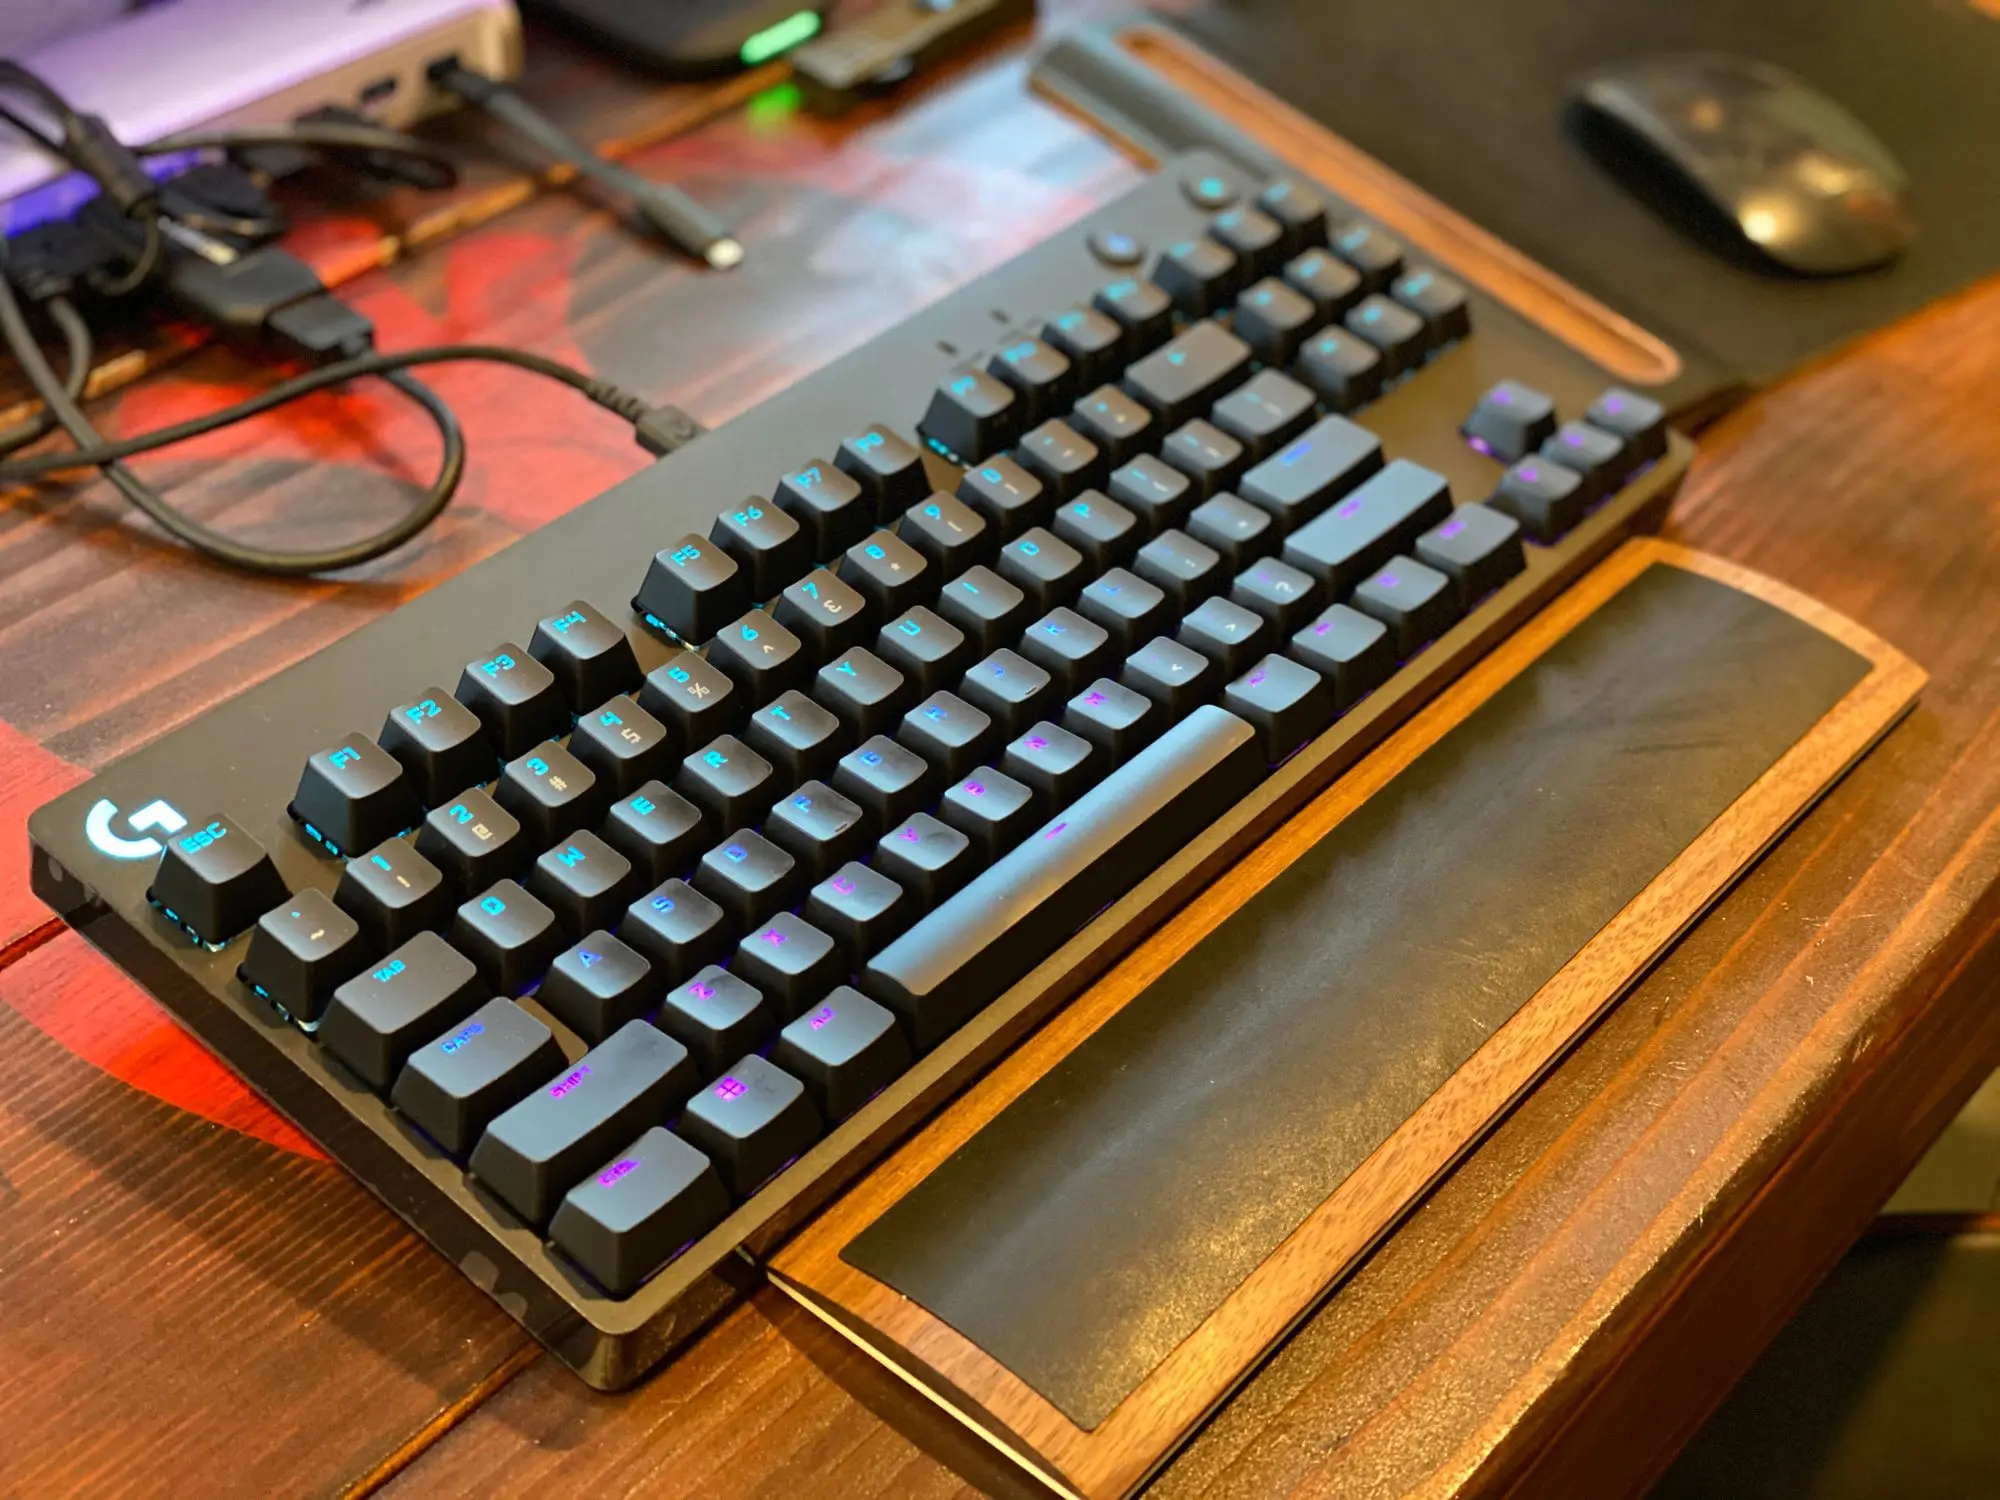
Up until the time of this writing I had been using a Pok3r RGB Mechanical 60% keyboard with cherry brown switches. However, I recently purchased a Logitech G Pro Mechanical (10-Keyless) Keyboard with GX blue (clicky) switches. The main reason for my switch was coding when working at home; I have been getting increasingly frustrated by the lack of a dedicated backtick key and arrow keys that aren’t dependent on layer configuration. It was honestly slowing me down from a productivity perspective, and on more than one occasion, I accidentially deleted all I had typed. Maybe I’m just not smart enough to figure out the best configuration, but so far the Logitech seems promising.
I will be selling the Pok3r keyboard to recover some of my upgrade cost. You can pick up your own Logitech G Pro Mechanical keyboard for $129.99 here.
There is also an older version with Romer G Switches available for $79.99 here, but I really prefer a clicky and tactile response when using a physical keyboard. You can learn more about the differnces in this hardware zone article.
Cost: $129.99
Microphone
I did a lot of research on the best USB microphones and considering I didn’t have dreams and aspirations of going into the YouTube ASMR business (though I do use ASMR to releax and calm my brain), I opted for something other than a Blue Yeti.
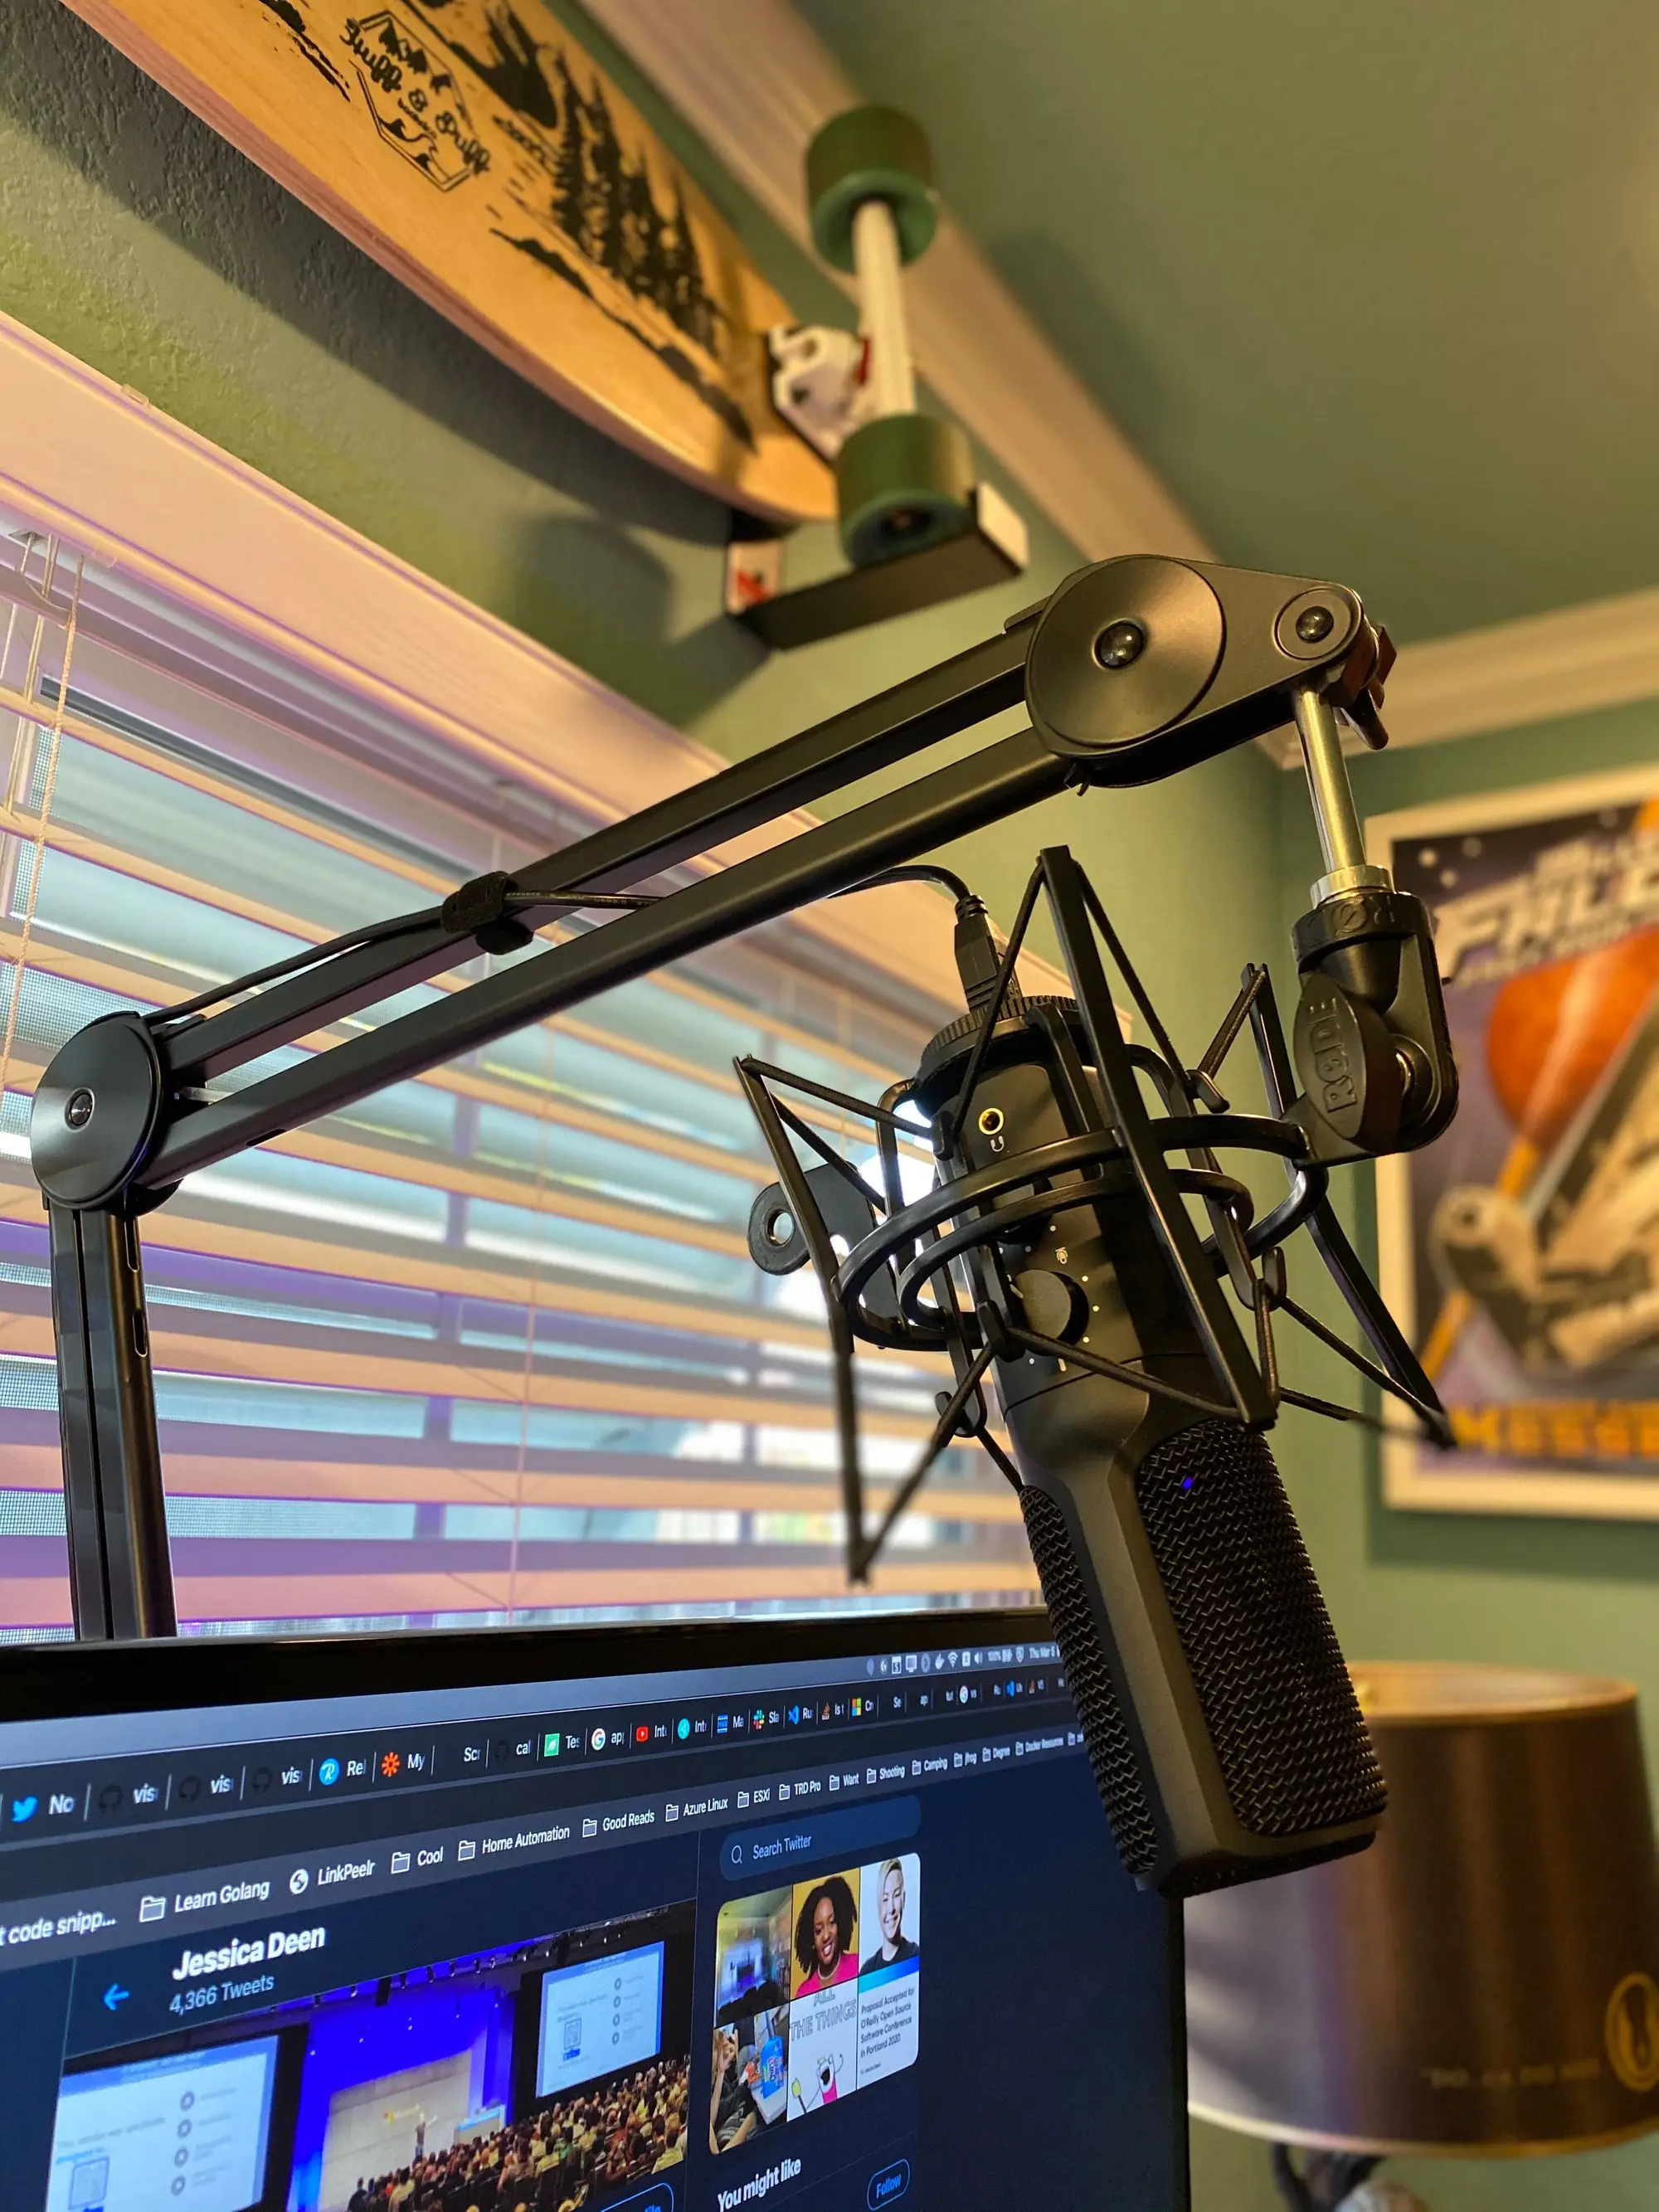
The Rode NT-USB microphone received great reviews and it was very easy to configure and tweak. I purchased this from Amazon as well, along with the Rode SM6 Shock Mount with Integrated Pop Shield for around $200. The shock mount is heavy and I had trouble finding a mic stand that could support the weight. I ended up not using the integrated pop shield, though I do have an alternate lighter one I could attach to a microphone arm if desired. This lighter pop filter was also from Amazon and I picked it up for around $15. For the distance I’m using the microphone at, I don’t notice plosives too much so I’m not concerned at the moment about having a filter on it.
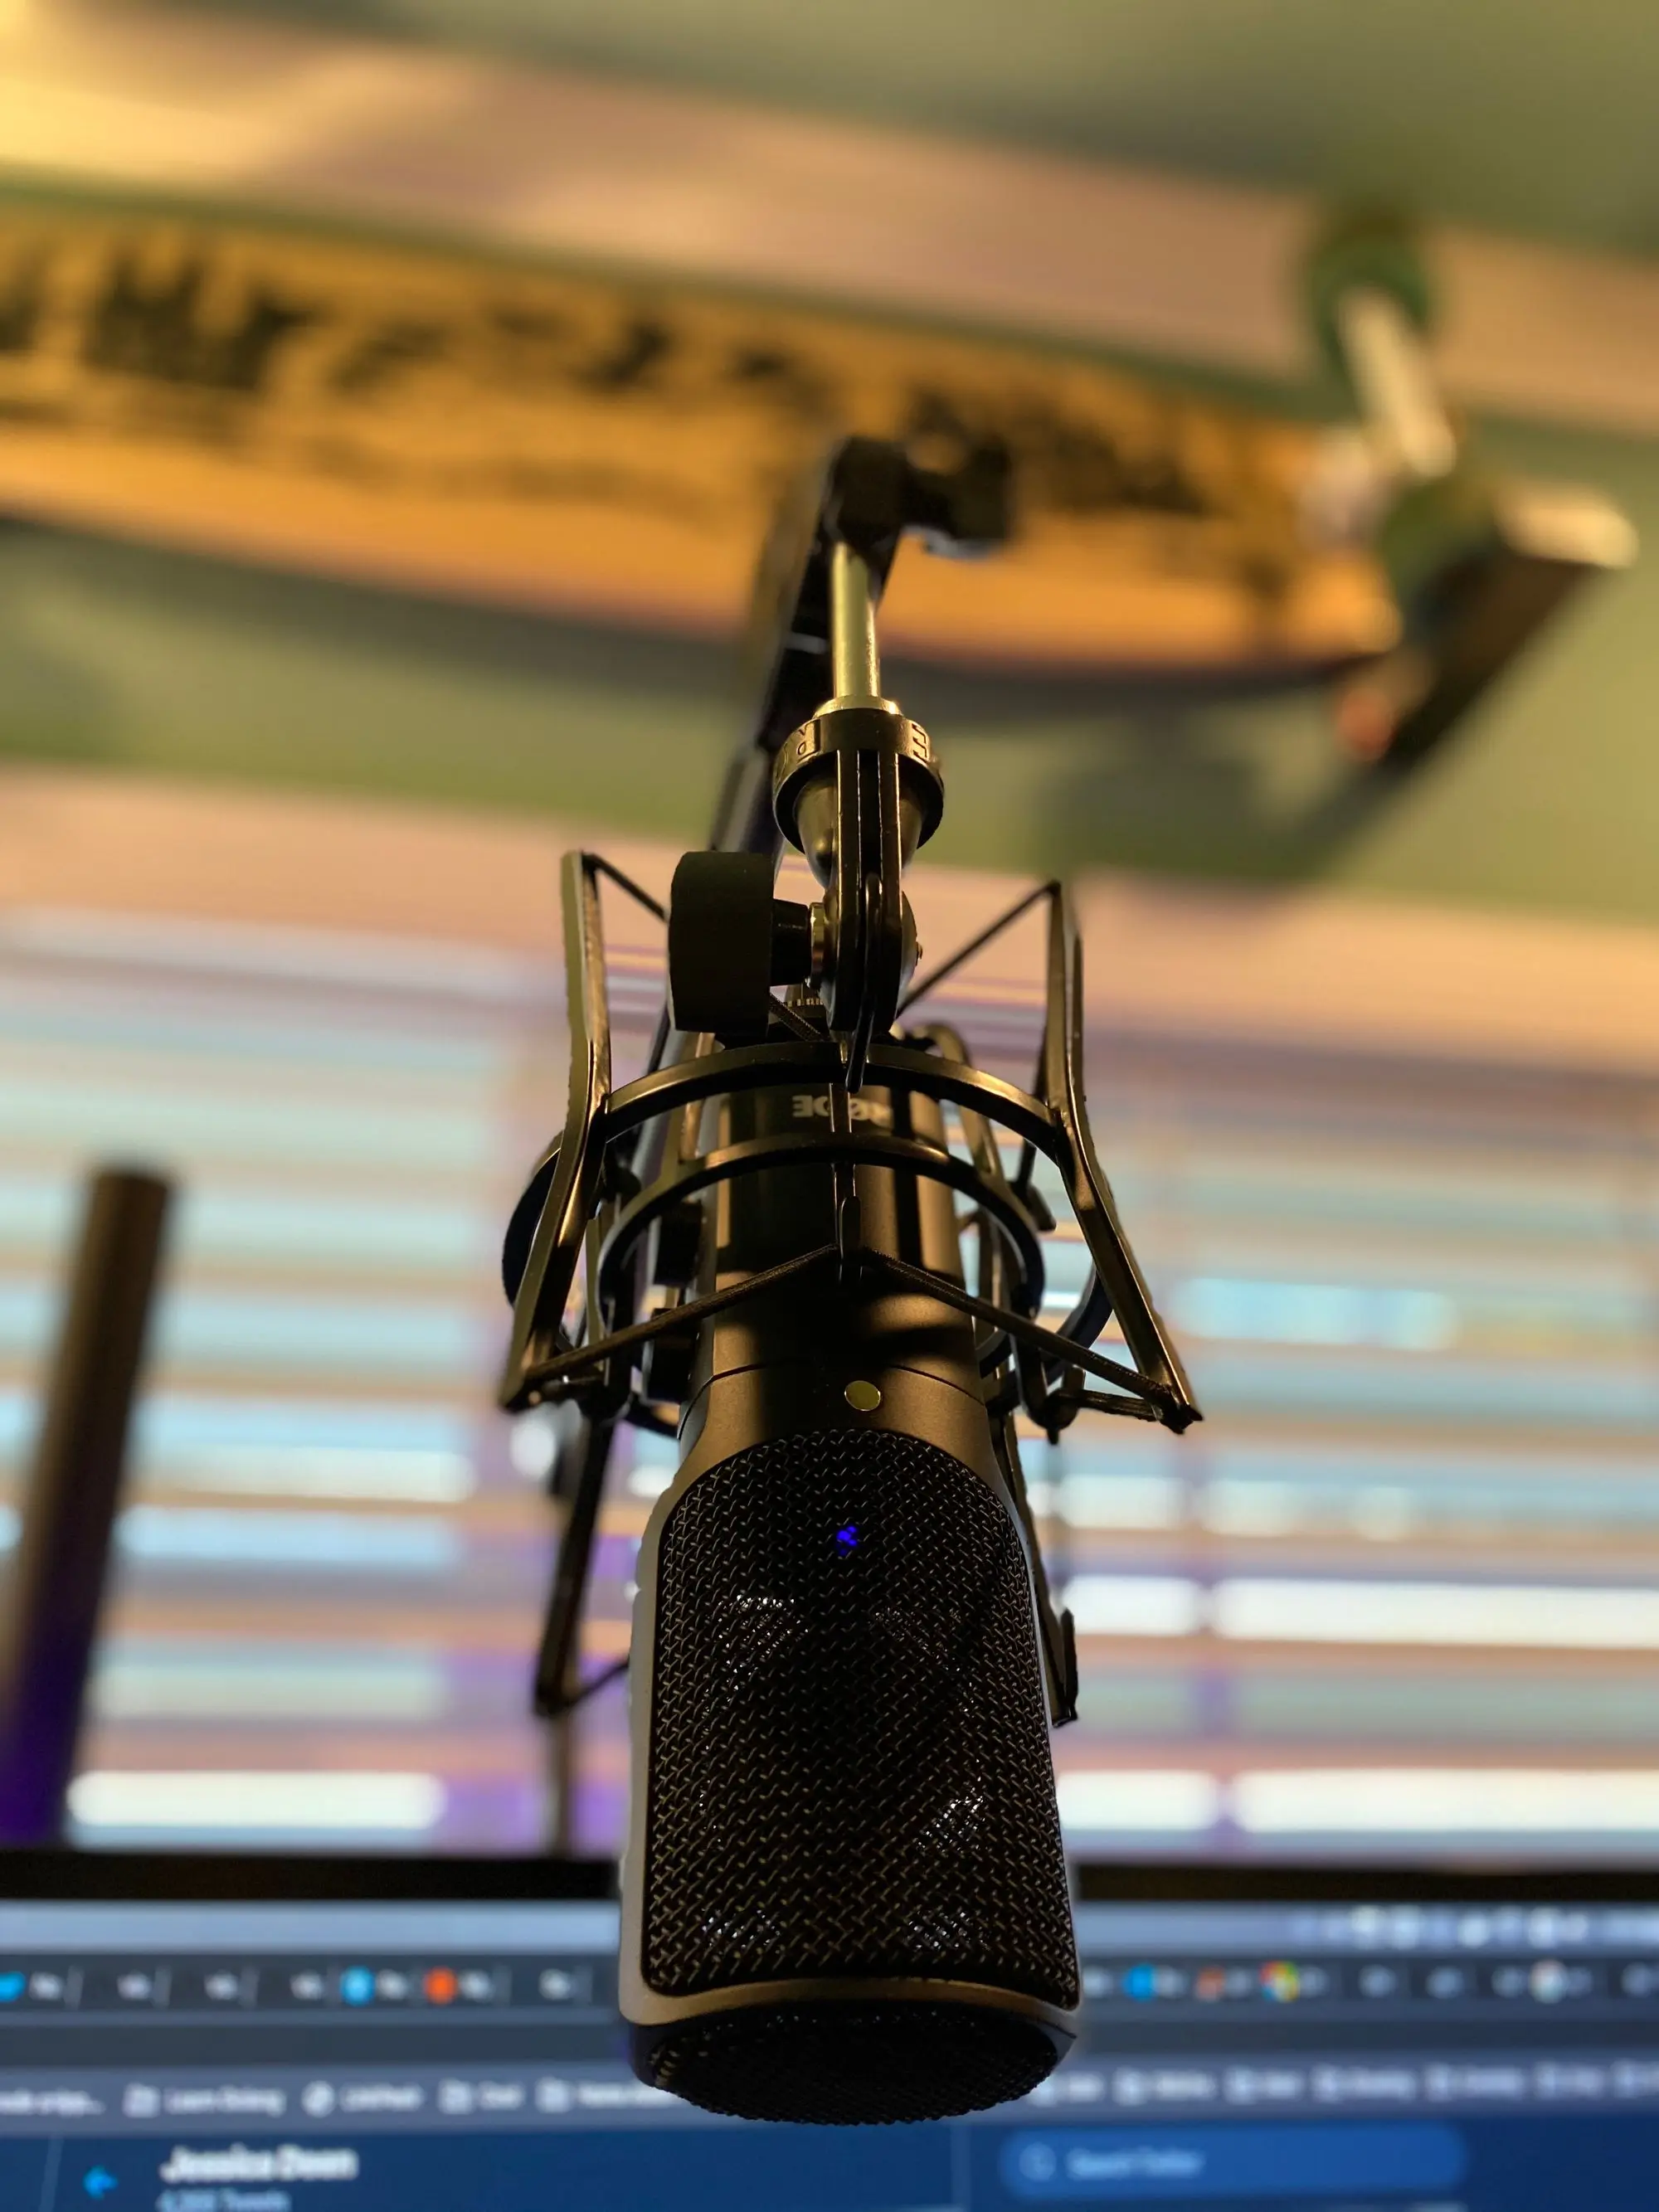
You can purchase the Rode NT-USB microphone today for $169 and the Rode SM6 Shock Mount for $39 without the integrated pop shield here or $58.85 with the integrated pop shield here.
Since I purchased the option with the integrated pop shield, I’ll value this section’s cost at: $227.85
Camera
My current YouTube Videos were filmed on my previous camera, which was a Canon Rebel T6i with a Tamron 16mm - 300mm macro lens. I rarely (less than 5 times) used the lens beyond 16mm for vlogging and noticed there was an aggressive autofocus with the Tamron lens. I have received comments about how distracting that is for viewers, and it’s also audible, which I didn’t like.
I plan to travel less this year (for real this time) and with that, I want to create more online content (streaming included). I opted to invest in a better camera setup to give me not only a clear and beautiful image, but also an option to connect my camera to my system.
I first invested in Camlink, which is an HDMI connector for your computer. You can pickup the Camlink HDMI connector I use for $122.98 here.
I quickly learned Canon cameras do not have true clean HDMI out, even the more recent mirrorless Canon M50. While you can get clean HDMI, you have to disable autofocus, which means you’d have to be 100% certain your focus is adjusted before you start recording. There also seemed to be a connection issue with the Canon T6i and Camlink - I could only use OBS to record because it was the only software I found that had the ability to apply deinterlacing properly. If I recorded using Camtasia or Screenflow, I would get horizontal lines on any kind of movement. If you’ve seen me speak before, I talk a lot with my hands, so this is a problem for more than just the obvious reasons.
Another problem I discovered was OBS allows recording multiple audio tracks, but only one video track. Since I record code demos frequently, I sometimes want to make my talking face disappear so viewers can see the full screen; this means I need the option of recording my desktop and camera separately. You can get around this by stretching your recording layout to be equal to that of your inputs. This meant if I were recording both my desktop and my camera at 1920x1080, I would make my canvas 3840x1080. I thought this would solve my issue only to have trouble in post processing - my 2017 MacBook Pro had trouble processing the video and would hang every 2-3 seconds. Of course, I wouldn’t have to record in that manner if I could use Camtasia, but even with the built in video effects, none of them could solve the deinterlacing issue so I had to use OBS. I even tried to fix the video with 3rd party tools like Handbrake - no dice.
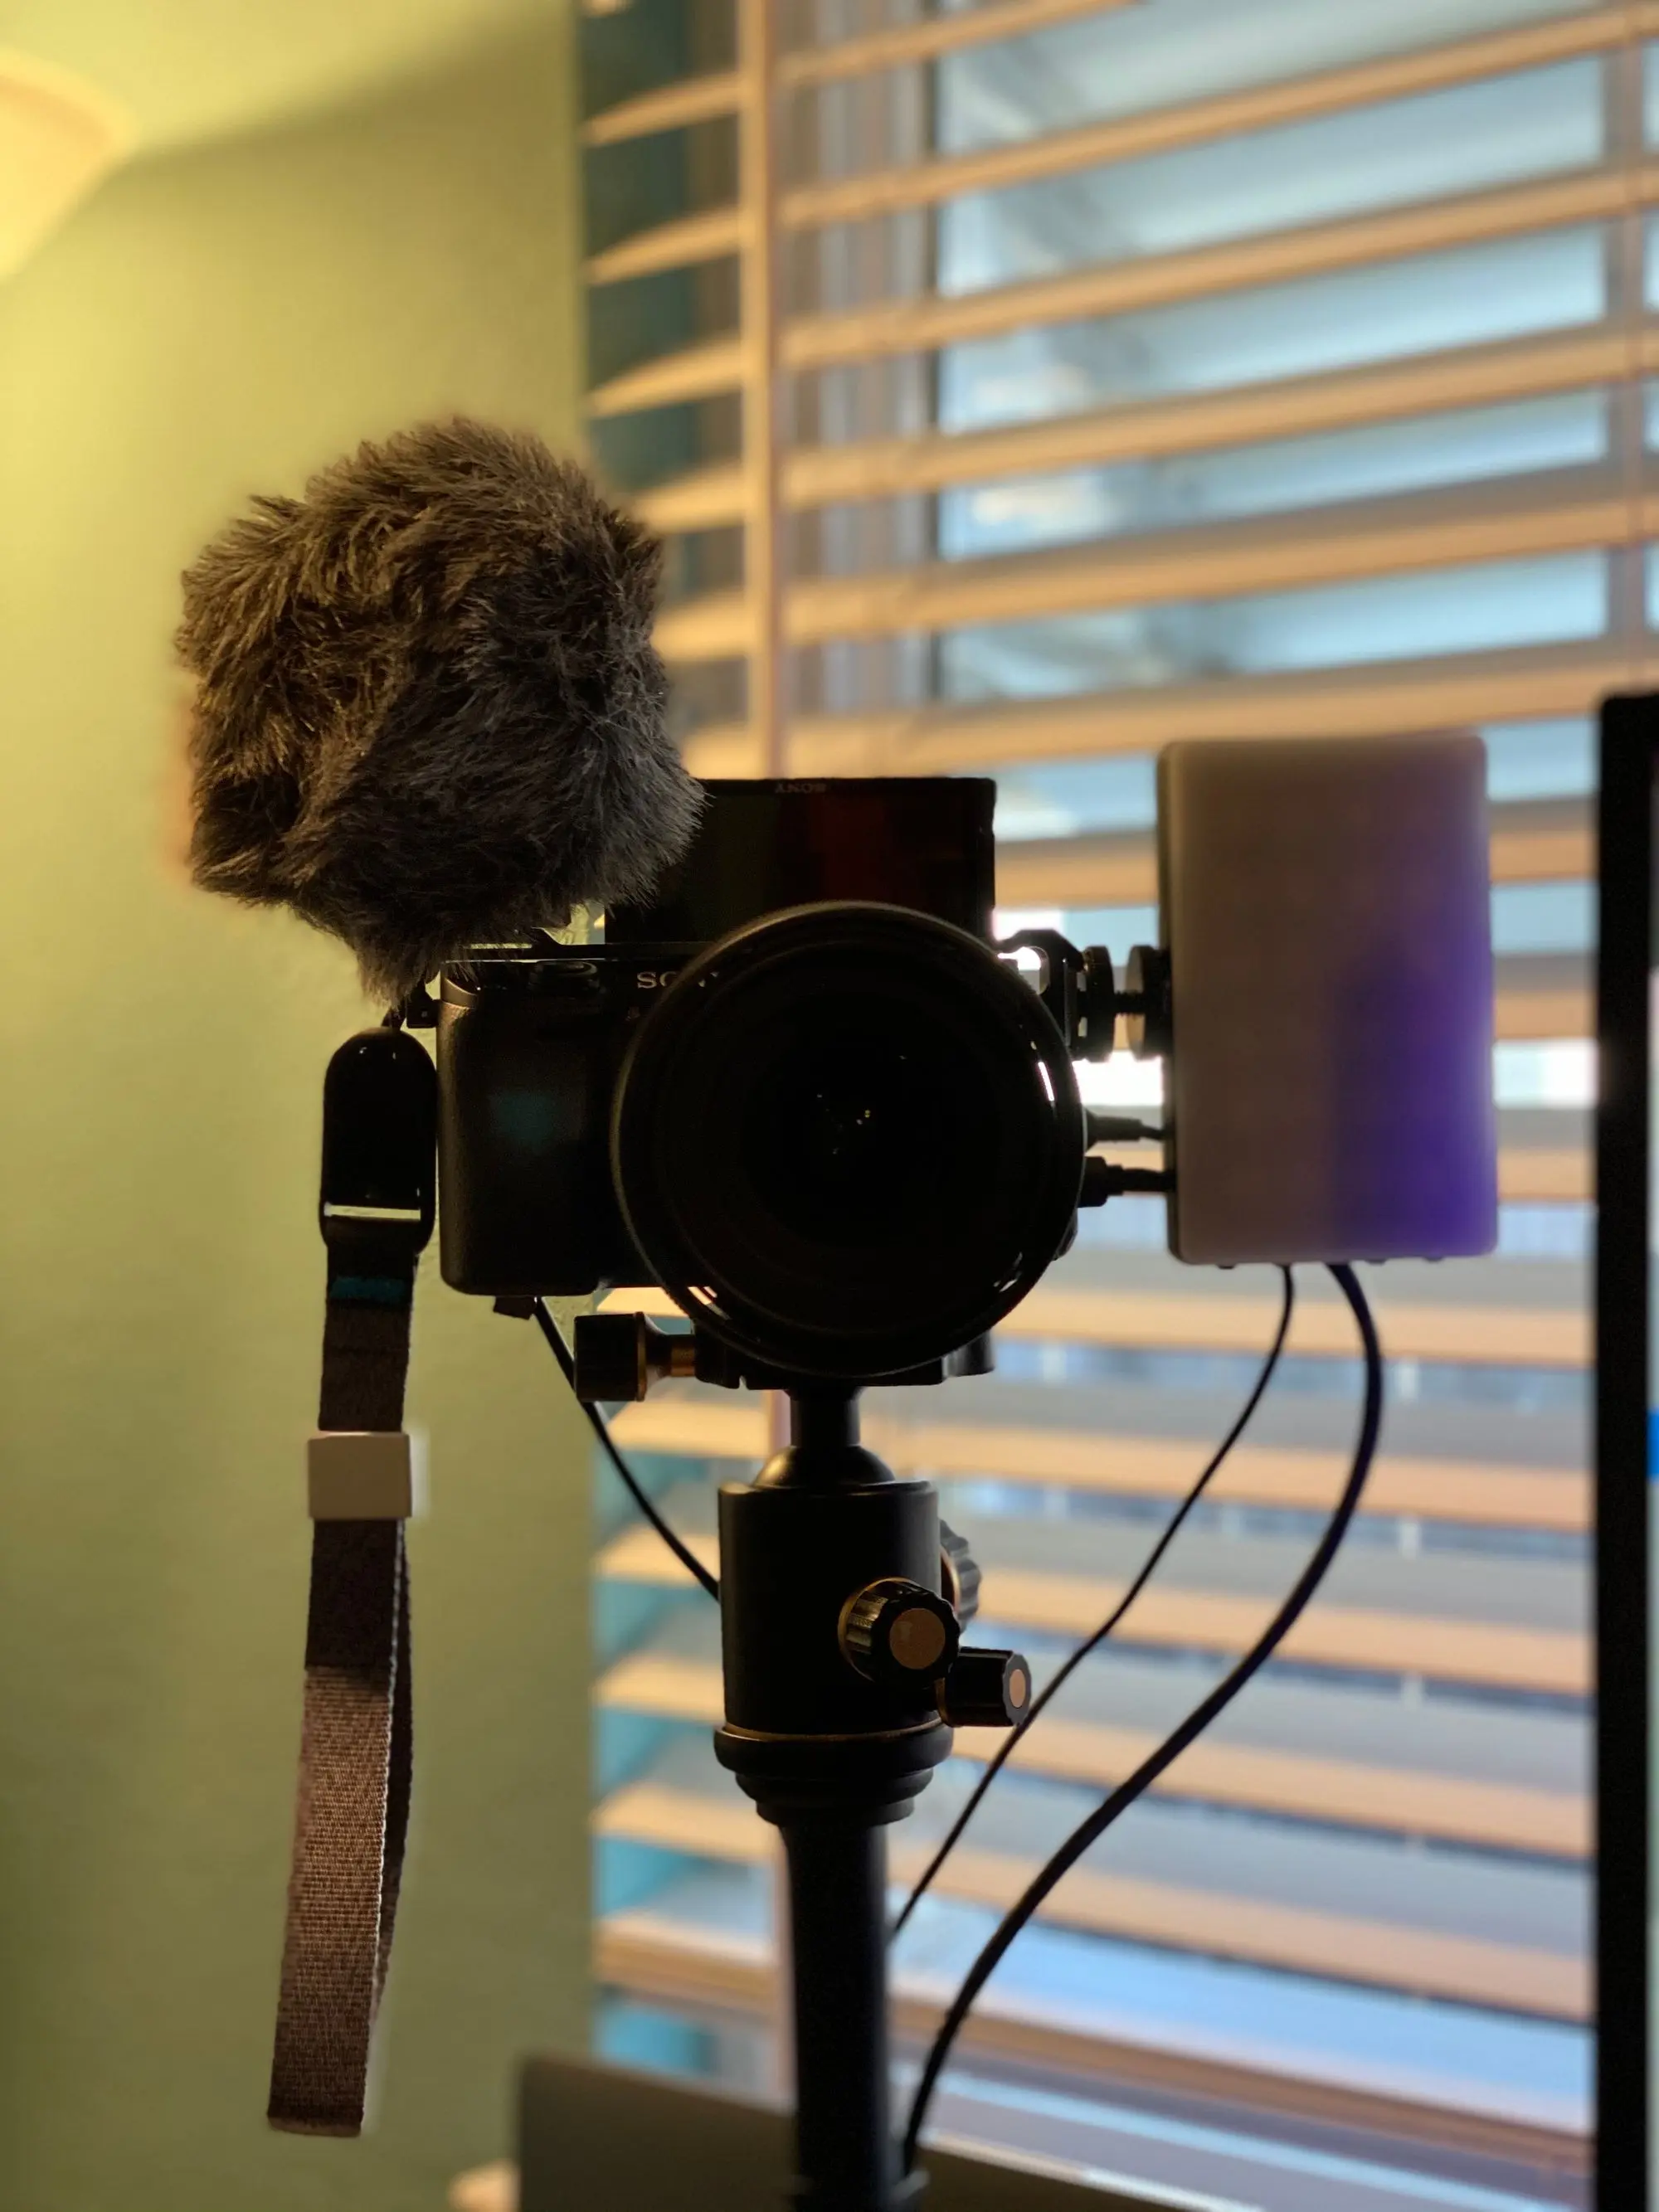
After struggling with all the tweaks I had to make to Canon just to get it to record video directly to my computer, I decided to sell all my Canon gear and upgrade to a Sony mirrorless camera. At first I was going to purchase a used Sony a6000 from eBay after reading Scott Hanselman’s blog on his setup. However, I wanted the option of using an external mic with my camera in case I wanted to record outside of my office. One of the two downsides with the a6000 was the lack of an external mic jack. The second downside was the 4K recording ability - the a6000 has a 29:59min cut off time so if you need to possibly record longer than 30 minutes, you had to get the a6400. I sometimes record my sessions and they are usually about 45min - 1hr. I decided to get the a6400 after watching hundreds of YouTube videos and reviews, but I went with the body only option since I typically don’t use kit lenses and I don’t want to pay for a lens I won’t use. You can get the Sony a6400 body only option for $898 here or a “bundle” that includes an extra battery, an SD card, an SD card reader, carrying case, and ac adapter for $934 here.
Since I had previously recorded all my videos at around 16mm and my office is fairly dim, I opted for the Sigma 16mm f/1.4 since it’s a highly recommended lens and it does incredible in low light. With the low aperature, I’m also able to get a pretty amazing depth of field, which also means my background is less distracting and viewers are more likely to focus on what I’m saying. You can puchase the same Sigma 16mm f/1.4 lens I have for $364.50 here.
In time, I would like to save up some pennies and add the Sony 10-18mm f/4 to my collection since I love wide-angle views. Pro-tip - if you also have a Sony alpha series camera, you can buy a used 10-18mm lens for about half the price of a new one.
Camlink 4k: $122.98 Sony a6400: $899 Sigma 16mm f/1.4 Lens: $364.99
Total Cost brand new: $1369
I sold my Canon for $425, but had to pay 12.9% on that in fees, bringing my net to $370. I then sold the Tamron lens locally for $350 cash, bringing my total upgrade cost from Canon to Sony to be $544 ($1264-$720). I didn’t include the cost of the Camlink in this since I would have purchased only the Camlink had it of worked properly with the Canon Rebel.
My total cost: $667 (Includes cost of Camlink, Sony, Sigma lens and factors in profit made from selling all Canon/Tamron equipment)
Mounting Hardware
Finding the hardware to mount all this was a journey, particularly because of how thick my desk is (and why I said previously I would likely use thinner wood today). I had looked about a year ago and I couldn’t find a c-clamp that would accommodate the 3.5" thickness of my desk; most of the clamps tap out at around 2". During my camera research on YouTube, I stumbled across this video and in it Caleb recommended most of the hardware I ended up using. The vesa arm system (main unit) came with a c-clamp that can actually support upto a 4" thick desk - I couldn’t believe it. I also bought 2 additional vesa arms, but I have only used one of them since I’m not planning on adding lighting like he did (though I do plan to add better lighting to my office at some point).
While I am using a lot of what he recommended, I configured it slightly differently. For the main unit, I do have my monitor mounted directly to the stand, using only one part of the 2 piece arm system it comes with. I then took the 2nd piece of that arm system and added it onto the one of the other vesa arms I purchased, thereby making an extra long arm - this is the arm my camera is mounted to. This allowed me to do two things:
- Keep cost down
- Have my monitor mounted along with my microphone
Note: The arm mount claims it can only support upto a 27" monitor, but I haven’t had any issues with my 32", probably because my monitor isn’t very heavy.
The microphone boom arm shares the same arm piece as the monitor, but I didn’t go with Caleb’s suggestion because it was too flimsy for my heavier mic setup. Instead, I went with a Tisino heavy duty version because it was half the cost of a Rode mic boom arm and still just as heavy duty.
Wali Vesa Extra Tall Single LCD Monitor Stand - $33.99 Wali Vesa Second Unit Arm - $17.99 Tisino Microphone Boom Arm - $49.99 Tripod Head (this thing is SOLID) - $19.50 Puluz Metal Handheld Adjustable 3/8" Size Tripod/Monopod Mount - $10.99 Niceryig 3/8 and 1/4 quick release screw - $9.99* *(note you will also need a split lock washer)
*** Prices listed are valid at the time of this writing ***
Cost: $142.45
Additional, and admittedly, luxury mods
It has been a few weeks and I’m already in love with my new setup. However, the only thing I didn’t like about the Sony is when you use the flip up “selfie” screen along with a shotgun mic, the mic blocks the screen. This means, if you need to see the screen, you are going to have to relocate the mic, which means purchasing more gear.
Since I do plan to travel with the camera setup as I mentioned, I originally went with the Small Rig cage, but I returned it and went with the simple Small Rig Mic Relocation adapter. The Small Rig cage is solid, but it adds a lot of bulk and I didn’t care for it.
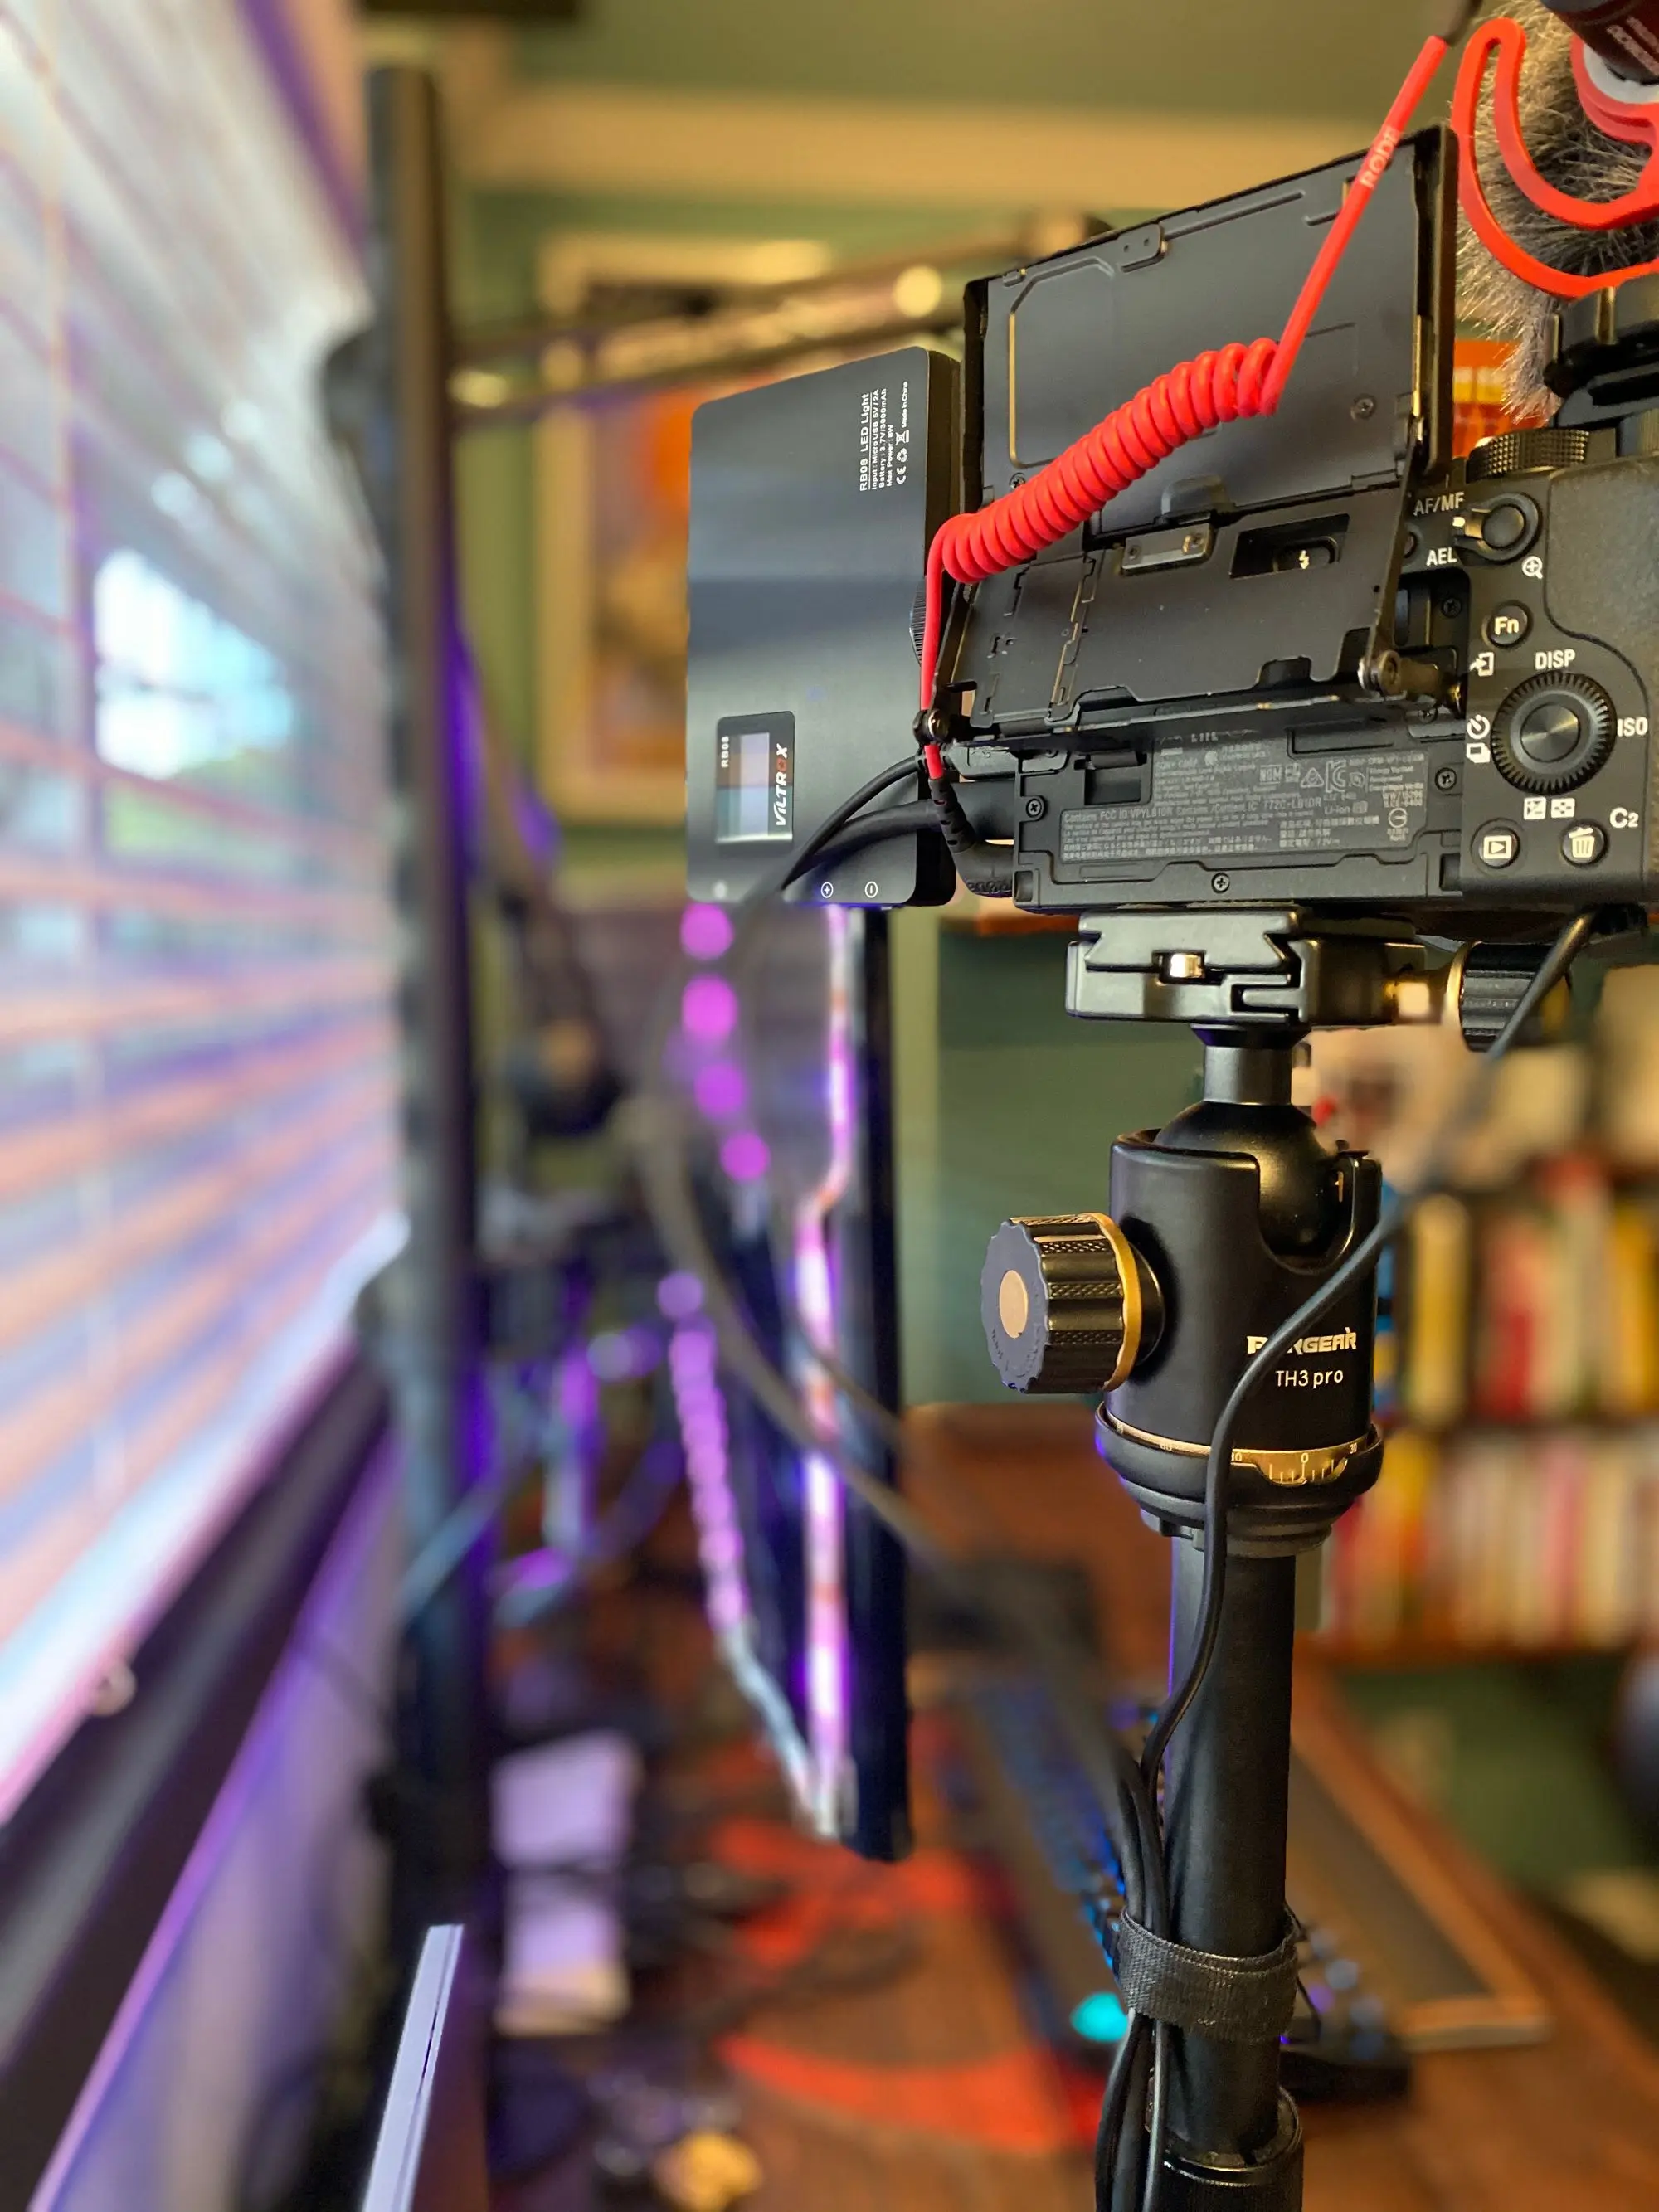
Also, when I am home, my camera is connected to my computer and remains on almost all day. Sony can be powered via the USB cable it comes with, but only if it has a full battery, and at some point, the battery will still die. In short, if you want to have constant power for your Sony camera, you’re going to need to get an AC adapter.
Finally, I haven’t mentioned which shotgun microphone I’m using. Short answer: Takstar SGC-598 because it was 1/10th of the cost of the Rode Video Pro mic and still has great sound. Just like everything else in this post, I did a metric ton of research and watched/listened to audio comparrisons on YouTube before I made my decision. The audio differences weren’t worth $200 for me. When I travel, however, I did pick up the Rode VideoMicro solely because I can fit it easily in my camera bag.
Sony AC Adapter - $22.99 Sony Screen Protector - $14.99 Smallrig Cold Shoe Adapter Relocation Plate - $26.99 Peak Design hand Strap - $29.95 Takstar SGC-598 Microphone - $22.50 Rode VideoMicro - perfect for travel - $57.50 VILTROX LED On Camera Video Light - $33.49 NP-FW50 RAVPower Dual Battery Charger - $29.99 (Includes 2 extra batteries)
Extras Total Cost: $238.40
Miscellaneous Artwork
Most of my artwork has been collected over the past decade. I have purchased some pieces direct from Disney’s WonderGround Gallery in Disneyland, while I have purchased others from local artists doing live painting in bars. My office artwork could be a post in and of itself, so sound off in the comments if you would enjoy a post on the various art pieces in my office.
One question I will answer now, primarily because I get asked it so frequently, is: Where did I get my Yoda desk lamp?
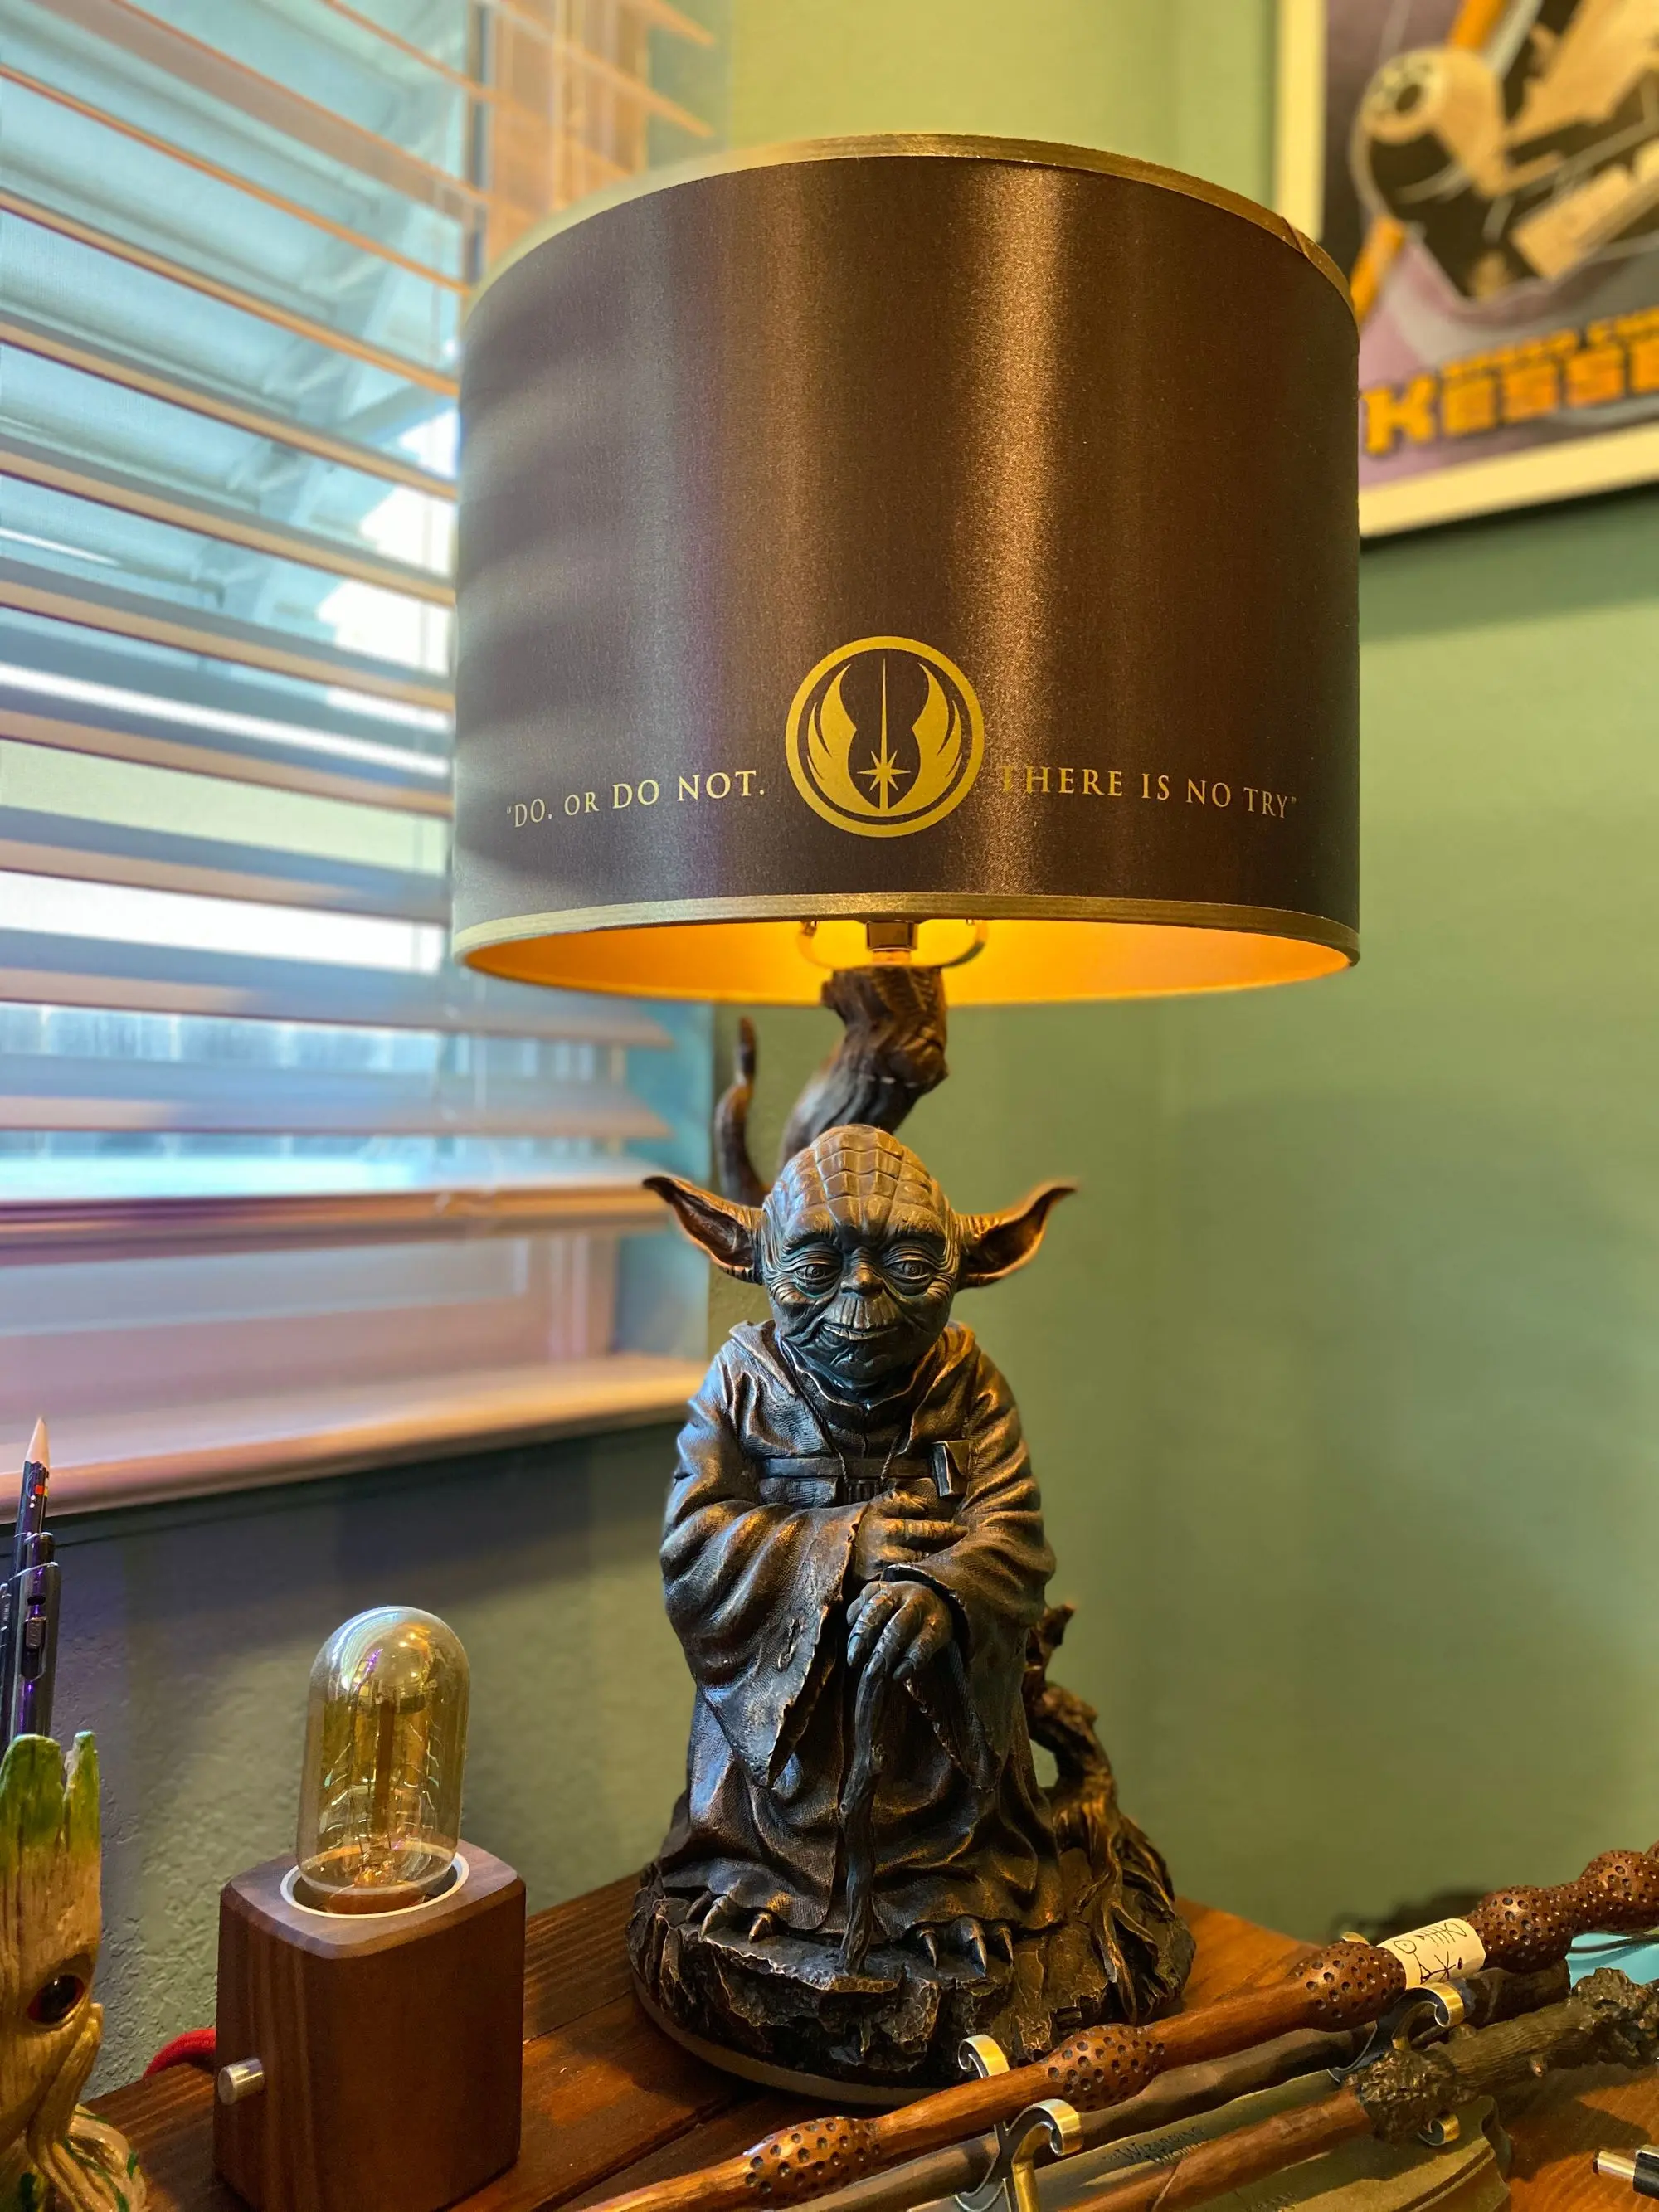
It was actually a gift several years back, but you can pick one up from Bradford Exchange here for $179.95 + shipping and handling.
Note: There is a delay in ordering it so if you were to order today, their website states shipping would begin June 11th, 2020.