

Azure Static Web Apps and the Trailing Slash
I recently published a blog post on setting up Twitter Cards in Hugo and shared it on Twitter …
Have you ever wondered how you take a free Let’s Encrypt Certificate and use it with an Azure Web App (Linux)? This post is for you! Follow along as I walk you through just 5 steps needed to secure your Azure website with a free SSL certificate.
If you’re using macOS and homebrew, you can install certbot easily by running the following command:
brew install certbot
If you’re using Linux, you can use certbot and certbot-auto with a few pre-requisites:
python-minimal
git-core
cd /opt
git clone https://github.com/certbot/certbot.git
cd certbot && ./certbot-auto
Using certbot, which you just installed, you can now create your Let’s Encrypt cert.
certbot certonly --manual --preferred-challenges=dns --email contact@domain.com --server https://acme-v02.api.letsencrypt.org/directory --agree-tos --domain "website.com" --work-dir /path/to/work-dir --config-dir /path/to/config-dir --logs-dir /path/to/logs-dir

If you get the above error you will need to add the following flags just as I did in my example command:
--work-dir
--config-dir
--logs-dir flags
Your cert and key information will be put in the work-dir you specify, which you will then reference in the following step.
Azure expects a cert in .pfx format so you will need to convert the created cert.pem file to .pfx. You can do so easily using openssl:
openssl pkcs12 -inkey /work-dir-path/live/website.com/privkey.pem -in /work-dir-path/live/website.com/cert.pem -export -out /work-dir-path/live/website.com/cert.pfx
(Tip: Be sure to update the -inkey, -in, and -out paths as appropriate to your environment. You will also have to provide a passphrase as you will need to enter it when you upload it to your Azure Web App.)
If you don’t have openssl you can install also via brew:
brew install openssl
or via apt-get:
sudo apt-get install openssl
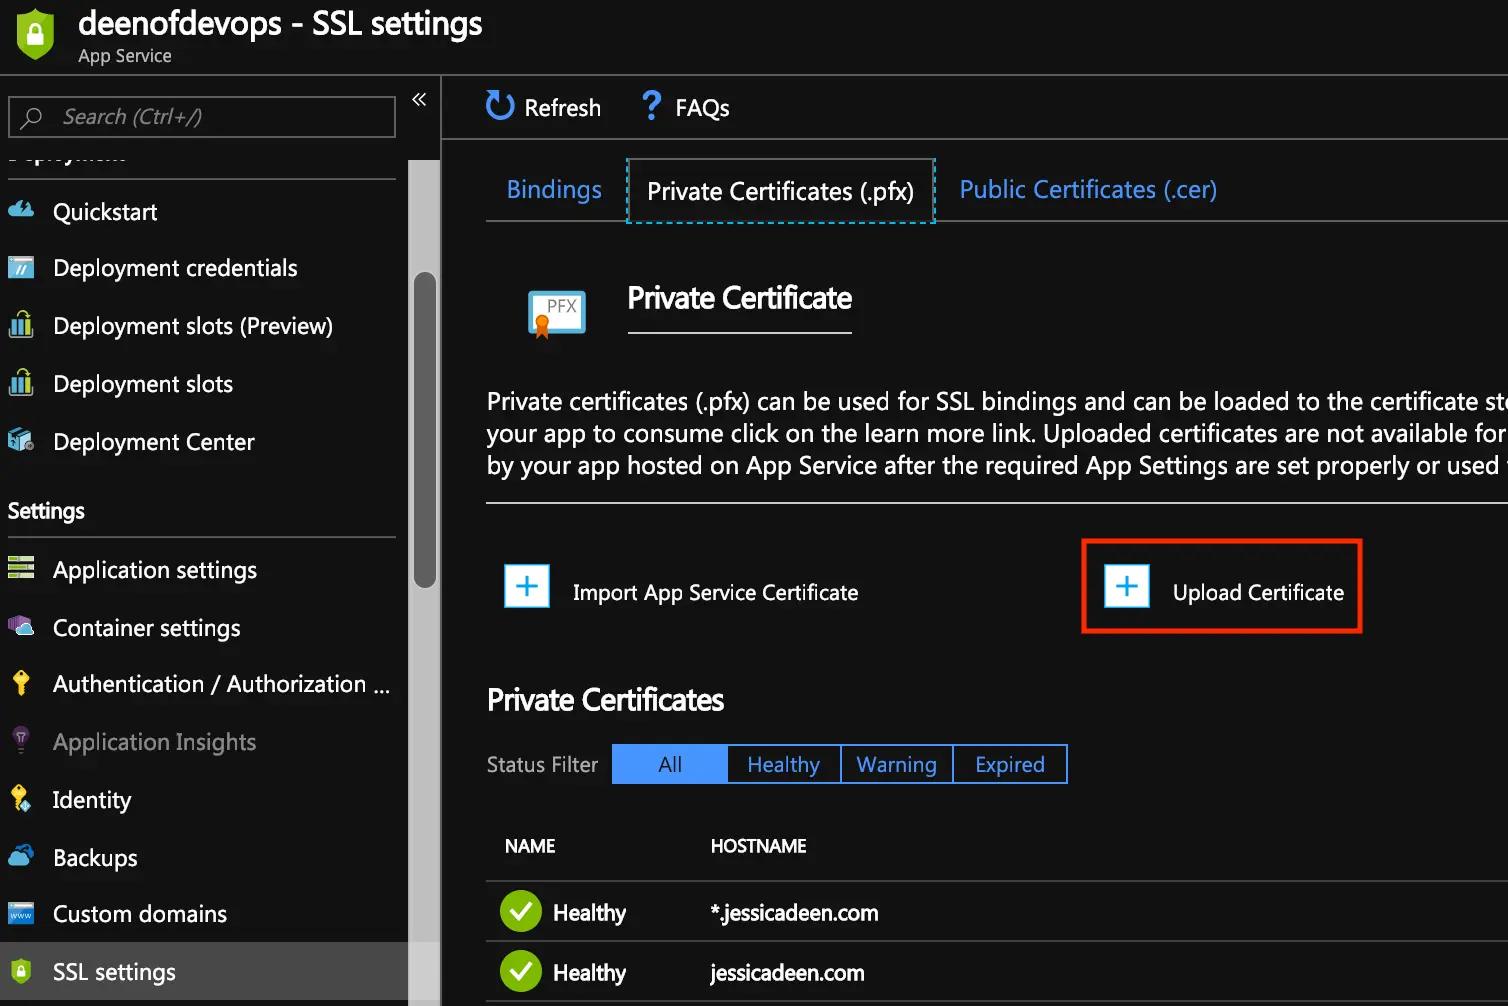
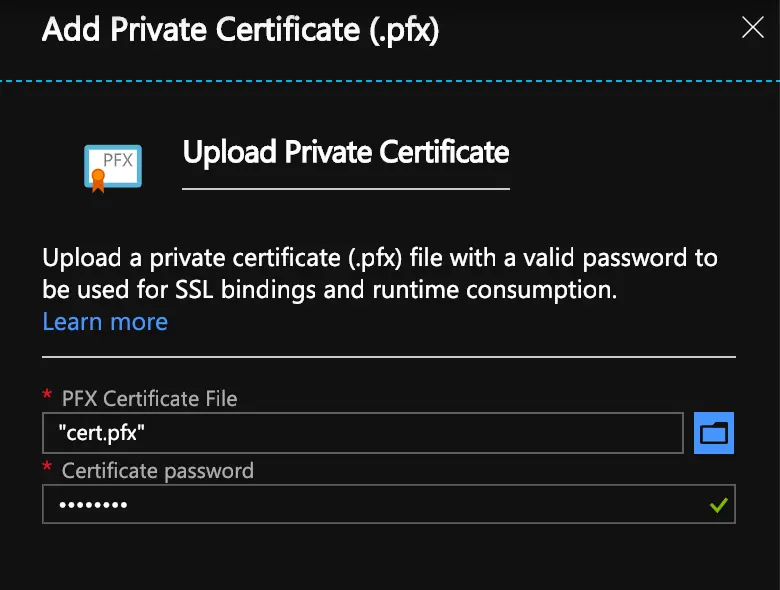
Then simply upload via portal by selecting your app service > ssl settings (under settings on the left) > Private Certificates (.pfx)
You can run a simple bash script to handle this, or you can manually run the necessary commands. More on how the bash script method works can be found on Azure Docs. I like to understand how each command works prior to running any foreign scripts on my machines so I run through the important commands below:
Variables:
fqdn=domain-goes-here.com
pfxPath=replace-with-path-to-your-.pfx-file
pfxPassword=pfx-password-here
resourceGroup=resource-group-name
webappname=web-app-name-here
Map your prepared custom domain name to the web app
az webapp config hostname add --webapp-name $webappname --resource-group $resourceGroup \
--hostname $fqdn
Upload the SSL certificate and get the thumbprint
thumbprint=$(az webapp config ssl upload --certificate-file $pfxPath \
--certificate-password $pfxPassword --name $webappname --resource-group $resourceGroup \
--query thumbprint --output tsv)
*The thumbprint command/captured variable will be used in step 5 for binding
Again, select your app service > ssl settings (under settings on the left) > Bindings
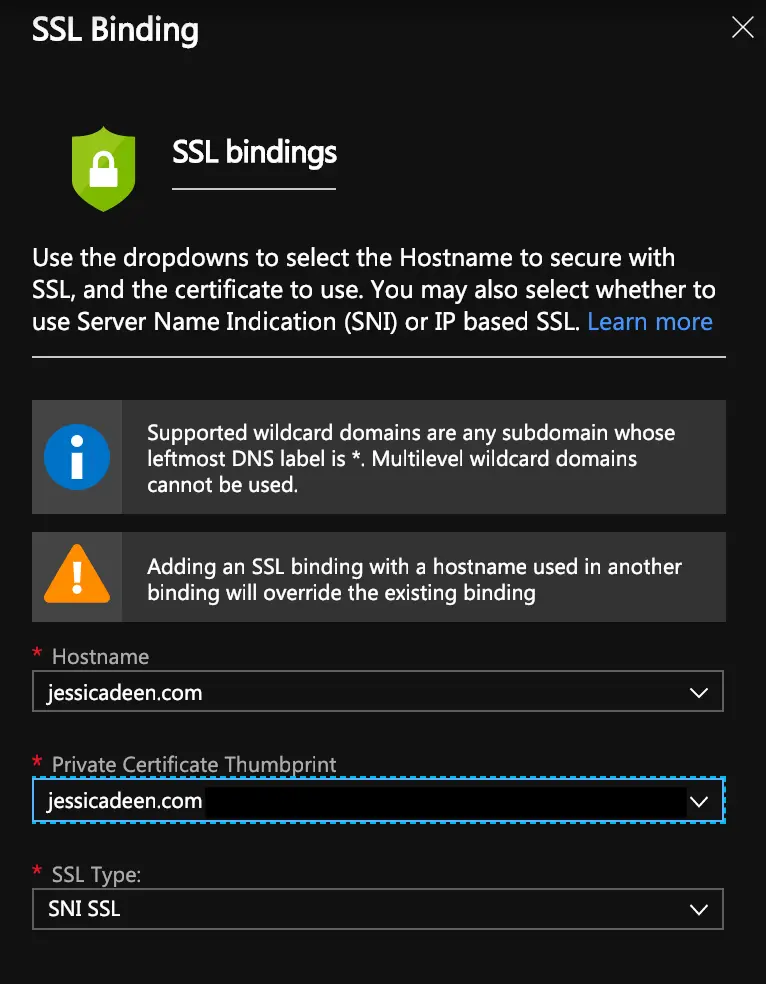
Add SSL Binding
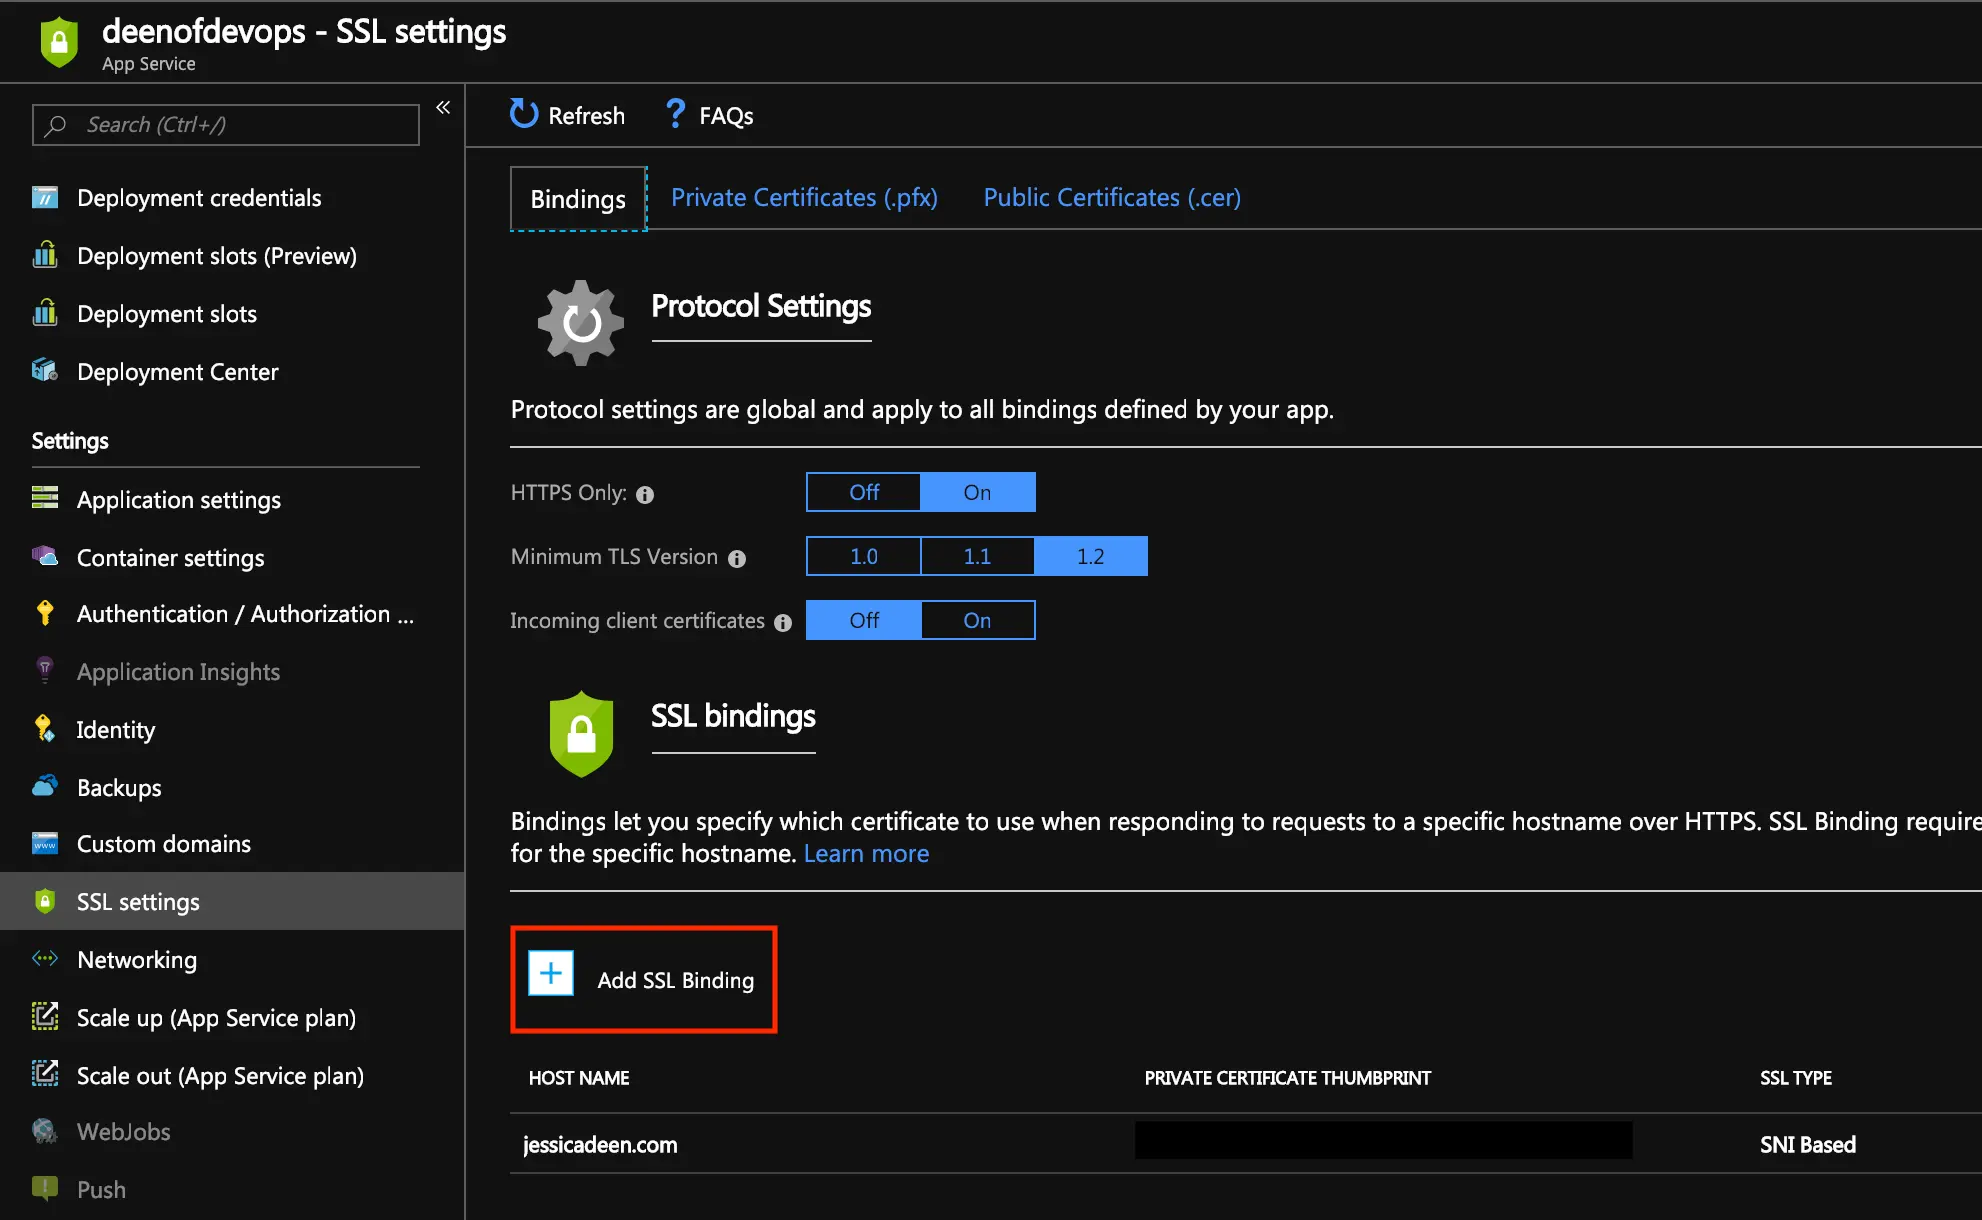
Select hostname, Private Certificate Thumbprint, SSL Type (SNI SSL)
(Continued from previous CLI commands used in step 4, specifically the captured thumbprint variable)
az webapp config ssl bind --certificate-thumbprint $thumbprint --ssl-type SNI \
--name $webappname --resource-group $resourceGroup
That’s it! 5 easy steps and you now have an SSL cert from Let’s Encrypt for your webapp. Remember, Let’s Encrypt certificates are limited to 90 days so you will manually have to rerun this process every 89 days or so. Of course, if you’re like me and believe in #noclickyclicky you can create a script to do it for you, or use Kubernetes and Helm charts as I have previously written about.
I recently published a blog post on setting up Twitter Cards in Hugo and shared it on Twitter …

All code featured in this blog post can be found here on GitHub. Problem Have you ever wanted …

We’ve all been there. You do everything correct - you set your container to run as non …