
Azure Static Web Apps and the Trailing Slash
I recently published a blog post on setting up Twitter Cards in Hugo and shared it on Twitter …
I’ve owned this domain (jessicadeen.com) for a long time - long enough to have previously used WordPress on Azure via Bitnami in a VM. I know, that’s so 2001. Anyway, late last year I set out to update to something more flexible, lightweight, minimal, and something I could containerize, so I settled on the node based, open source platform known as Ghost.
One of the benefits I like and Ghost offers is all the blogging/writing is done in a minimal format using markdown, which really streamlines my personal writing process.
DISCLAIMER: This post is not a how to migrate from WordPress to Ghost, as there are plenty of those posts already online (I recommend this one), however this is a post on how to run Ghost in a Docker container on Azure.
For those who don’t want to read a long blog post, the tl;dr, or the Dockerfile I use is below:
FROM ghost:2.18.1-alpine

# set url-hostname for Ghost with build arg
ARG mode
ENV devMode ${mode}
ENV url ""

# copy config.production.json with db
COPY config.${devMode}.json config.production.json

# copy themes/images to container
COPY content content

# copy redirects
COPY redirects.json content/data

# Install Azure Storage
RUN npm install ghost-storage-azure
RUN cp -vR node_modules/ghost-storage-azure current/core/server/adapters/storage/ghost-storage-azure

# Install cloudinary module (OPTIONAL - MUST COMMENT OUT Azure Storage Section)
# RUN npm install ghost-cloudinary-store
# RUN cp -r node_modules/ghost-cloudinary-store current/core/server/adapters/storage
Now, with the above Dockerfile, I can keep my updated theme in my working content/themes directory and my Dockerfile will copy it over to my image; I also check it into source control. You’ll also notice I have 2 different blocks of code for storage adapters, more on that in a later post.
To build this image locally, I run the following command:
docker build --build-arg mode=development -f Dockerfile -t jldeen/deen-of-devops .
Then, to run this image locally, I run the following command:
docker run -it --name ghost-test -e url=http://localhost:2368 -p 2368:2368 jldeen/deen-of-devops:latest
You’ll notice my build command uses a build-argument development which I’m capturing on line 4 of my Dockerfile ARG mode; line 5 will then set it appropriately for later use on line 9. I do this intentionally because I have 2 different config.json files that are labeled config.development.json and config.production.json. Both have different database connection strings so I can safely test out new features, especially since I occasionally have to touch database schemas. Using two different config files also helped me test out different storage adapters - more on that in a later blog post.
You’ll also notice my run command uses an environment variable url where I can set the canonical url for Ghost - this is important because we will need this in our Azure App Settings too. If you already have an Azure App Service and just need to see the settings you have to configure, skip to step 5 in the next section.
As it stands, the above Dockerfile buils an image that can easily be used with Azure App Service for Linux Containers, or even AKS (not covered in this post).
For personal reasons, I currently have this blog running in a Web App for Linux Containers with two deployment slots (dev/production). Now, Ghost stores its necessary data in a content folder with necessary subfolders to store persistent data such as themes and images and if I want to keept that content local, I would need to account for persistence by mounting a volume to my container. As of the writing of this blog post, I do not have a volume mounted as you can see from my Dockerfile.
With my current configuration design, I do not have to account for persistent storage or volume mounting since I use external services, though I will write a how-to use Azure storage for volumes with Azure App Service in a later post.
I use Disqus for my comments so I need to modify my theme’s post.hbs page with the appropriate embed code, which means I have a “custom” theme. As part of my development process, I check my theme into source control via the content/themes/<theme-name-here> directory and the Dockerfile copies the content folder, and all subfolders, over to my Docker container (line 12).
I opted to host my images externally, to allow for scale, but I will write more about that in a later blog post. The tl;dr of my storage adapter search is: I was using Cloudinary, I exceeded my free bandwidth limits, I switched to Azure Storage and rewrote the Ghost Azure Storage adapter, which I install via npm in my Dockerfile and then force copy over to the Ghost core directory.
This section uses Azure CLI since I find it simpler than clicking in the Azure Portal and #noclickyclicky. You can also run all of the following commands in Azure Cloud Shell using az cli.
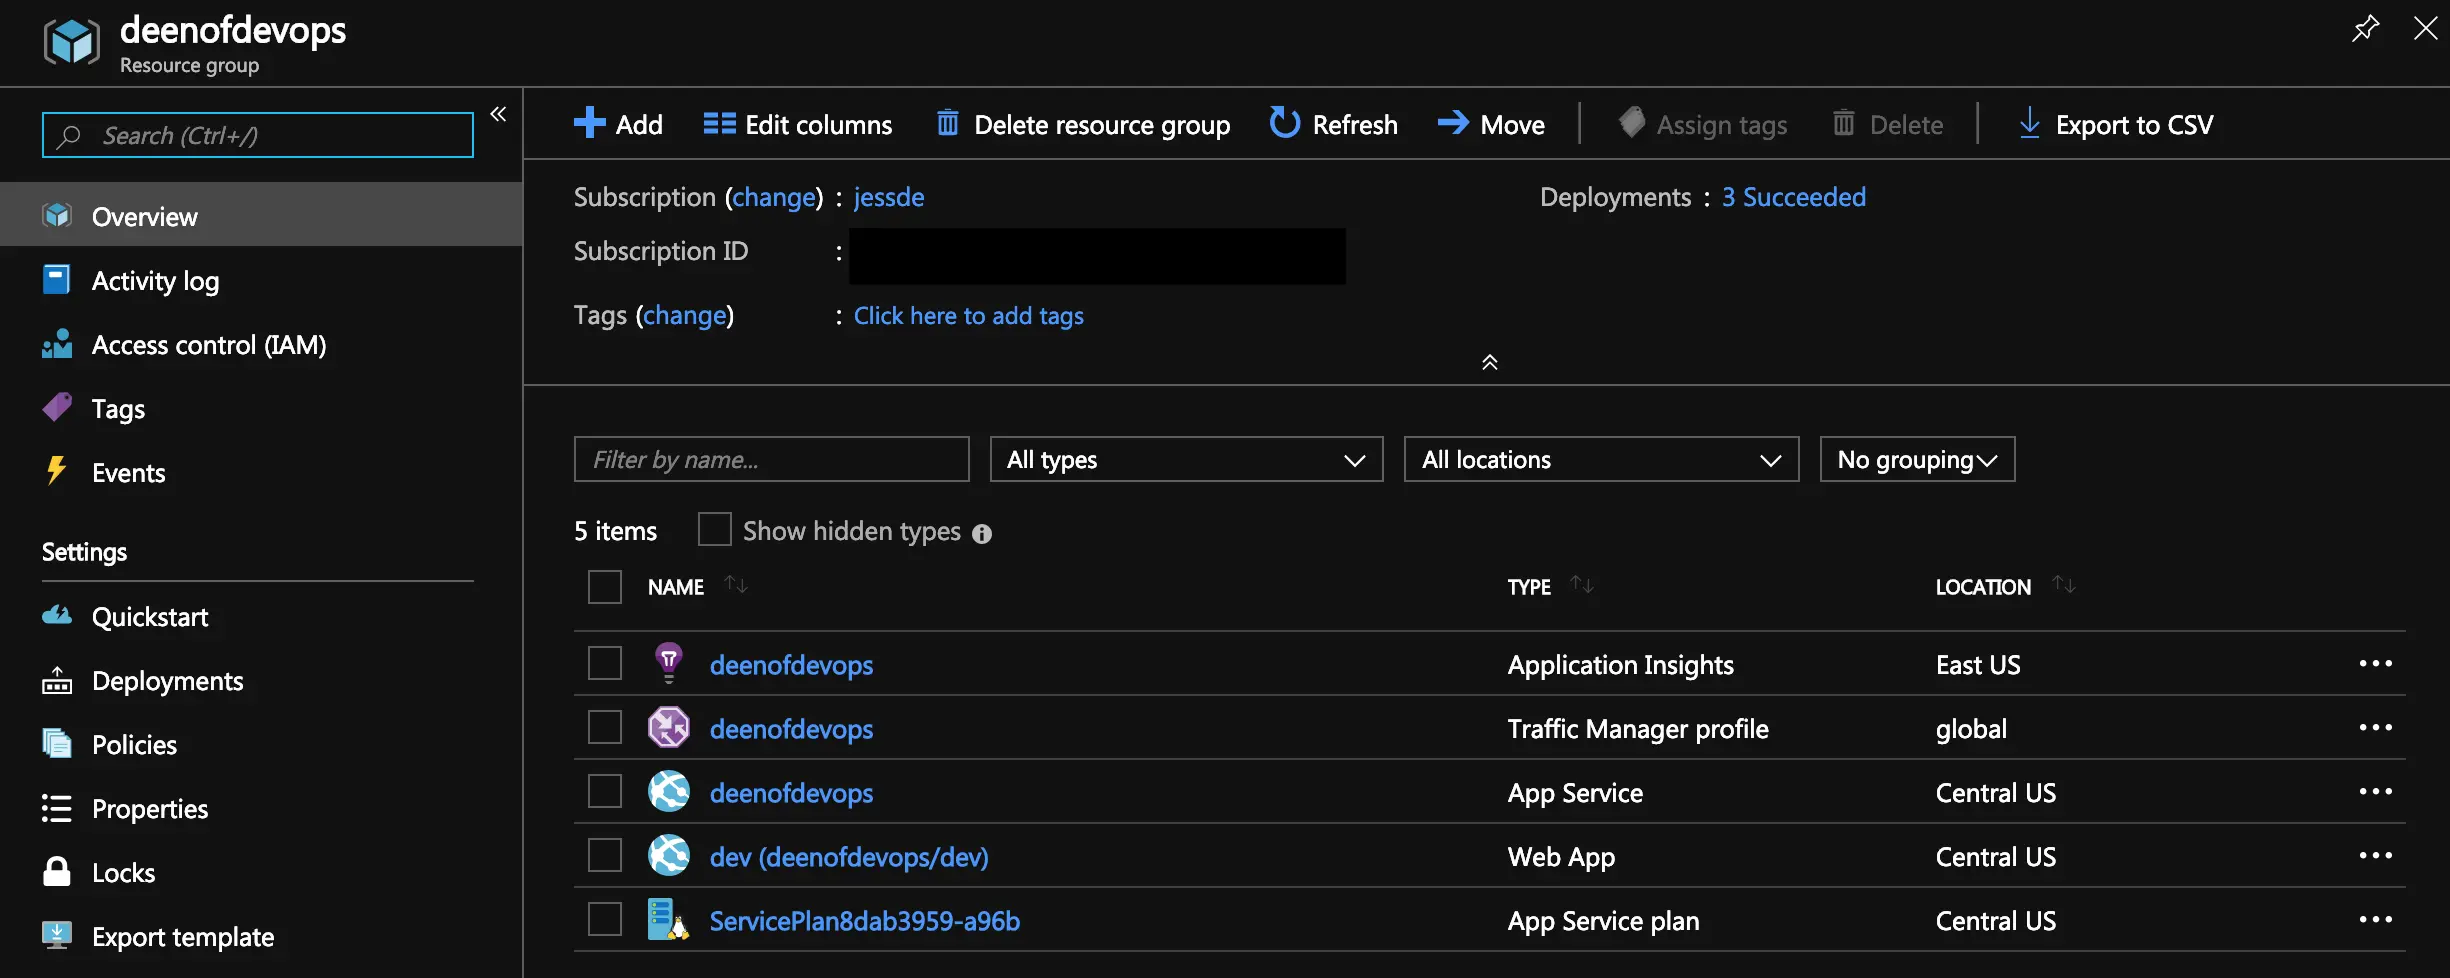
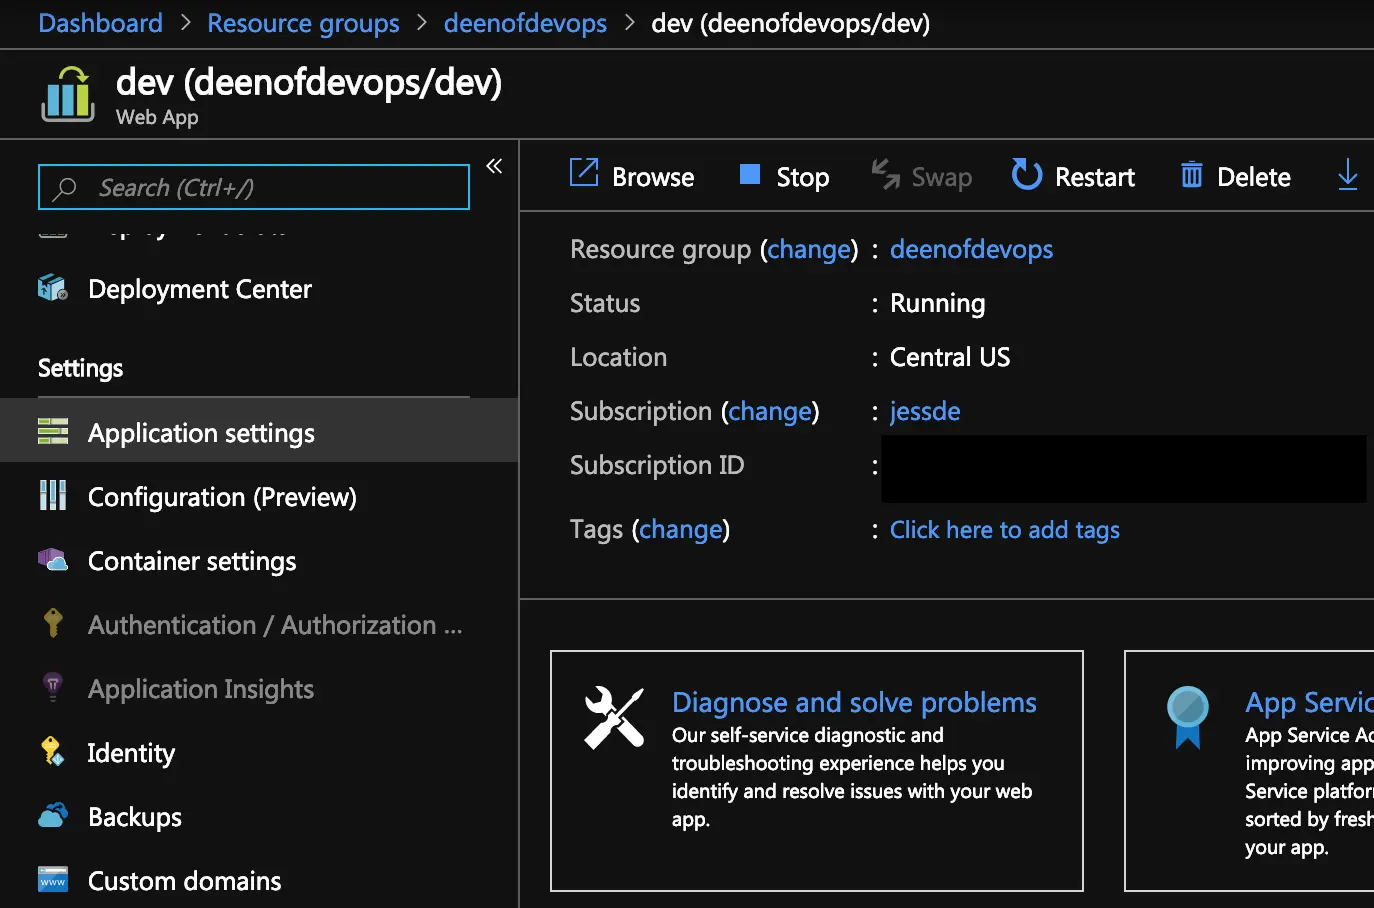
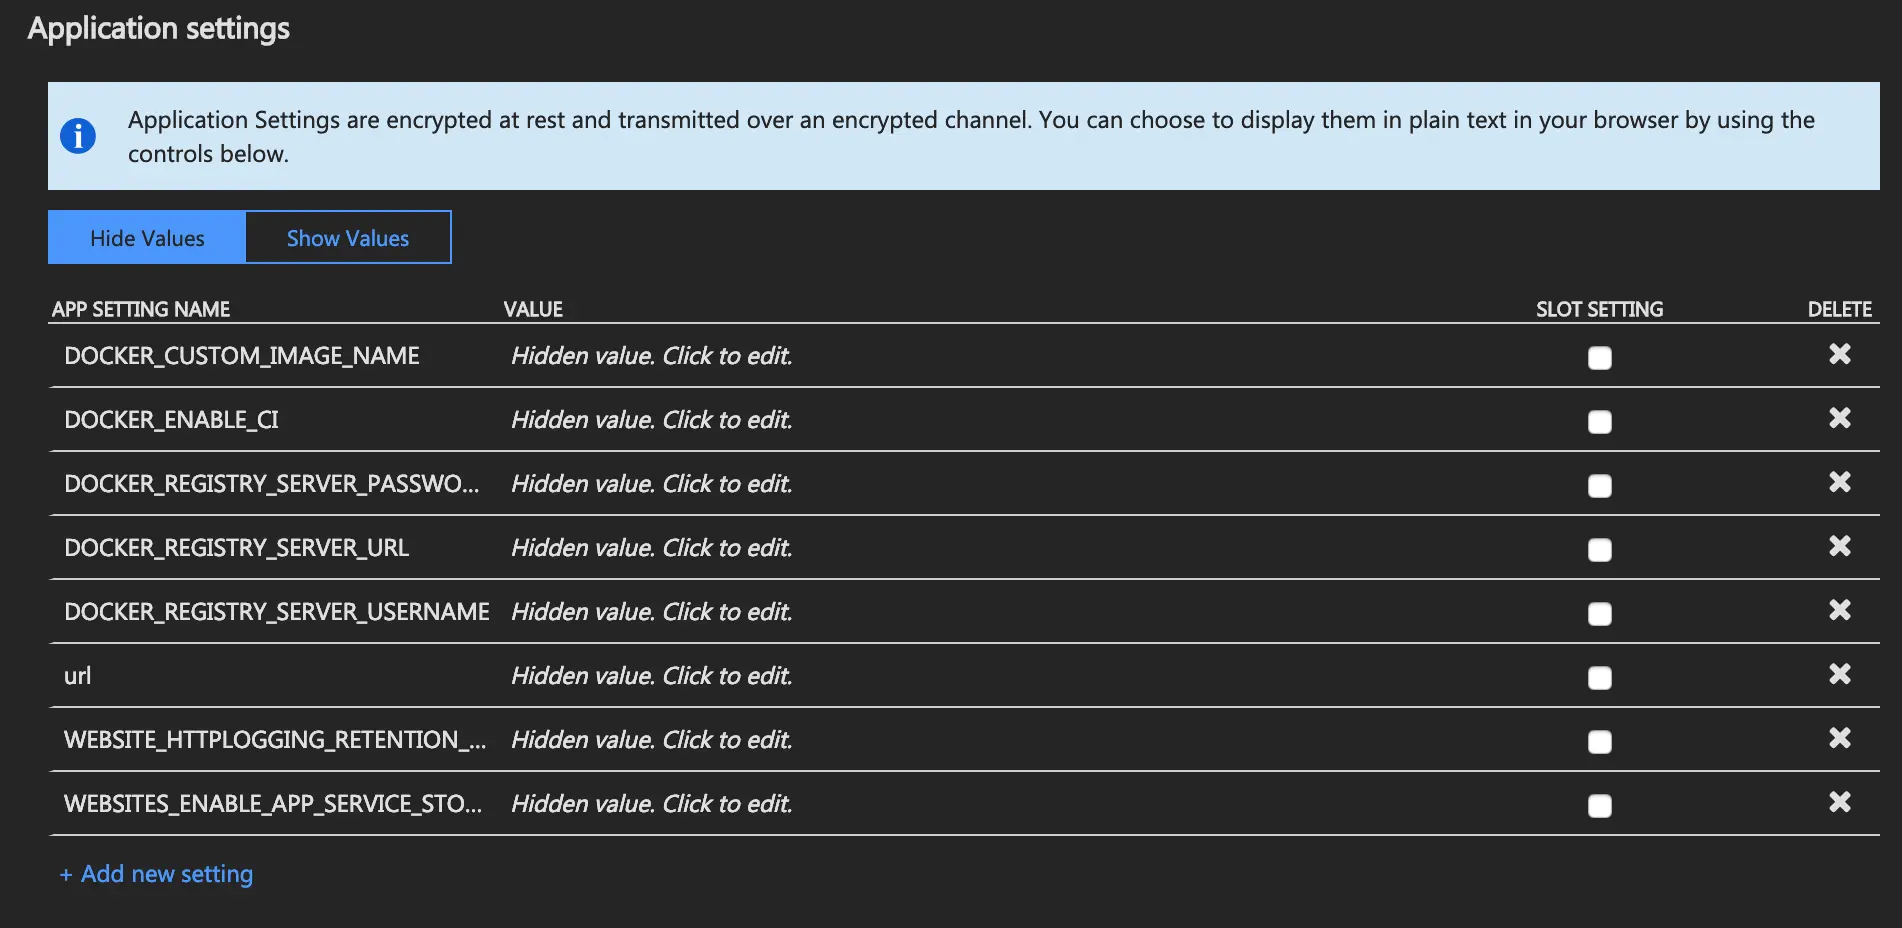
az group create --name <resource-group-name> --location "eastus"az appservice plan create --name <app-service-plan-name> --resource-group <resource-group-name> --sku B1 --is-linuxaz webapp create --resource-group <resource-group-name> --plan <app-service-plan-name> --name <web-app-name> --deployment-container-image-name <docker-ID>/mydockerimage:<docker-tag>az webapp config container set --name <app-name> --resource-group <resource-group-name> --docker-custom-image-name <azure-container-registry-name>.azurecr.io/mydockerimage --docker-registry-server-url https://<azure-container-registry-name>.azurecr.io --docker-registry-server-user <registry-username> --docker-registry-server-password <password>url environment variable: az webapp config appsettings set --resource-group <resource-group-name> --name <app-name> --settings url=<http://url-goes-here> (You can swap out http with https if you have SSL enabled.)az webapp deployment slot create --name <app-name> --resource-group <resource-group-name> --slot <slot-name-here> --configuration-source <app-name> (Note: the --configuration-source flag should clone configurations from the production slot.)az webapp deployment container config --enable-cd true --name <app-name> --resource-group <resource-group-name>You can then verify your app settings in the portal if you want a visual confirmation. In the portal, find the created resource group, find your app service or dev web app and select one of them, and find Application Settings on the left hand side. About half way down the right blade page you should see an Application Settings table with the configured settings.
Once you have your App Service in place, you can setup your DevOps pipeline to automate this setup.
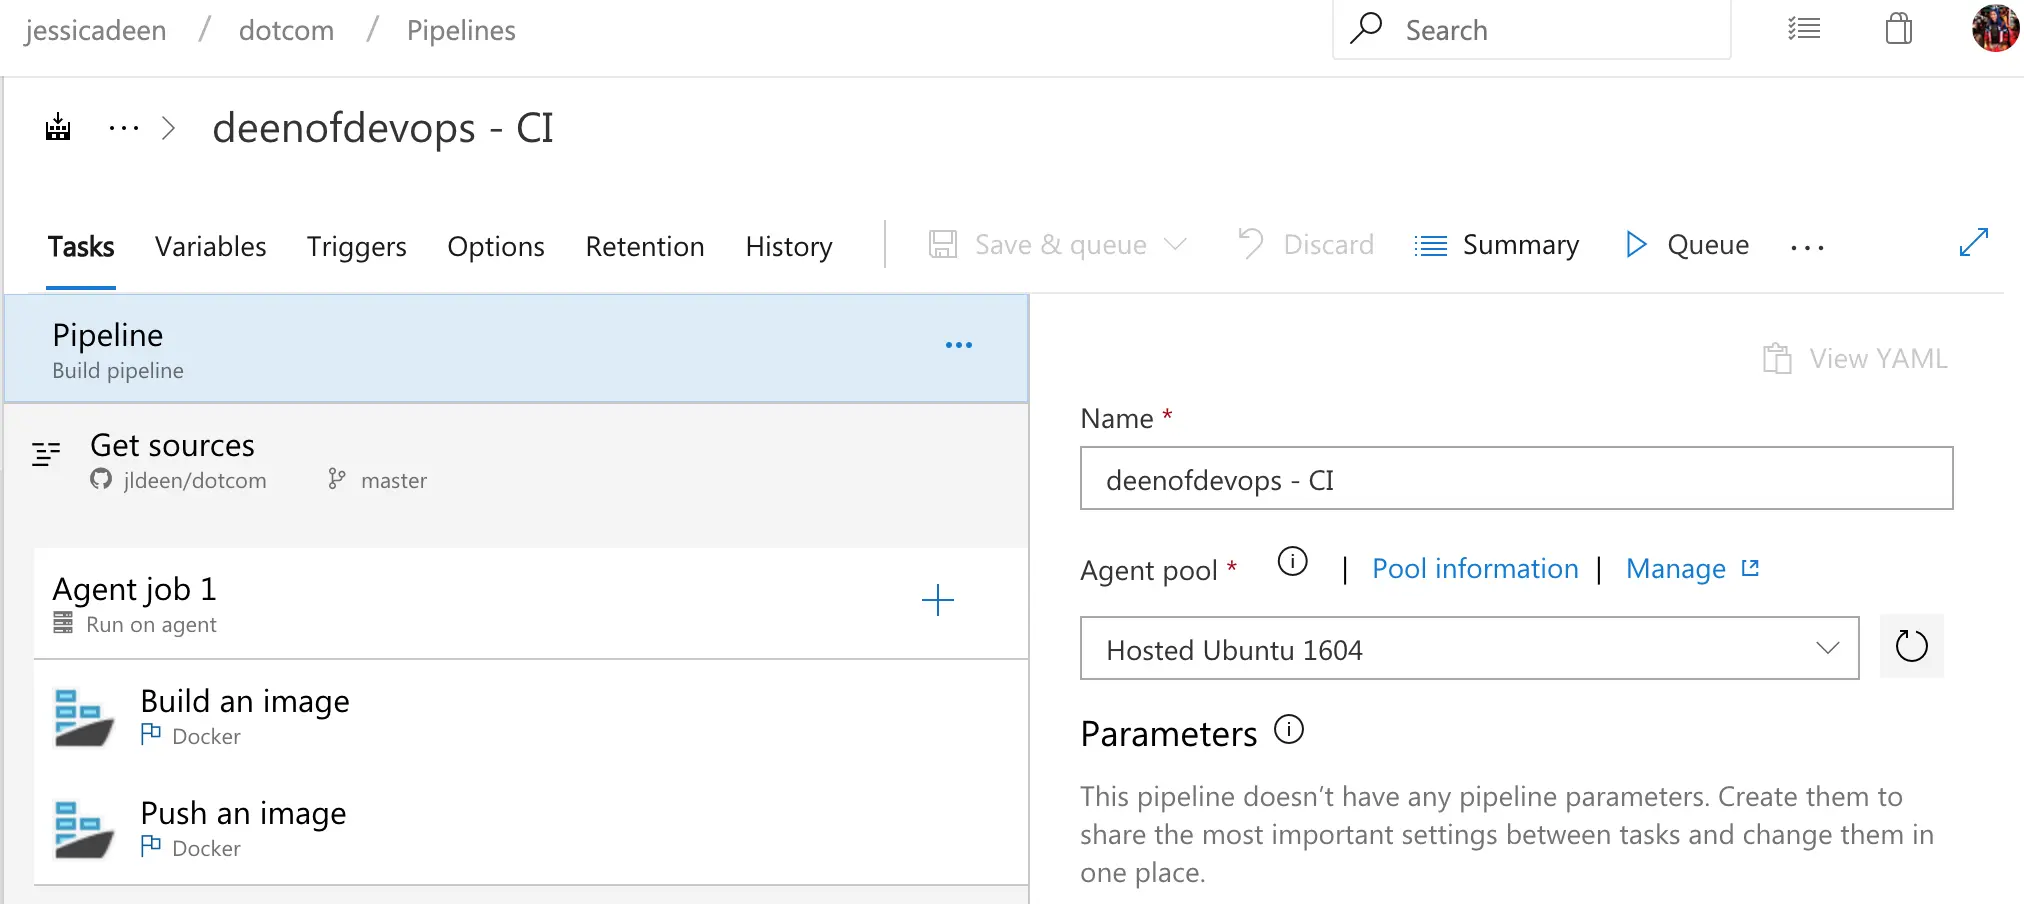
For my CI/CD I’m using Azure Pipelines with 2 simple steps for build: Docker Build and Docker Push. My build step has mode=development or mode=production set for build argument depending on my branch. My push step will push the image to my private registry in Azure, which my release pipeline will then use.
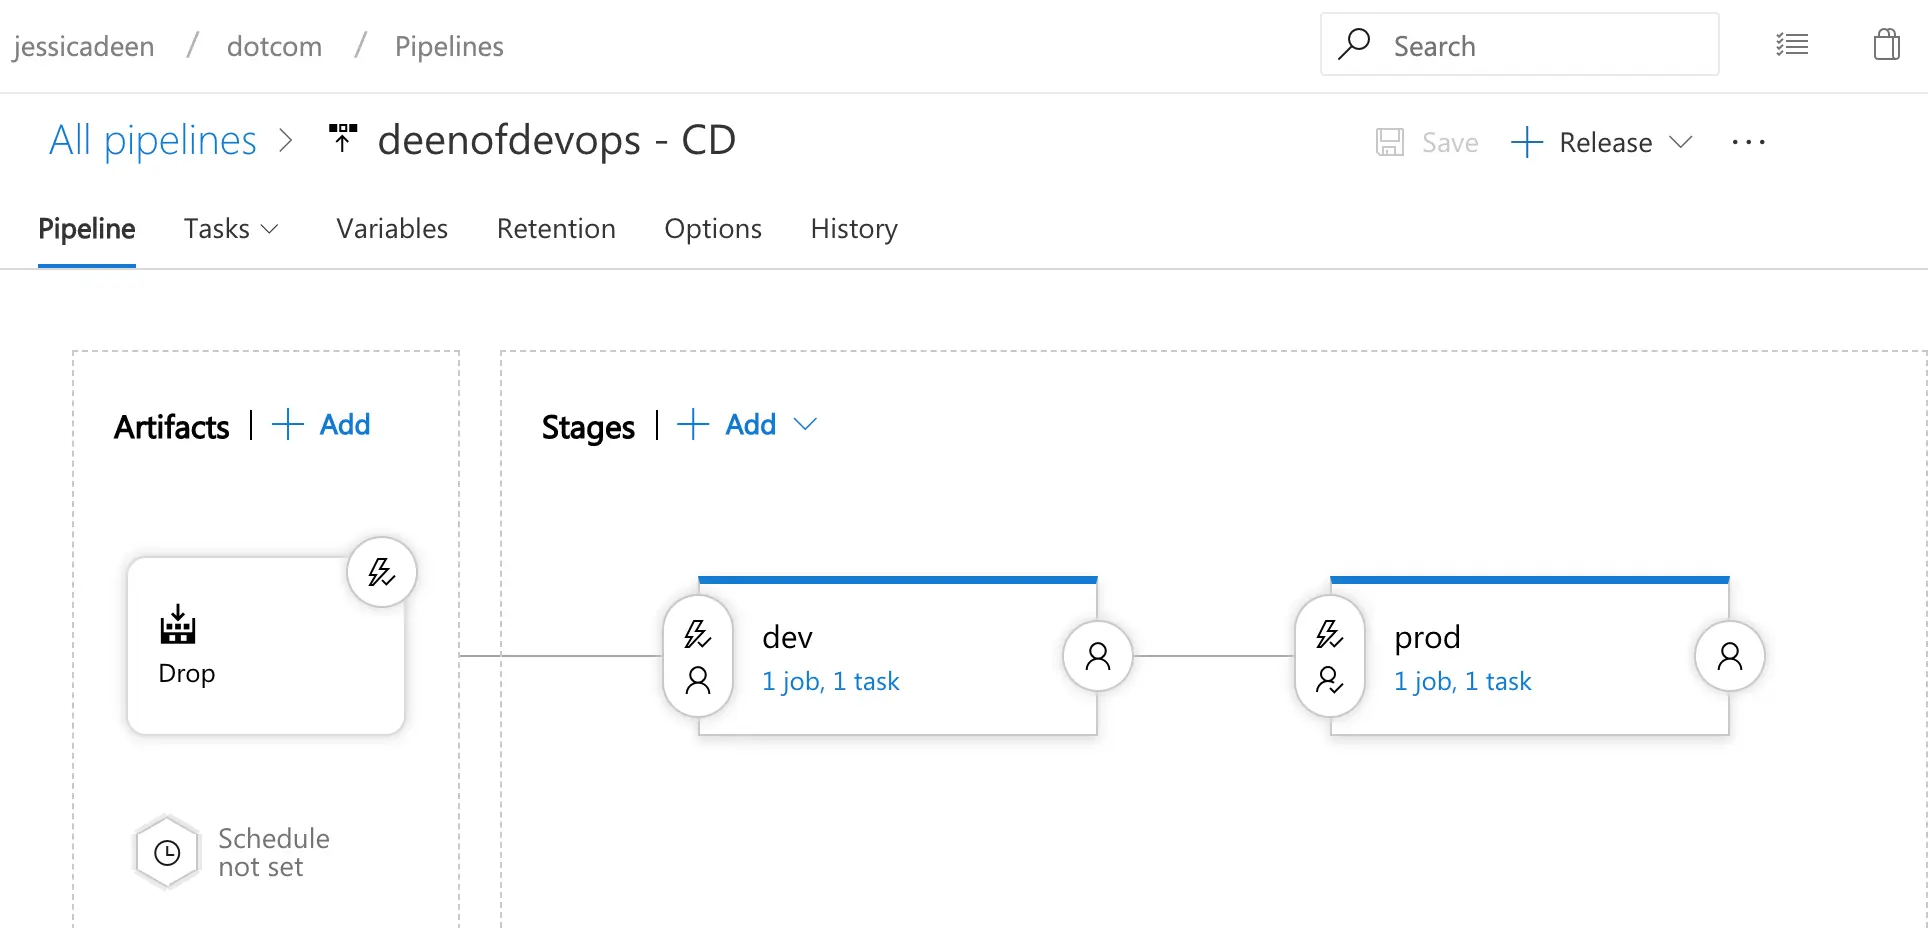
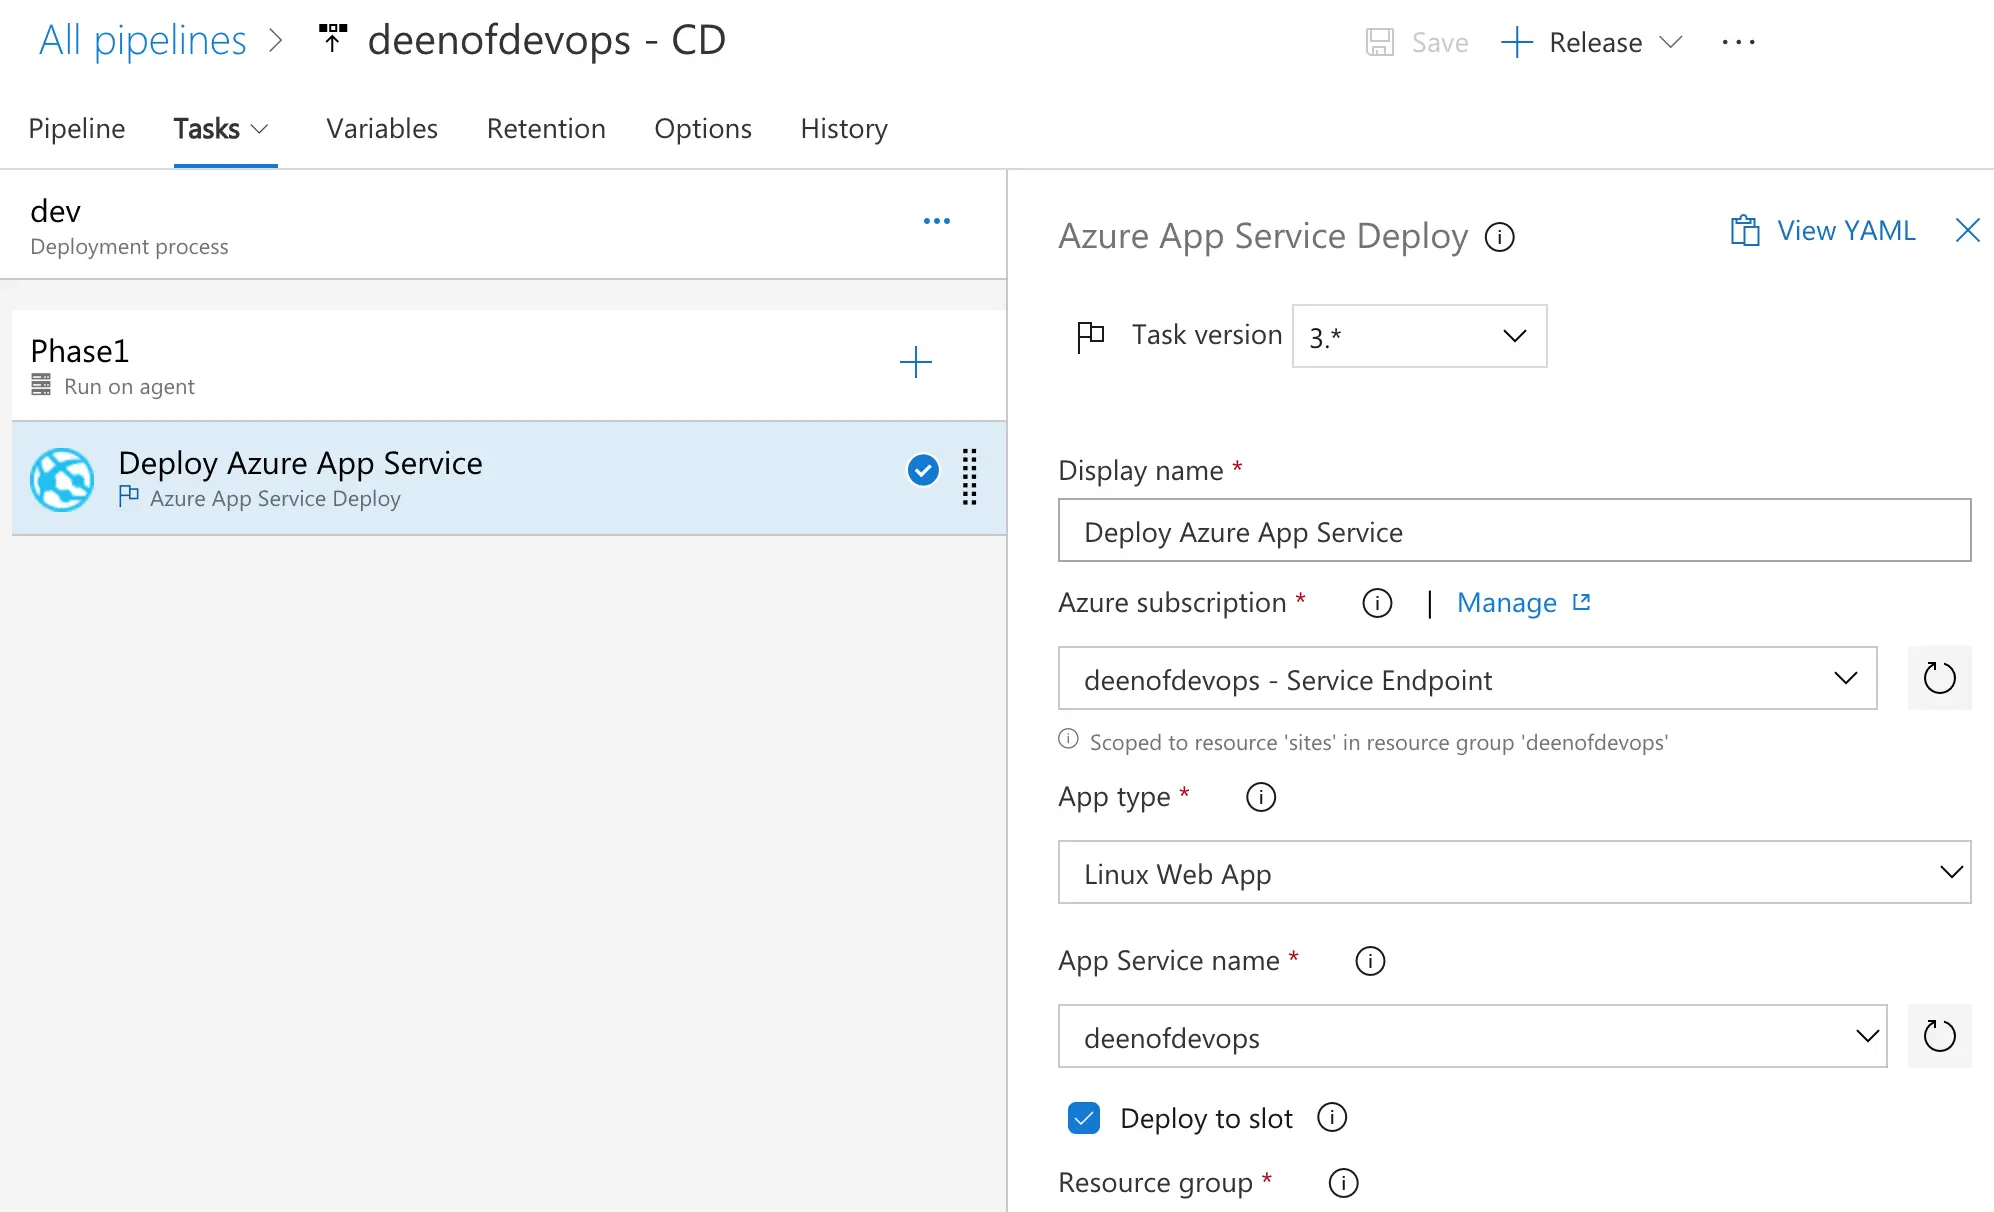
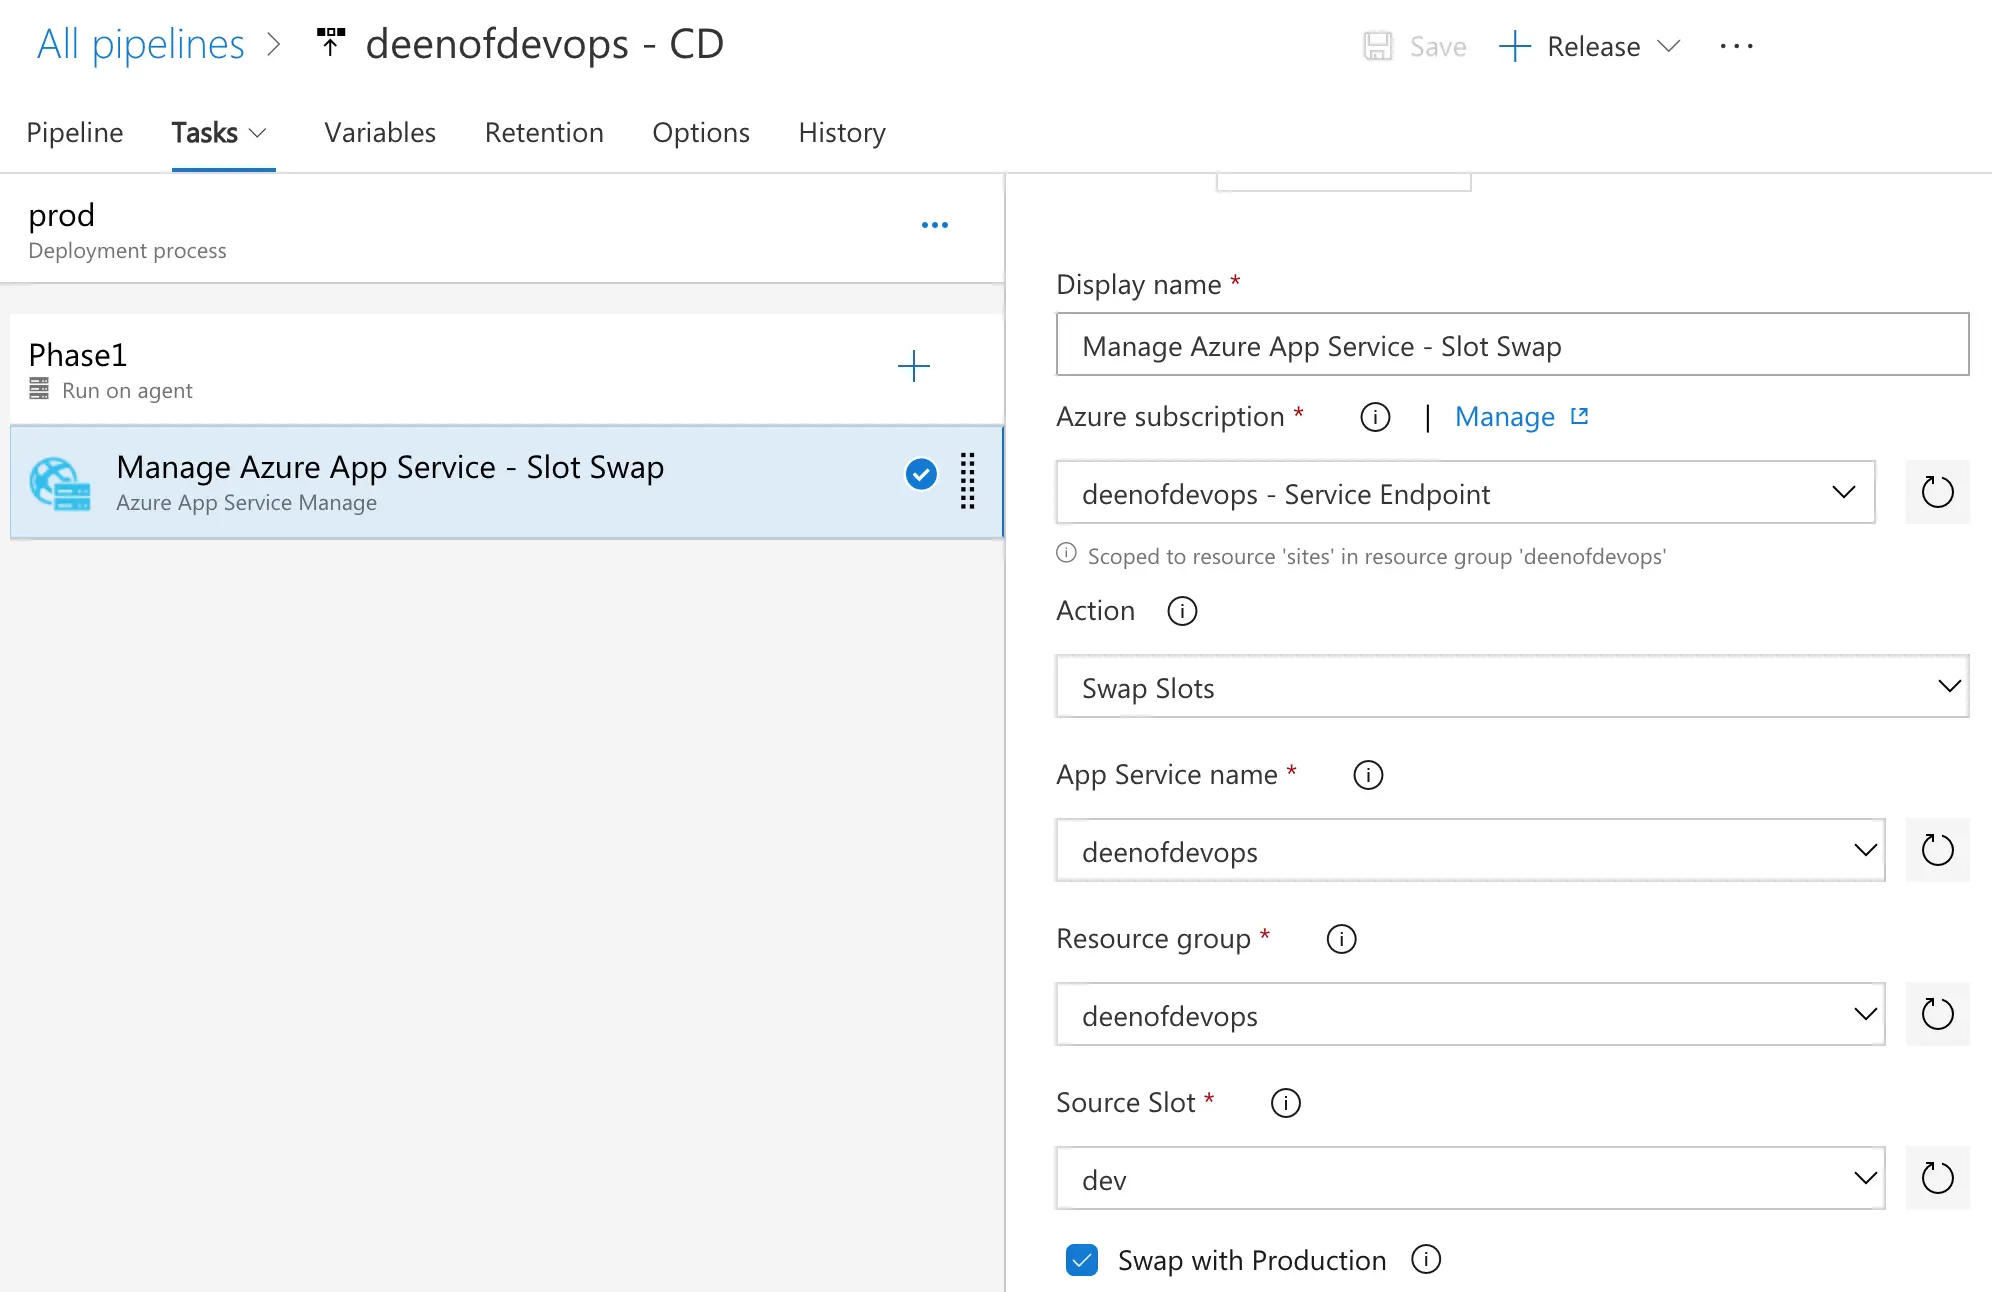
I have two stages for release: dev and prod and each stage has 1 step: Deploy to Azure App Service. My dev stage will deploy to my dev slot in my app service and my prod step does a slot swap where dev is the source and “Swap with Production” is checked.
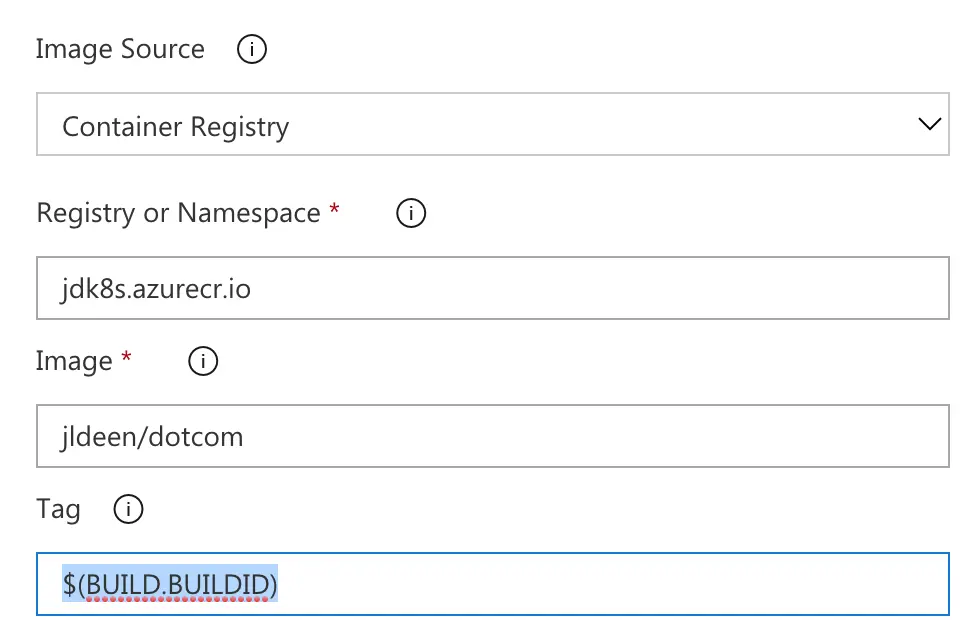
For my image source settings I chose container registry an entered my ACR details. For tag I use $(BUILD.BUILDID) so it will pull the tag pushed during build based on build number.
That’s it - using the above settings, commands, and instructions, you should be able to run Ghost in a Docker container on Azure. In future posts I’ll review how I utilized CloudFlare, Azure Storage and Azure CDN in lieu of Cloudinary.
I recently published a blog post on setting up Twitter Cards in Hugo and shared it on Twitter …
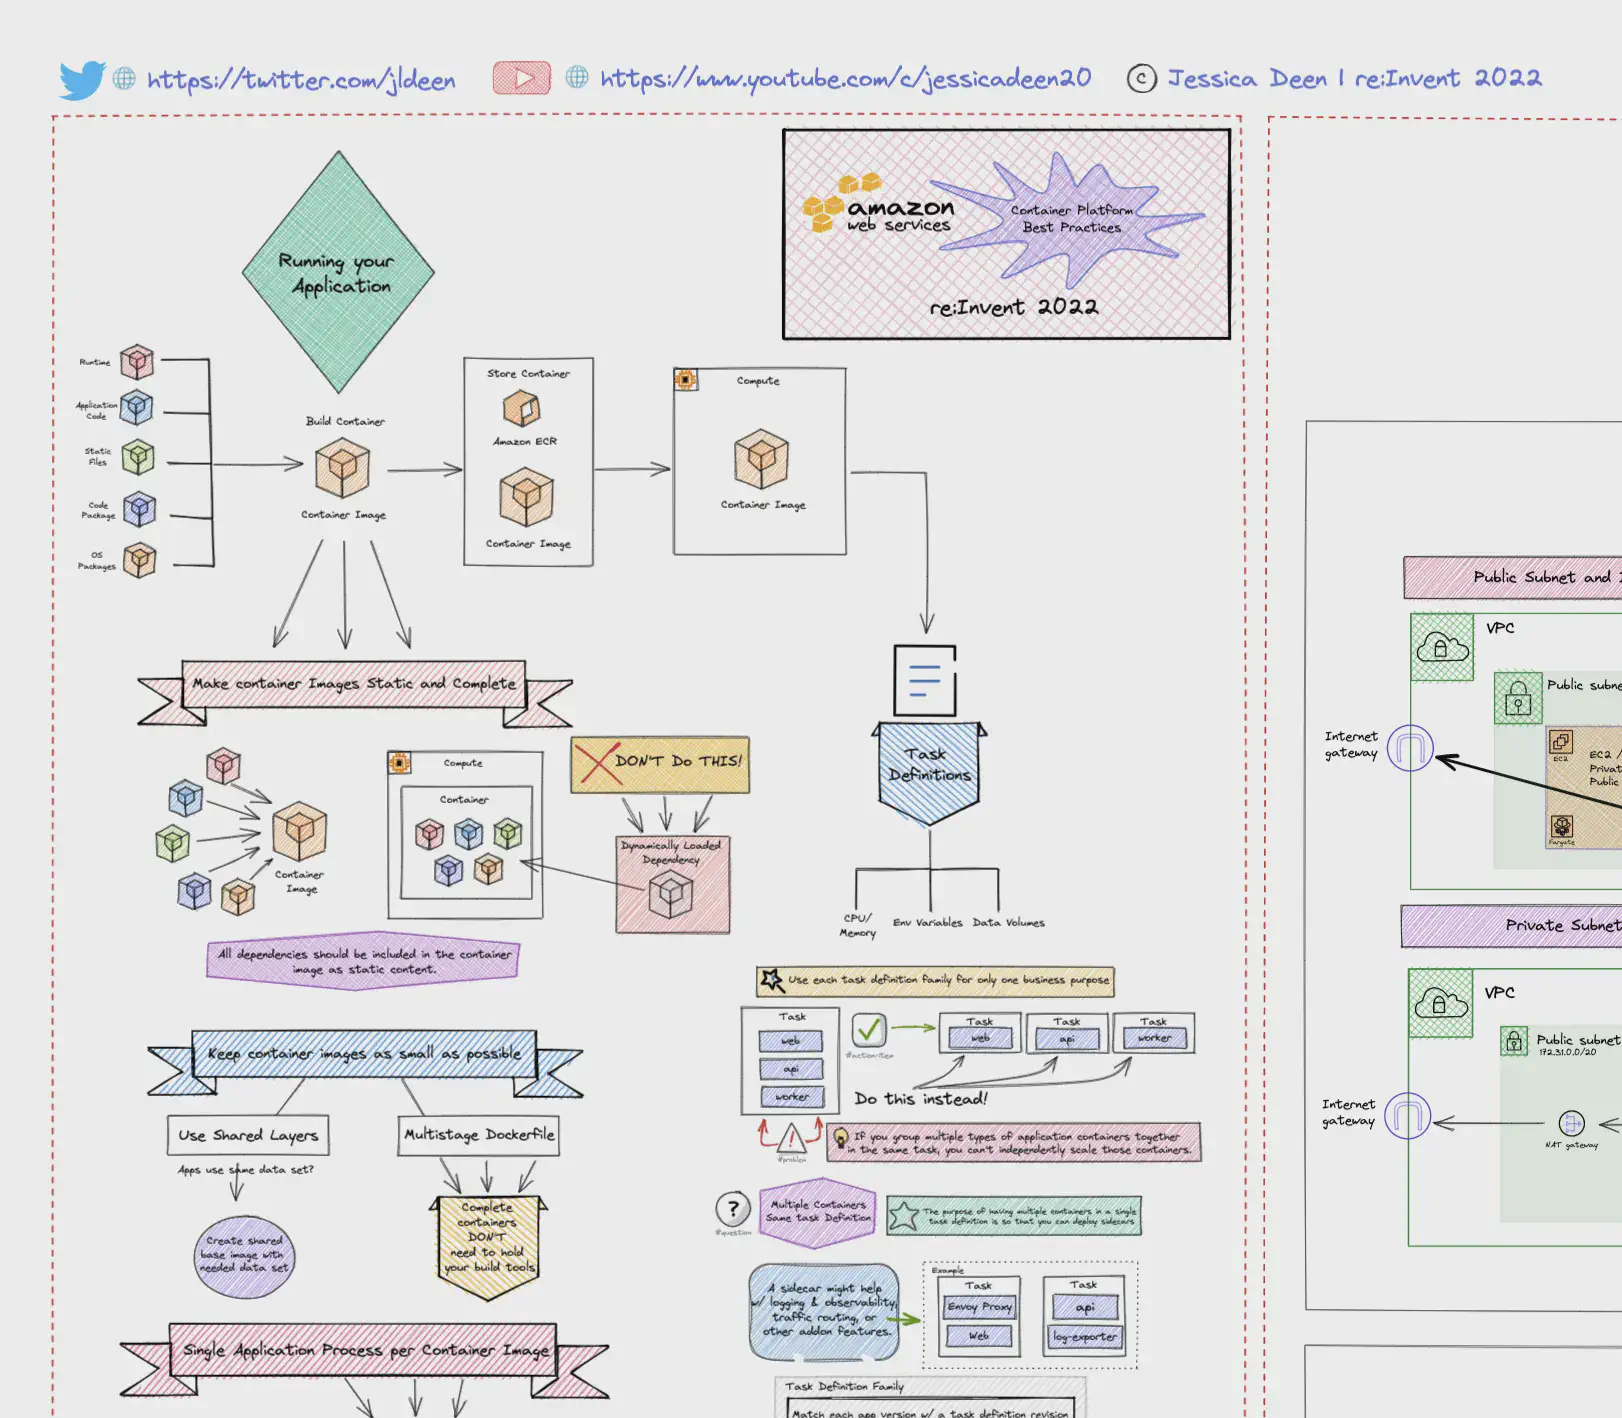
Recap: Best practices for a container management platform In this chalk talk, we learned about …

We’ve all been there. You do everything correct - you set your container to run as non …