
Azure Static Web Apps and the Trailing Slash
I recently published a blog post on setting up Twitter Cards in Hugo and shared it on Twitter …
It’s no secret I love custom terminals and personalized dotfiles. I already have dotfiles for WSL/WSL2, Ubuntu, and macOS so naturally I wanted a custom terminal and tmux access in Azure Cloud Shell. Azure Cloud Shell is an interactive, authenticated, browser-accessible shell for managing Azure resources - and other resources, as you’ll come to see below.
Turns out the whole setup is suprisingly easy and fast. Here’s what I did:
To start, I discovered Cloud Shell just runs on top of Ubuntu 16.04.

This means I can simply use the same dotfiles config/bootstrap script I use for wsl and standard ubuntu by running the following command in my existing (or new) cloud shell environment:
bash -c "$(curl -fsSL https://raw.githubusercontent.com/jldeen/dotfiles/wsl/configure.sh)"
If you’re familiar with my dotfiles already, you know how to run through the oh-my-zsh prompts and the option to use my custom dotfiles. If you’re not, check out this blog post.
Note: One thing I will point out here: you will not be able to change the default shell to zsh from my install script since you don’t have sudo/root access in cloud shell, and you don’t know the user password (you also can’t set it with passwd, I tried). Just hit n for no when prompted to change the default shell, we’ll deal with that later.
Once the script completes, which will take less than 60 seconds, we have to do a few tweaks to accomodate an environment that doesn’t support elevated permissions.
In order to truly get my standard dotfiles for Ubuntu (and WSL/WSL2) working in cloud shell (assuming you want to use mine, or build off them to create your own), we have to do a few tweaks/modifications.
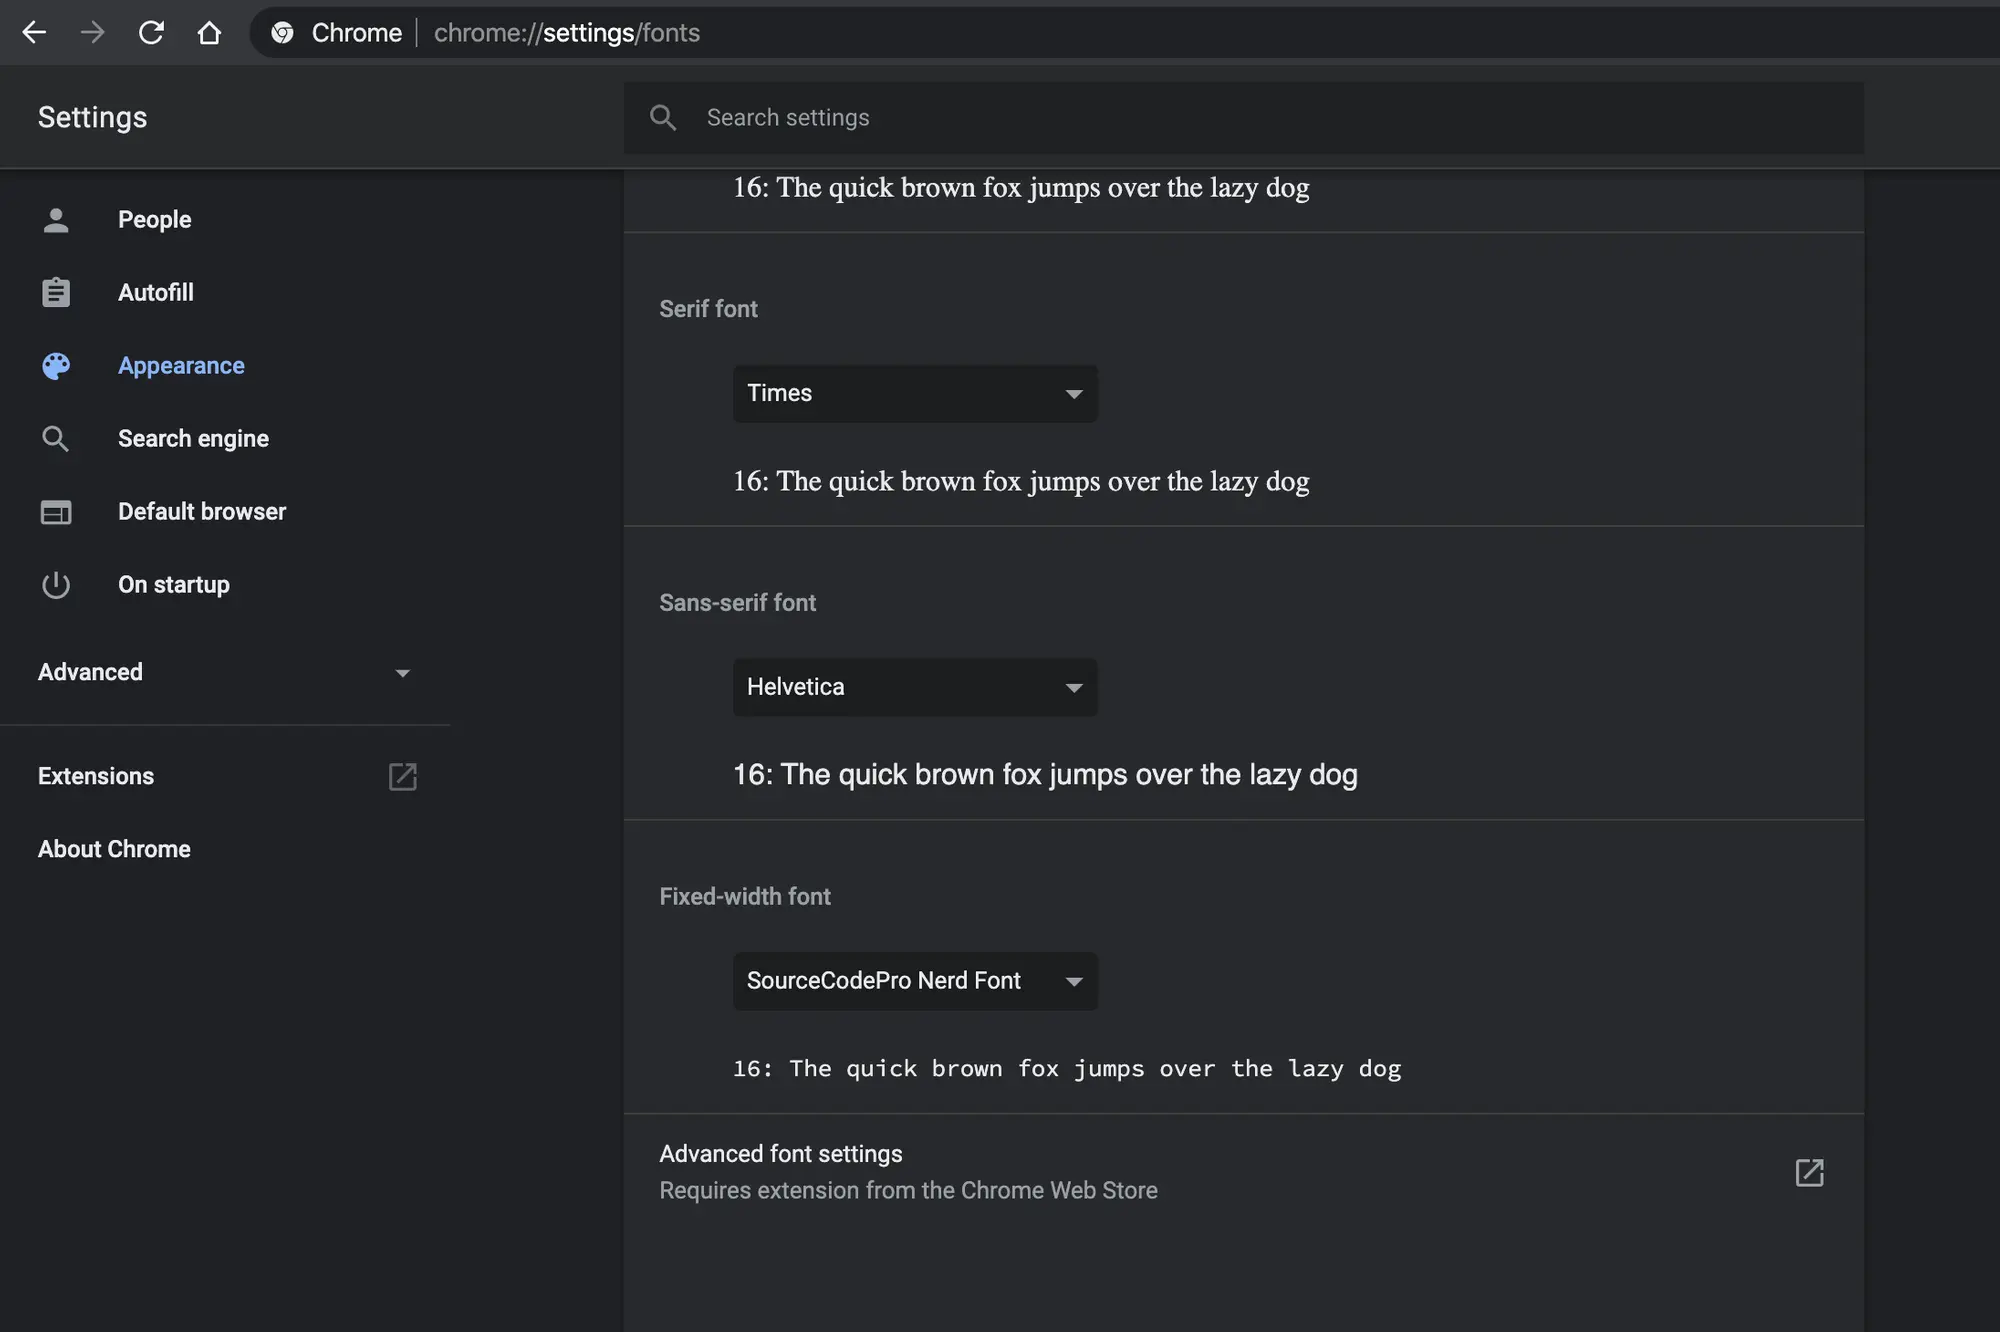
First, we have to install a powerline font and then select it in our browser since my dotfiles use Powerlevel9k and Powerlevel10k config stylization. If you’re using Chrome, navigate to chrome://settings/fonts and change Fixed-width font to the powerline font of your choice. I use SourceCodePro Nerd Font.
Second, we need to fix the text colors for visibility with the black background of Azure Cloud Shell. I’m just going to make the text white so we can read our directory and kubecontext info more clearly. We can do that with 2 simple lines of code:
Run code .p9kgt to open the PowerLevel9k customizations file and comment out line 31. Then add the below text immediately beneath line 31:
# Cloud Shell Colors
POWERLEVEL9K_DIR_FOREGROUND='FFF'
POWERLEVEL9K_KUBECONTEXT_FOREGROUND='FFF'
Save the file and resource your zshrc file using . ~/.zshrc.
Second, I use colorls for my ls commands. Colorls is installed via ruby typically using the gem install colorls command - only, the version of ruby we have access to in cloud shell is a little outdated (v2.3.0) so instead, we need to specify a version by running the following:
gem install colorls -v 1.2.0
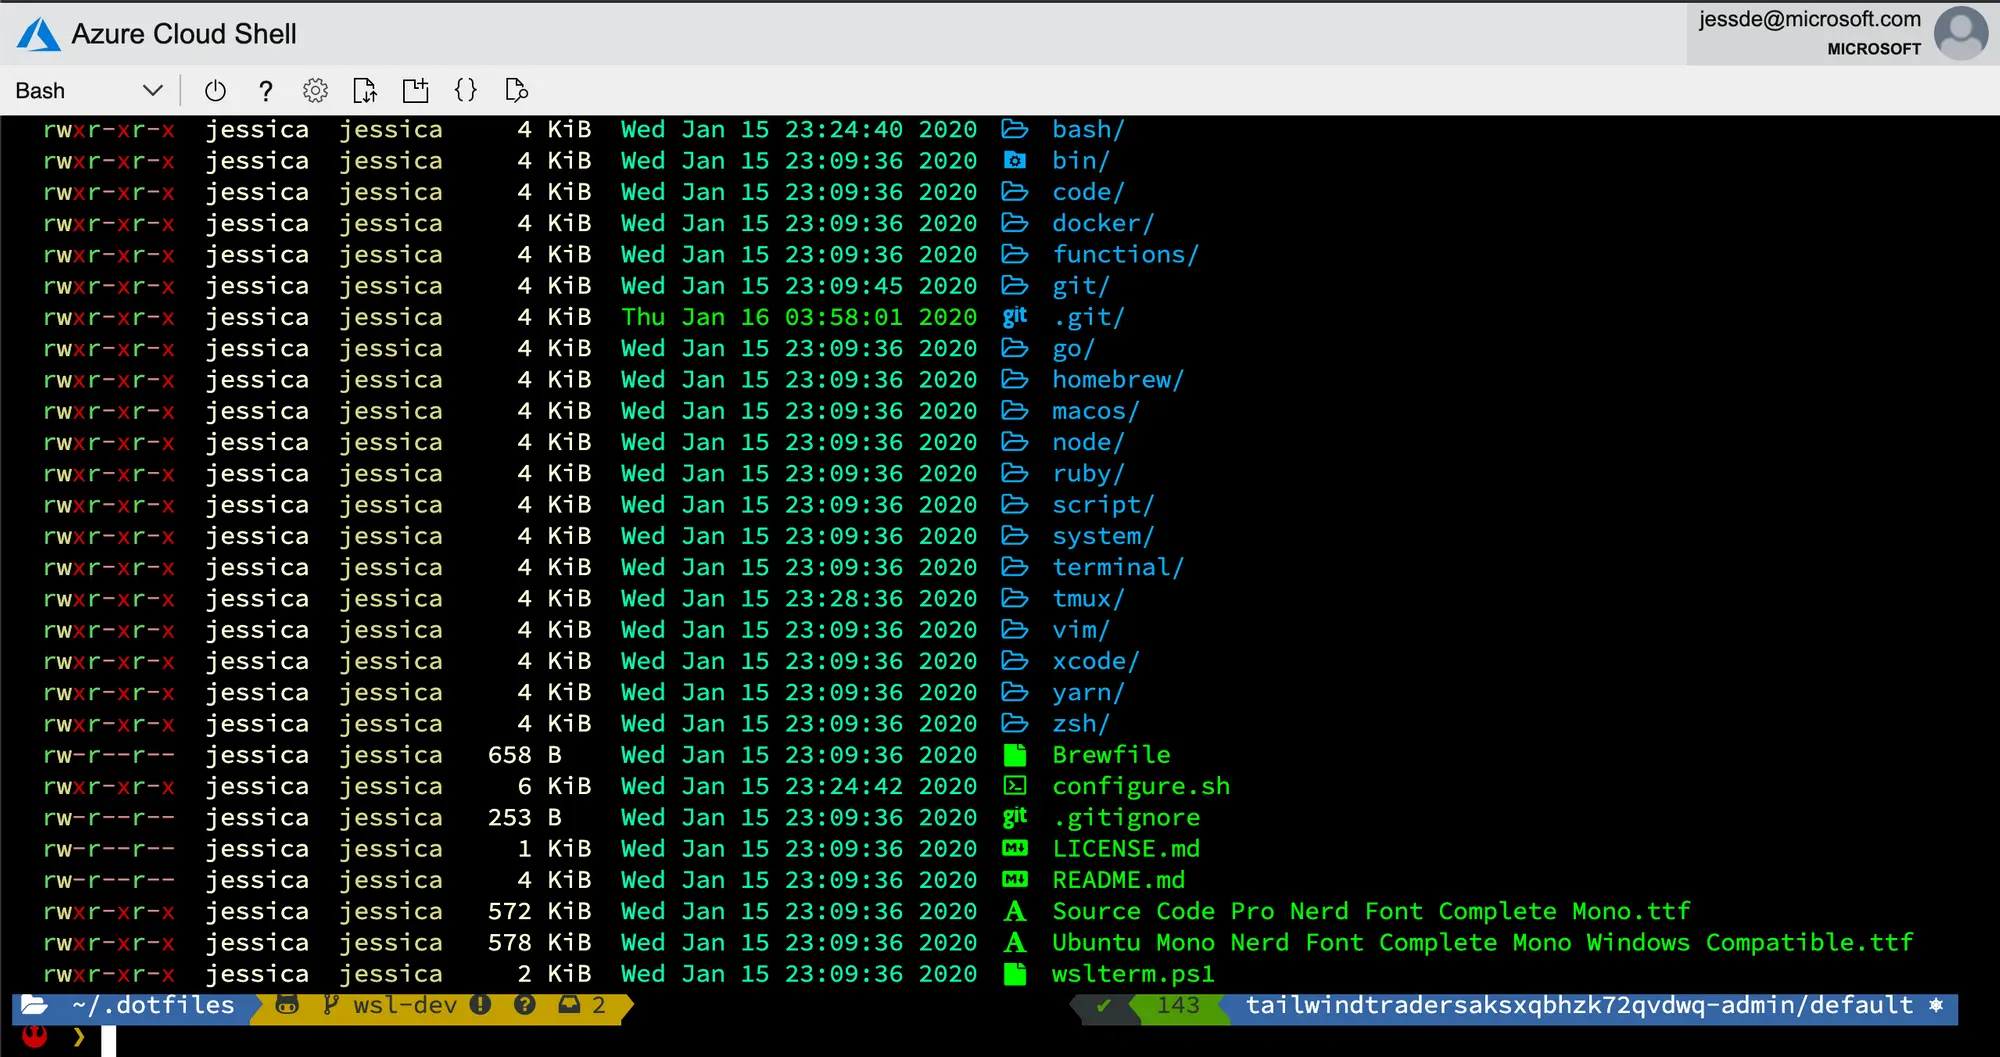
Now when you run ls, you’ll see pretty folder and file icons instead of boring simple text.
This is cool, but I noticed after my first run of the above command, the install of the colorls gem was not persistent in the cloud shell environment . This meant I would get an error telling me colorls couldn’t be found on any brand new cloud shell sessions. I made the following work around by adding the below text to the top of the .bashrc file (use code ~/.bashrc to open your cloud shell editor:
echo 'Loading custom ZSH badass environment...'
gem install colorls -v 1.2.0 > /dev/null && bash -c zsh
echo ''
You’ll notice the above code snippet also tells bash to immediately go into zsh - this is a perfect little work around for the change shell problem mentioned earlier. Since we can’t run chsh -s /usr/bin/zsh in cloud shell due to our inability to elevate permissions, we can tell bash to invoke zsh directly.
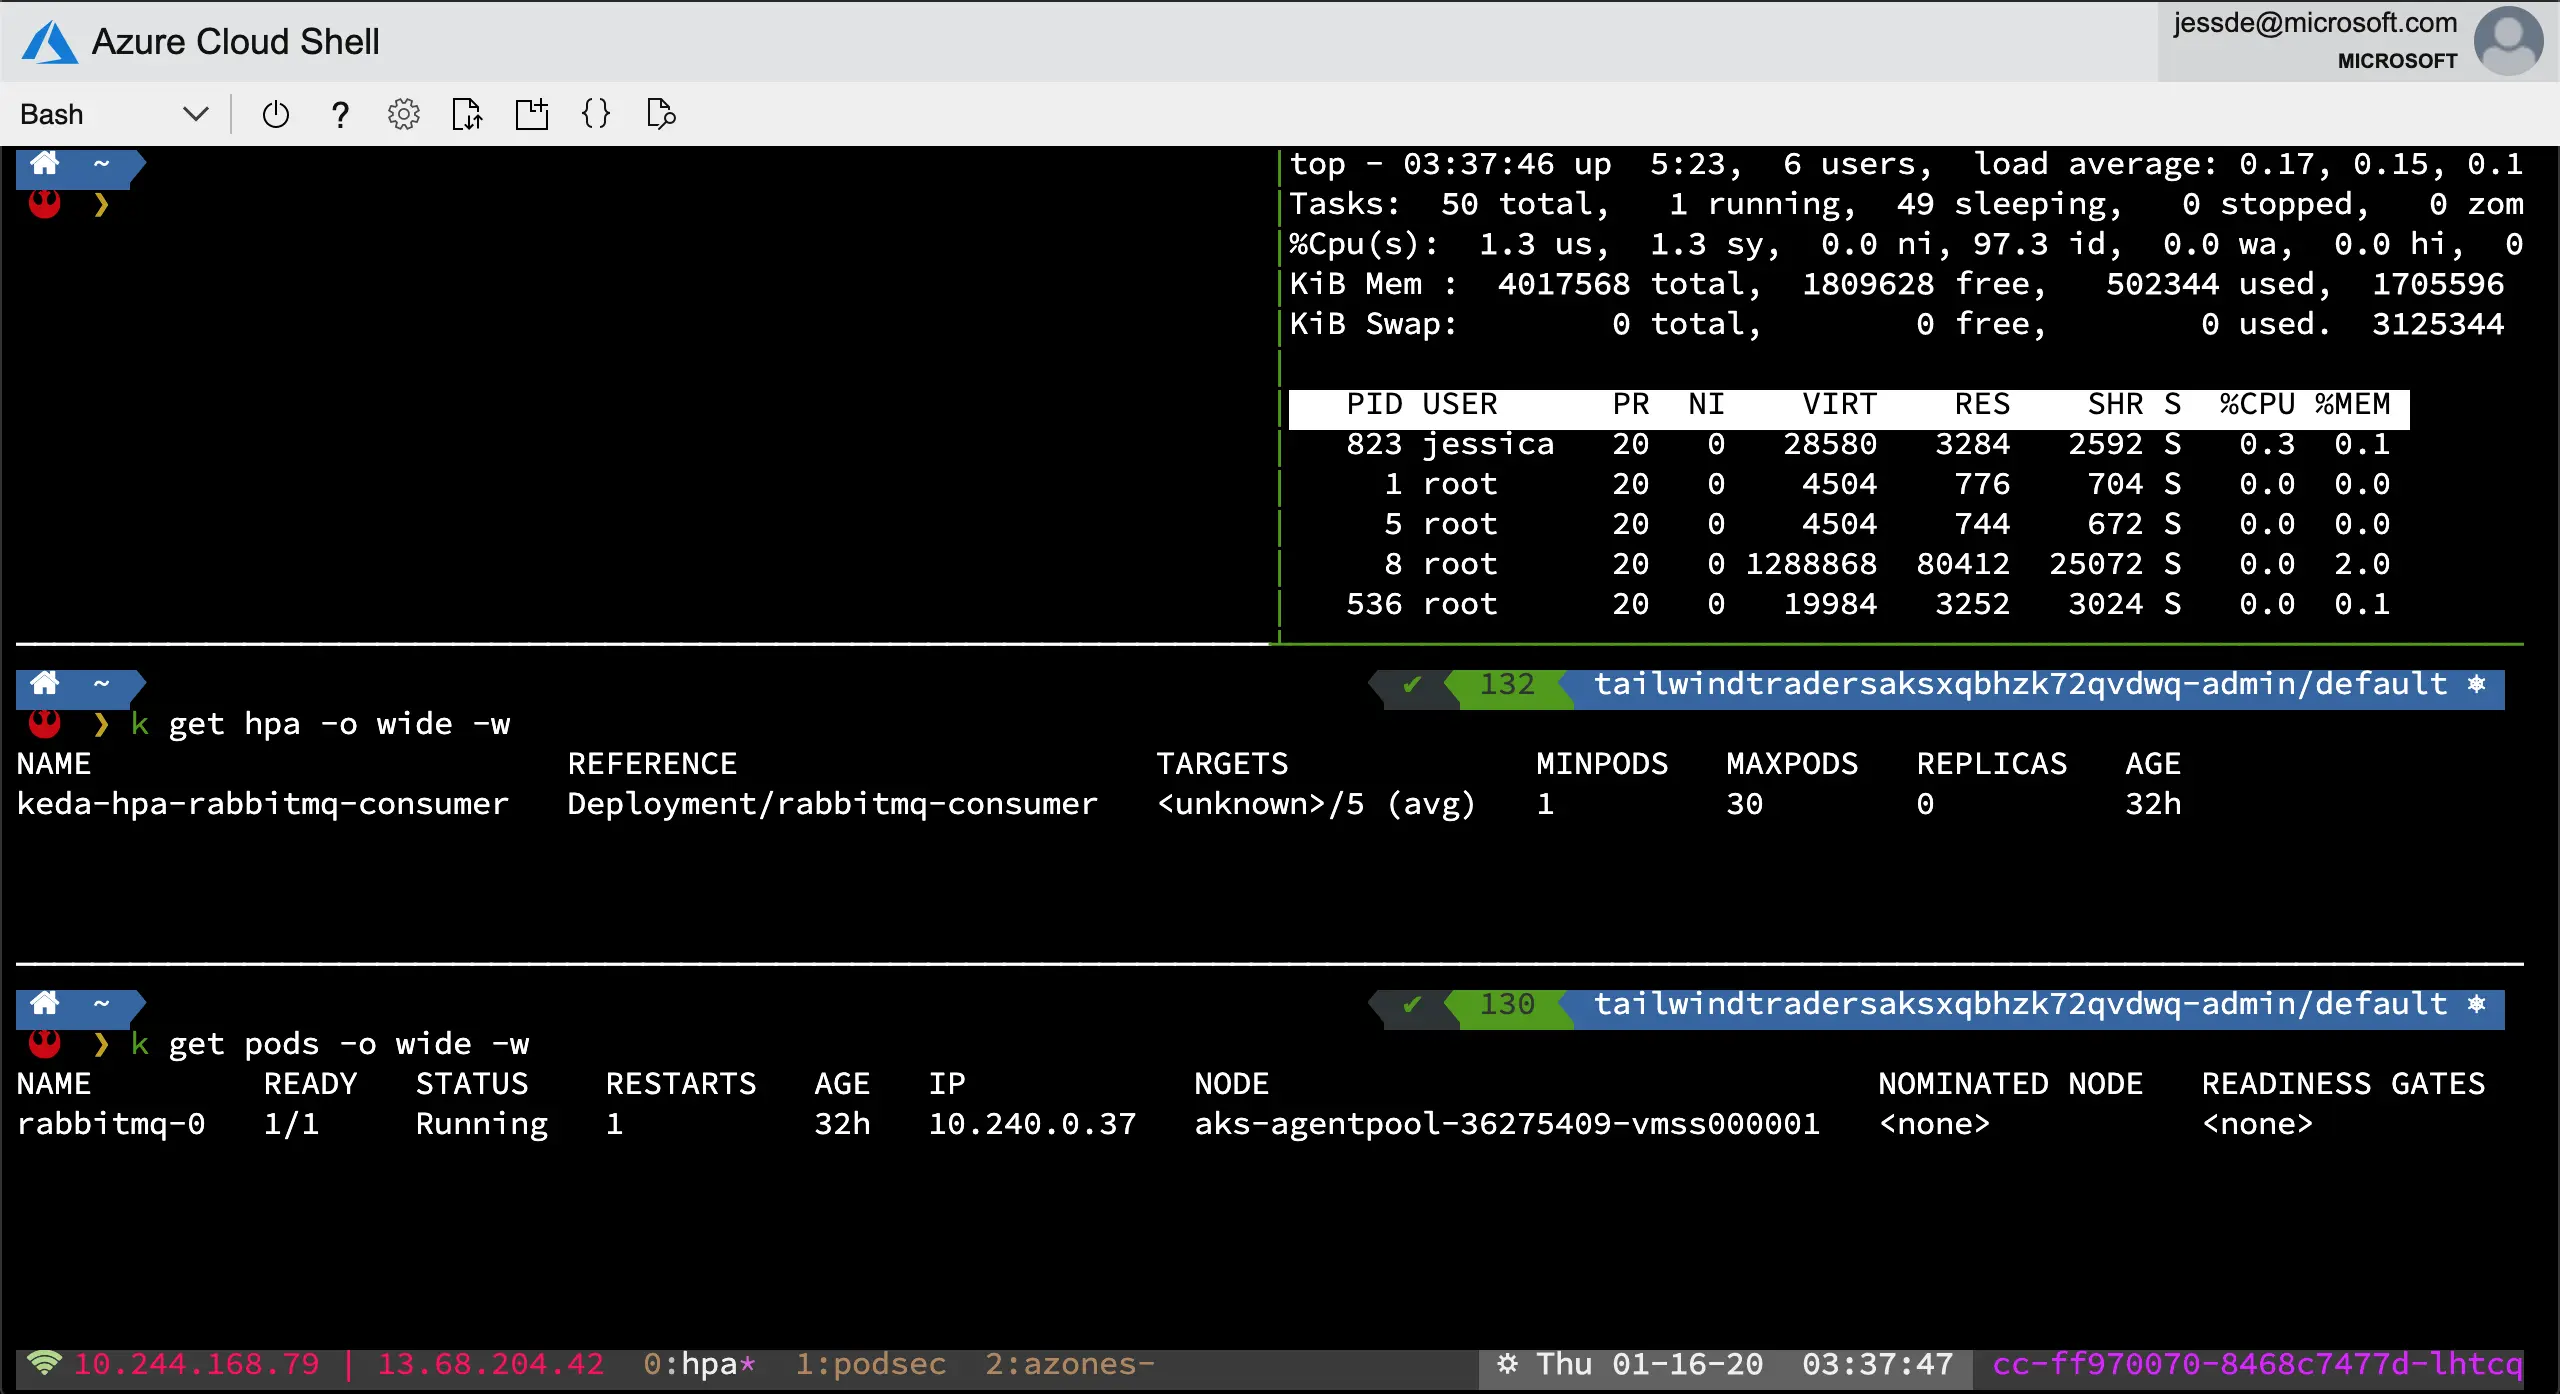
Save the file and restart cloud shell - you should now see a loading screen like this:

You can always remove the echo 'Loading custom...' if it’s not your style, especially since you will see it on every session/window if you use tmux. Personally though, I dig it.
One last thing we need to do is edit our tmux.conf. Tmux in cloud shell is old - it’s v2.1, which saddens me, but we can deal with it. My config file is setup to support v3.0+ versions of tmux so we have to change line 54 of our .tmux.conf file. To do that, let’s load it in our editor (code ~/.tmux.conf) and then make the following change:
# old line
54 bind \\ split-window -h -c '#{pane_current_path}' # vertical pane

# new line
54 bind \ split-window -h -c '#{pane_current_path}' # vertical pane
Save the file and start a tmux session by typing tmux.
If using my dotfiles, my tmux prefix is ctl+a so you might find the following helpful:
prefix + x kill the current pane
prefix + k kill the current window
prefix + K kill the current server
prefix + c will open a new window
prefix + , will rename the current session
prefix + - split screen horizontally
prefix + \ split screen vertically
prefix + R reload tmux config
prefix + I Install tpm plugins
prefix + u uninstall tpm plugins
Copy and Paste within a tmux session works only with the tmux buffer at this time because neither xclip or xsel are installed in cloud shell. I also normally use tmux-yank, a standard tmux plugin, but the dependencies for the plugin include xclip/xsel so that’s a bummer. You can copy/paste just fine when outside of a tmux session.
In the meantime, here are my commands for copy/paste to tmux buffer.
prefix + [ enter copy mode
    once in copy mode, use vi bindings:
    v - enter visual mode to select desired text
    y - yank desired text
prefix + P paste copied text
Note: you can also use the mouse to drag and copy desired text then standard prefix + P to paste it.
You will need to uncomment lines 24-26 in ~/.tmux.conf for this to work:
23 ### --- tmux 2.1 or azure cloud shell
24 # bind-key -t vi-copy 'v' begin-selection
25 # bind-key -t vi-copy 'y' copy-selection
26 # bind-key -t vi-copy 'r' rectangle-toggle
27 ### --- end tmux 2.1 or azure cloud shell
And comment lines 29 and 30:
29 bind-key -T copy-mode-vi 'v' send-keys -X begin-selection
30 bind-key -T copy-mode-vi 'y' send-keys -X copy-selection
One thing I found really neat in all this is you can use this customized cloud shell in VS Code.
Simply ensure you have the Azure Account extension installed and then open your command pallette (cmd + shift + p on macOS; ctl + shift + p on Windows). Type: Azure:Open Bash in Cloud Shell and hit enter. You will be prompted to login if you aren’t already. Once you login, you’ll now have access to your freshly minted cloud shell environment.

One last question I had is if I could blow my cloud shell environment away (or even just detach from it like I would a tmux session) in the event I wanted to start fresh. Yes! You can. This Microsoft Docs page has some helpful details, but I figured I’d include the 2 commands here:
To unmount current clouddrive: clouddrive unmount
To mount existing clouddrive: clouddrive mount
I recently published a blog post on setting up Twitter Cards in Hugo and shared it on Twitter …

All code featured in this blog post can be found here on GitHub. Problem Have you ever wanted …

We’ve all been there. You do everything correct - you set your container to run as non …