
Things to consider when running visual tests in CI/CD pipelines: Container Pipeline Edition (Part 3)
If you haven’t at least read the first post in this series, I recommend checking it out …
I cannot even express how excited I am for this post. As most of you know, I blog/speak pretty extensively about all things Linux and Open Source, however, today, I get to do that and also tie in some Visual Studio Team Services (VSTS). One of the questions I have been frequently asked is, “How do I deploy to Kuberentes (K8s) via VSTS if I also want to use Helm?” Previously, I didn’t have an answer I could or would stand behind, but today I do.
First, some points to clarify:
Now, let’s get started… some assumptions:
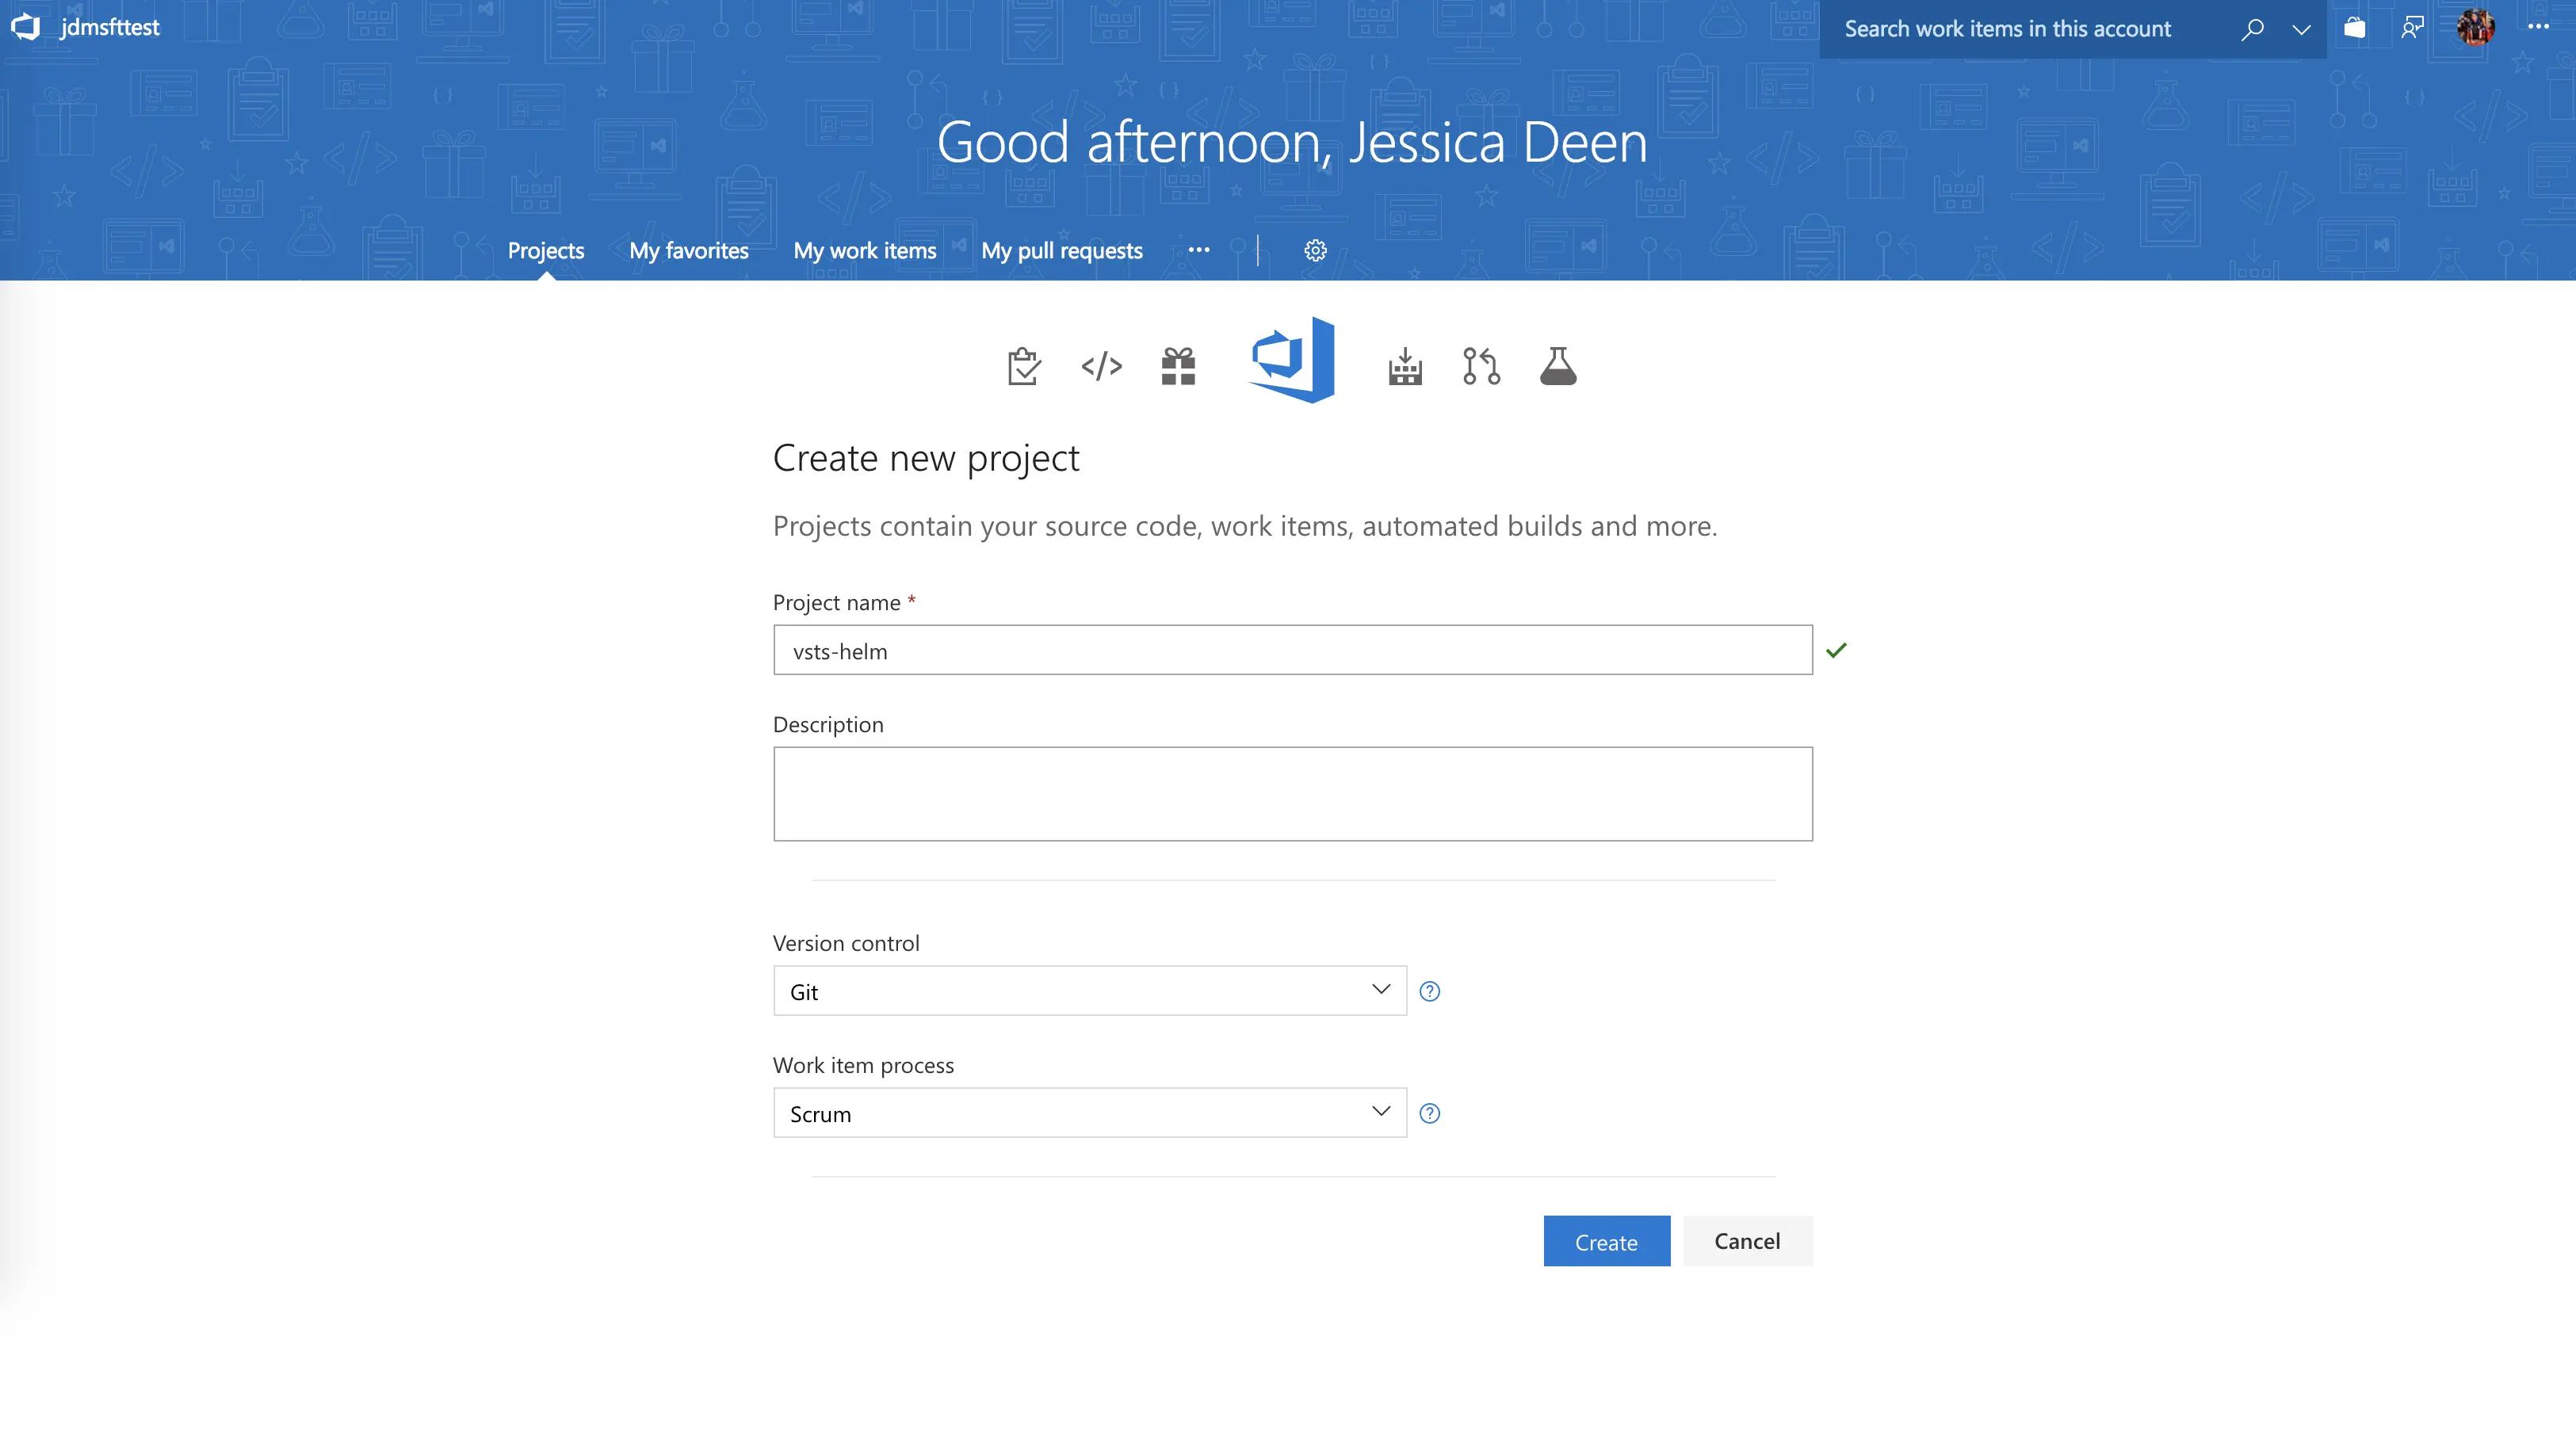
From within your VSTS account, you will need to create a new project for your deployment.
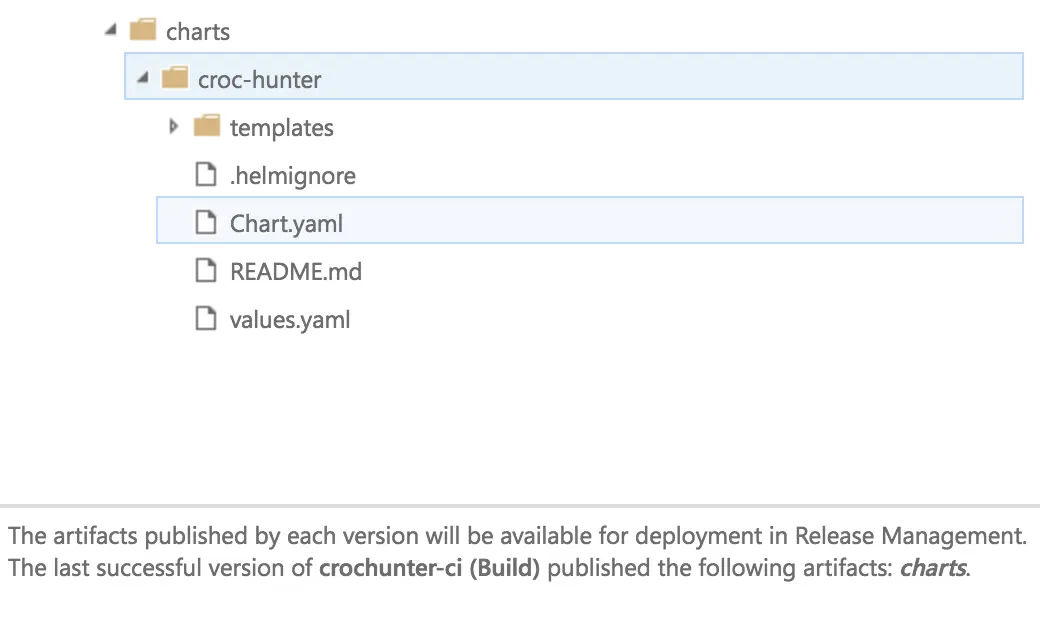
Next, you’re going to need to grab some code. If you want to play along with this post, I have a helm chart demo on my GitHub you can use here. It’s the same repo I use with other CI/CD tools. I chose to import rather than use my existing public repo since VSTS gives me unlimited private repos for free.

Now that I have my code imported, I’m going to setup my build.
Build – Continuous Integration

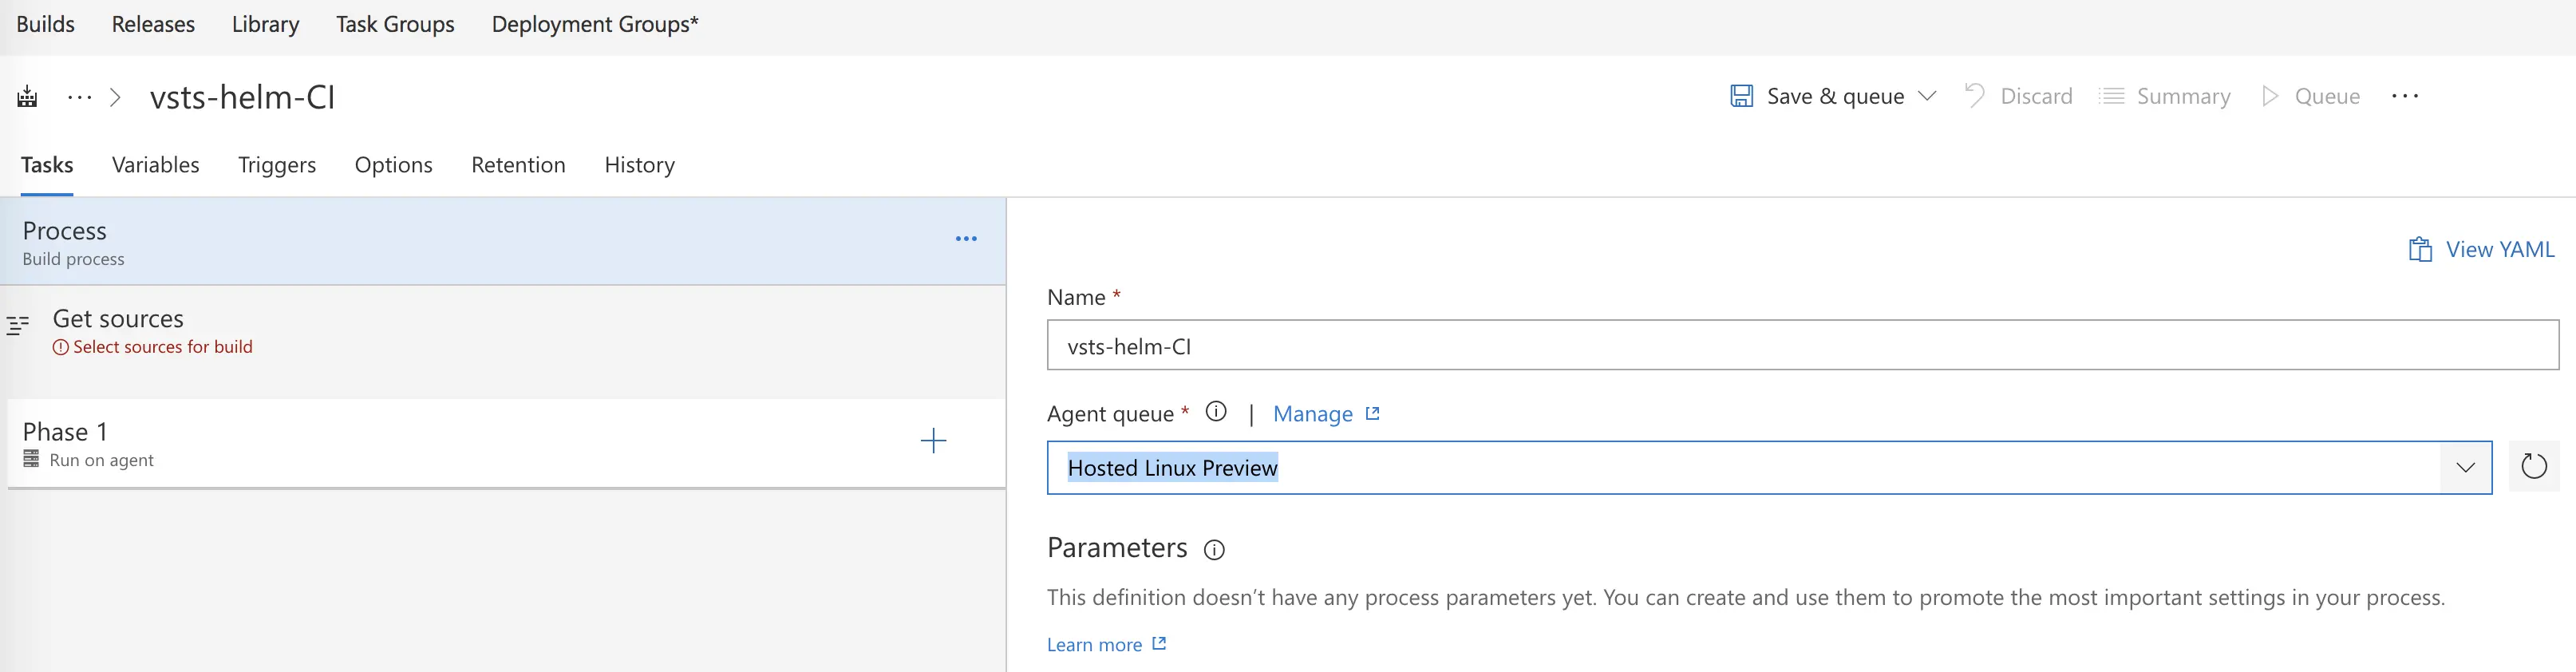
I will opt to start with an empty process.

And the first thing I will do is update my Agent Queue to use the Hosted Linux Preview agent. All the hosted agents available under Agent Queue are machines hosted for you by VSTS in Azure and they are ready for you to use.
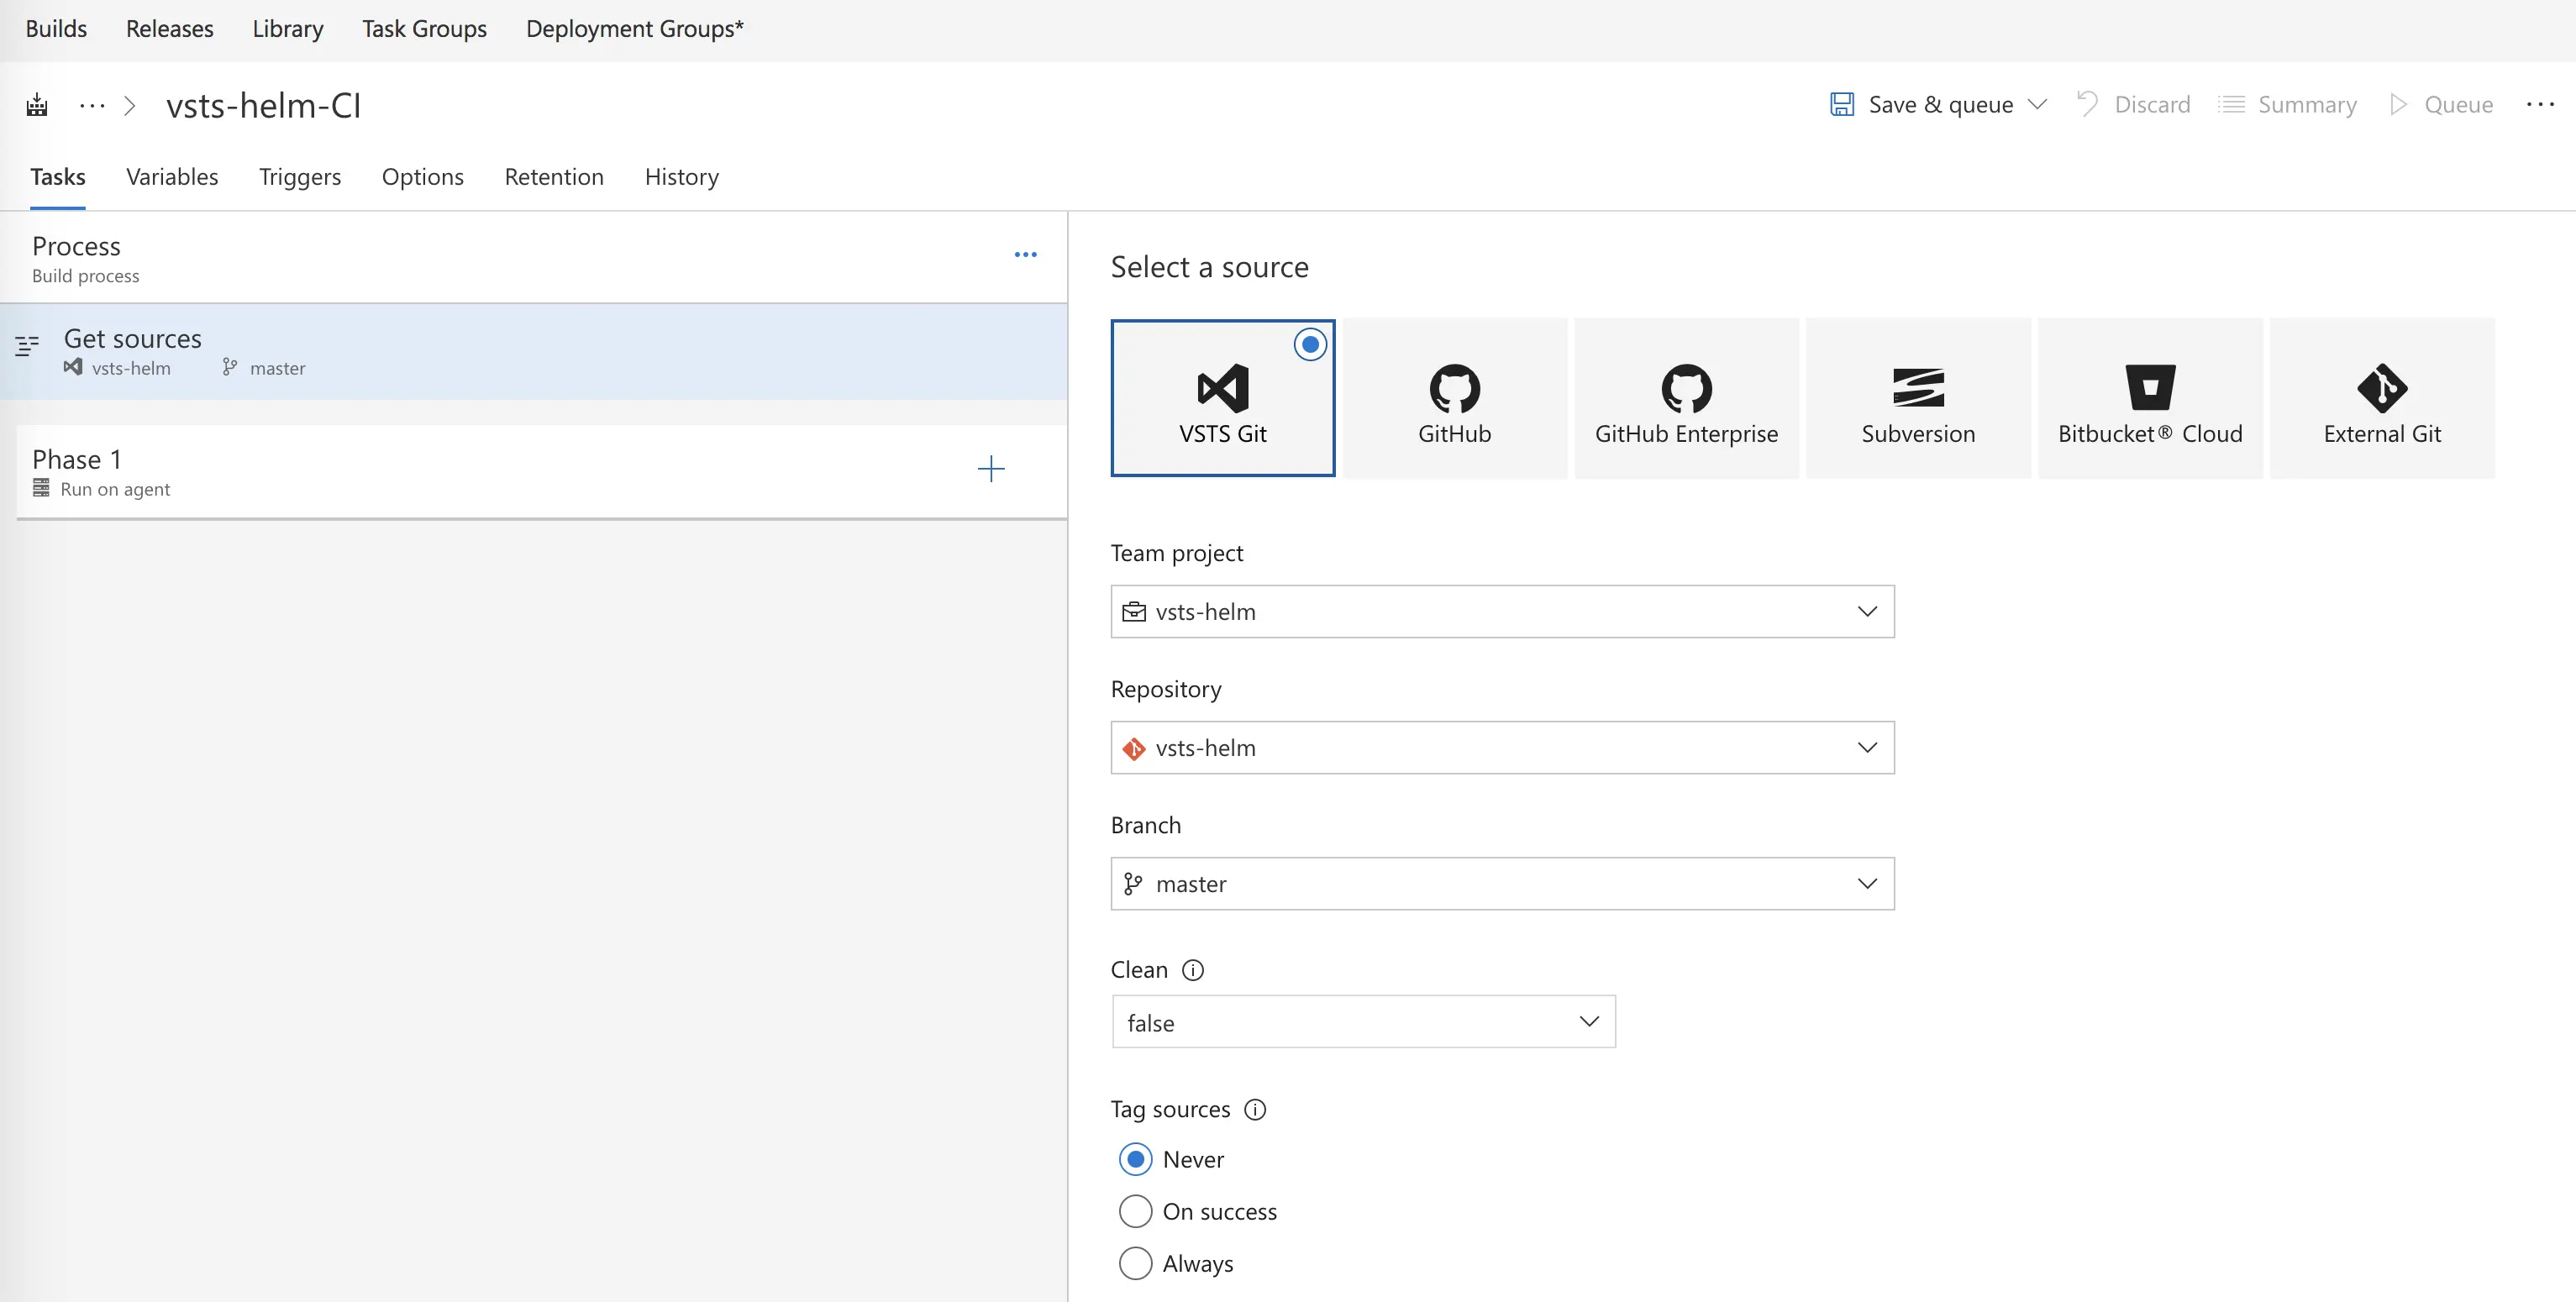
Next, I will get sources and choose my VSTS Git repo, leaving it using the master branch for now. (Future blog post will walk through DevOps best practices with multiple branches and PRs)
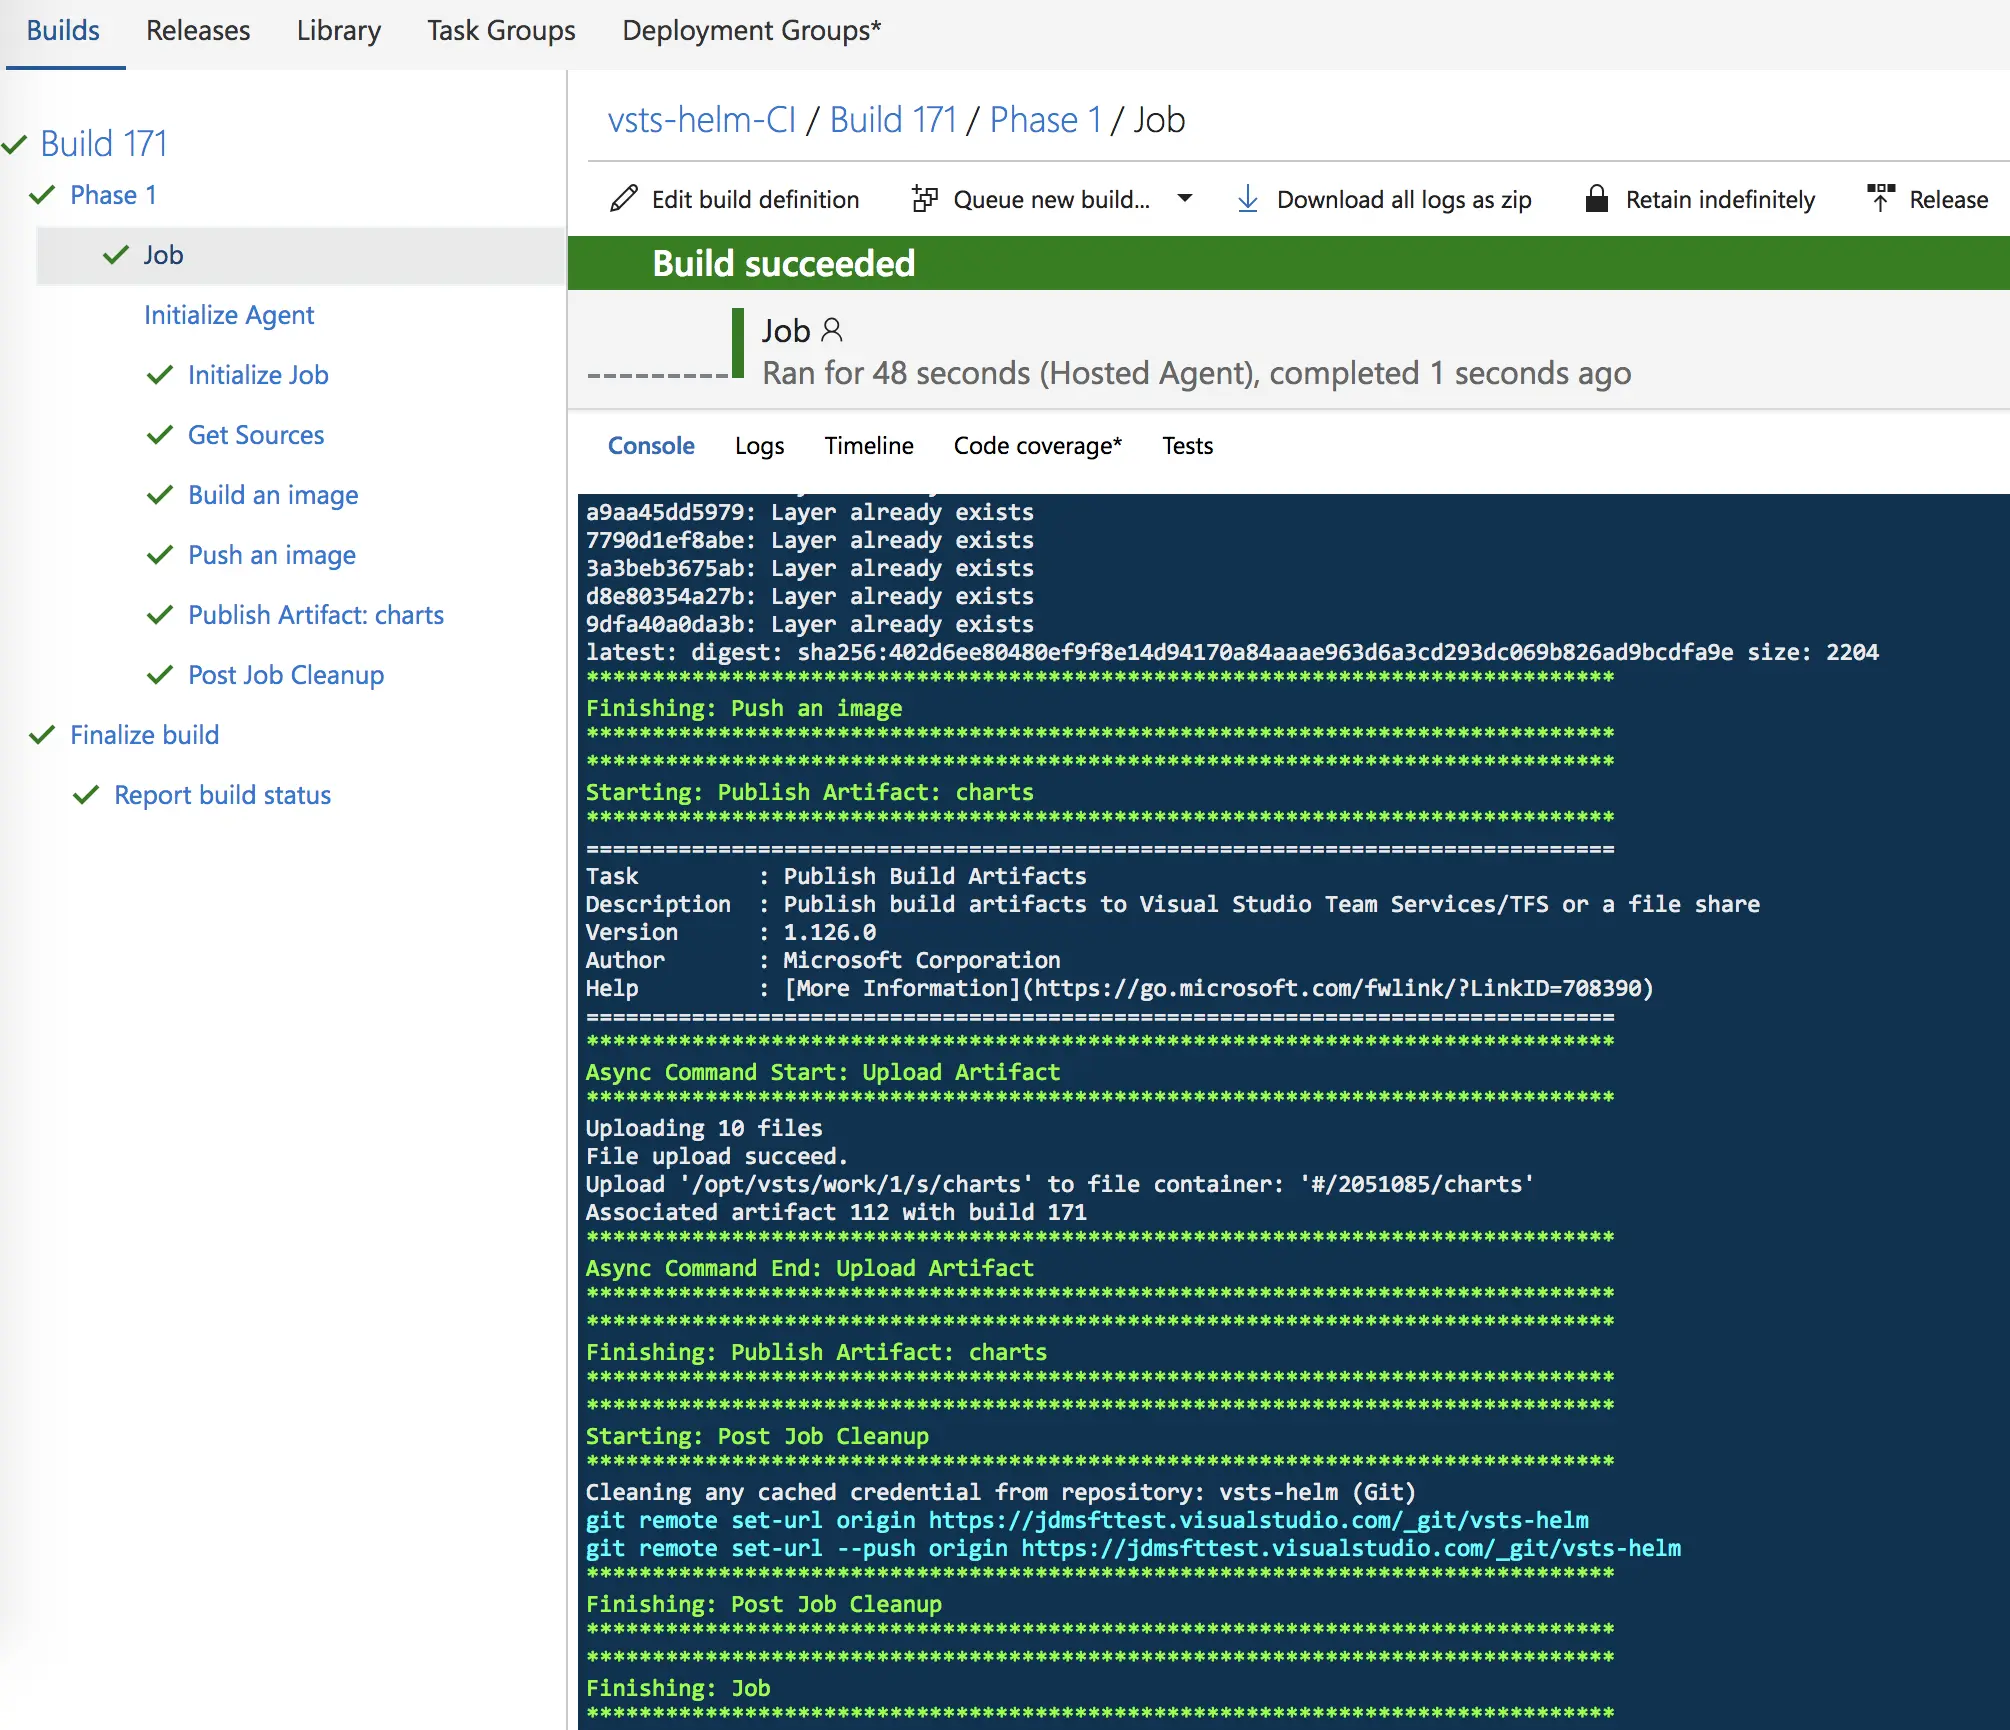
I will then add my tasks. During the build process, I’m really just going to build my image and push it to my private repo. For this blog post, I will use Azure Container Registry, but in other public demos, I have also used private registries like JFrog’s Artifactory, Docker Hub, and Codefresh. I will add 3 tasks – 1 docker task to build, 1 docker task to push, and 1 publish artifact task to copy my artifact files for release (I.E my helm charts).

You’ll notice my Dockerfile is simply in my root directory. If you are using a repo other than my demo one, you’ll have to select the location of your Dockerfile. Also, in both my build and push steps, I am telling it to tag the image using the BuildId and the latest tag. The BuildId is unique and will increment with each new build; this will allow helm to identify new releases by a change in the image name.

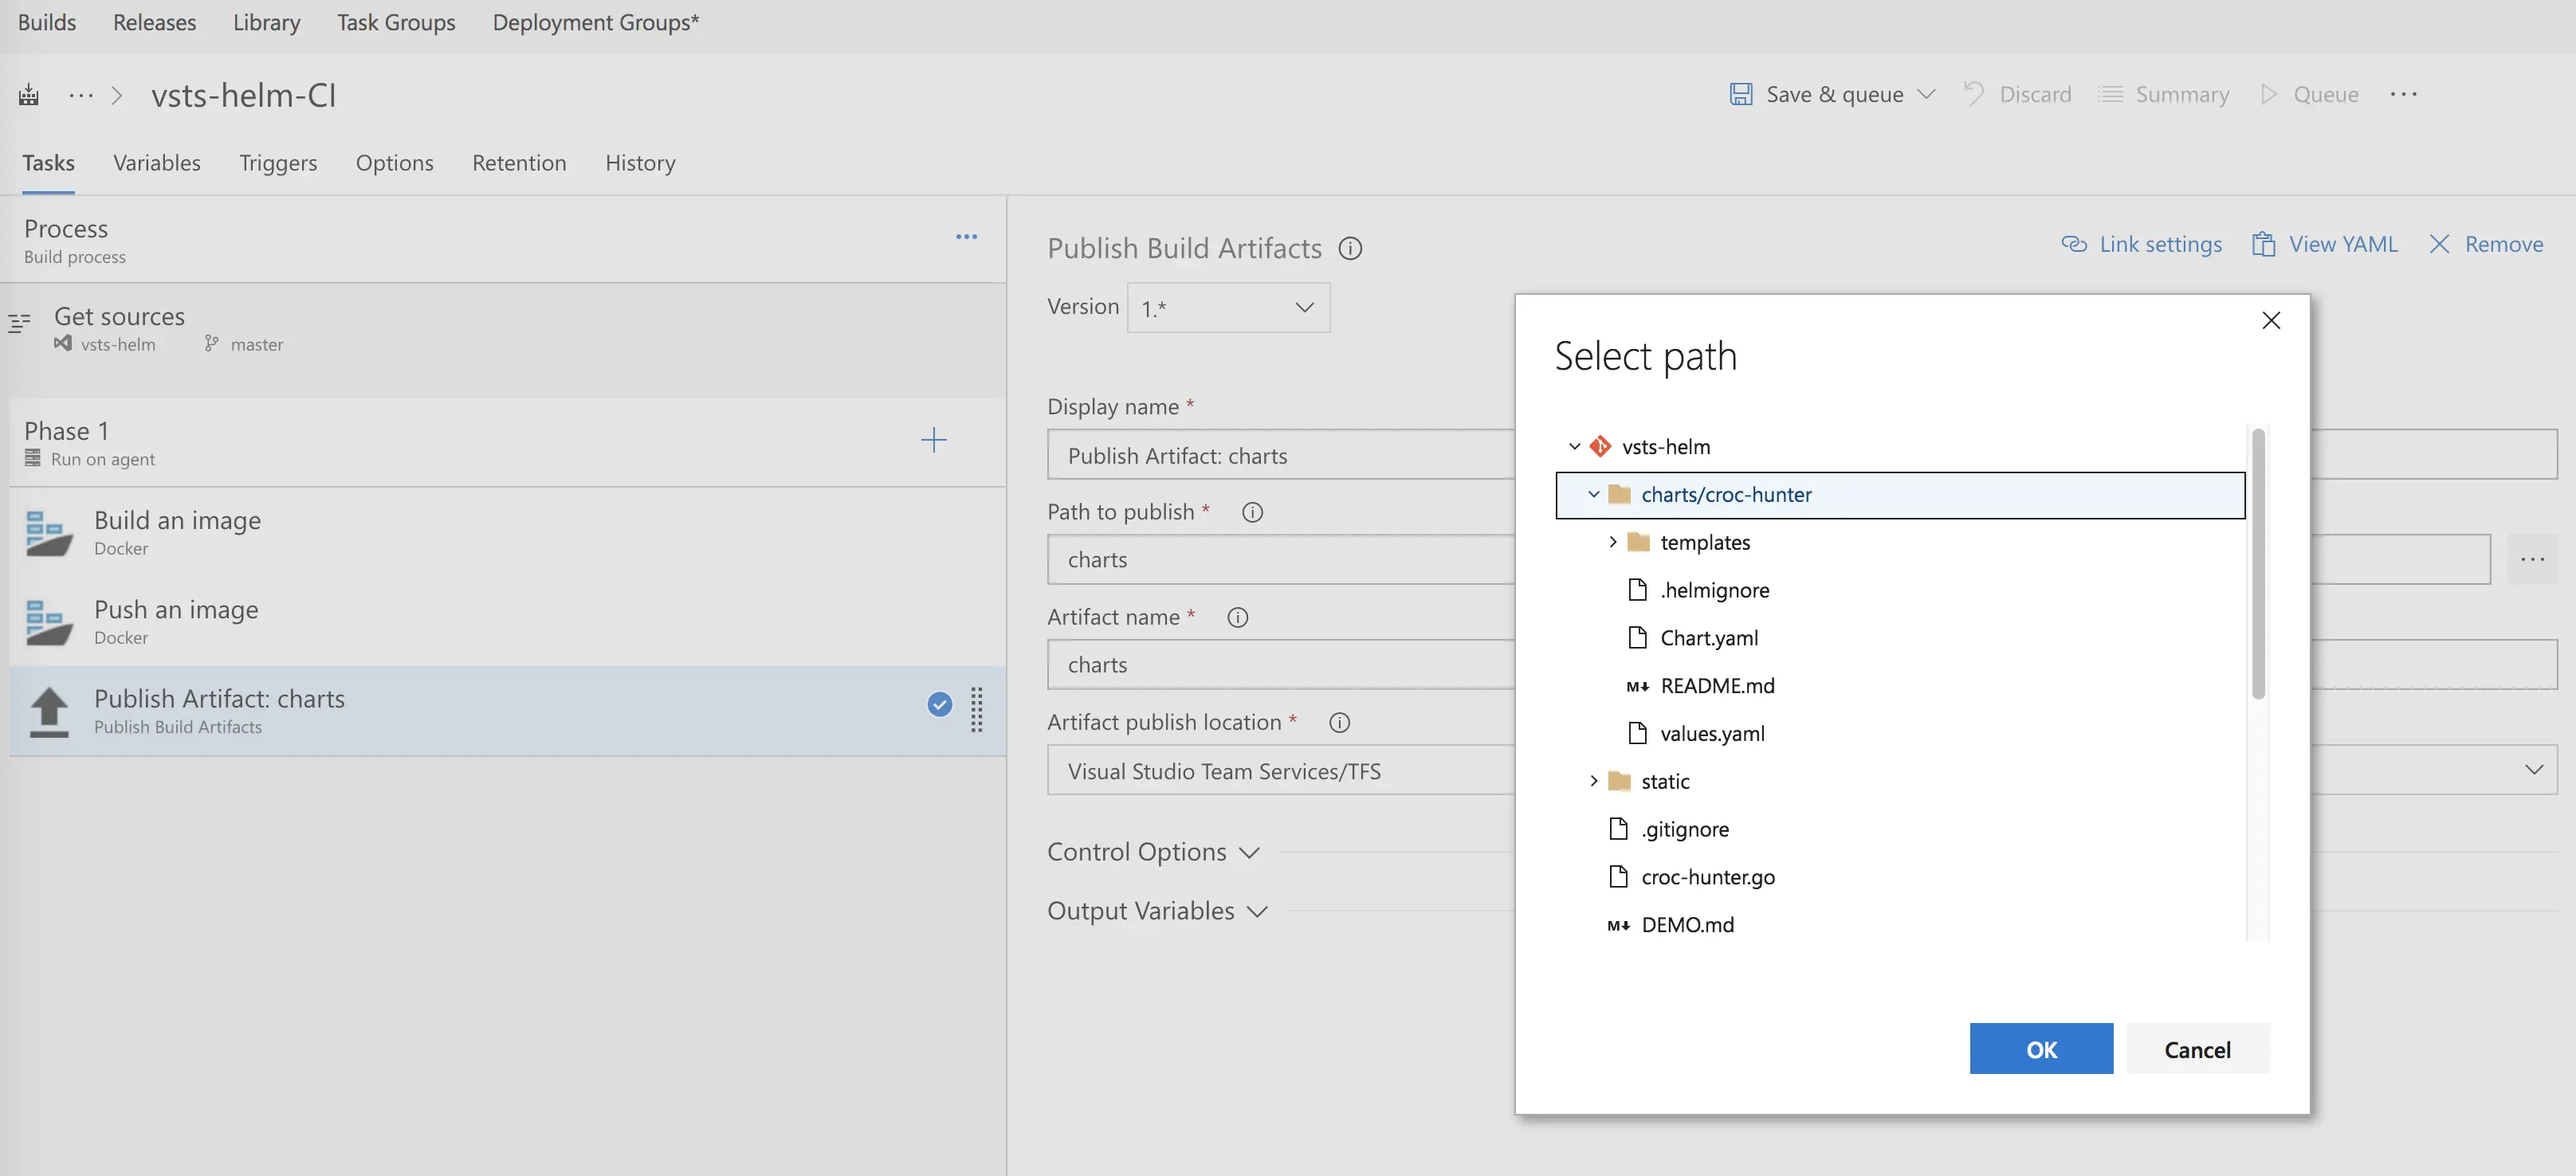
In my final step, Publish Artifact, I am providing the location of my chart files and naming the artifact “charts.” I am also opting to publish directly to VSTS (as opposed to a file share). The publishing artifacts task allows me to “handoff,” so to speak, files I want to use in my release stage.
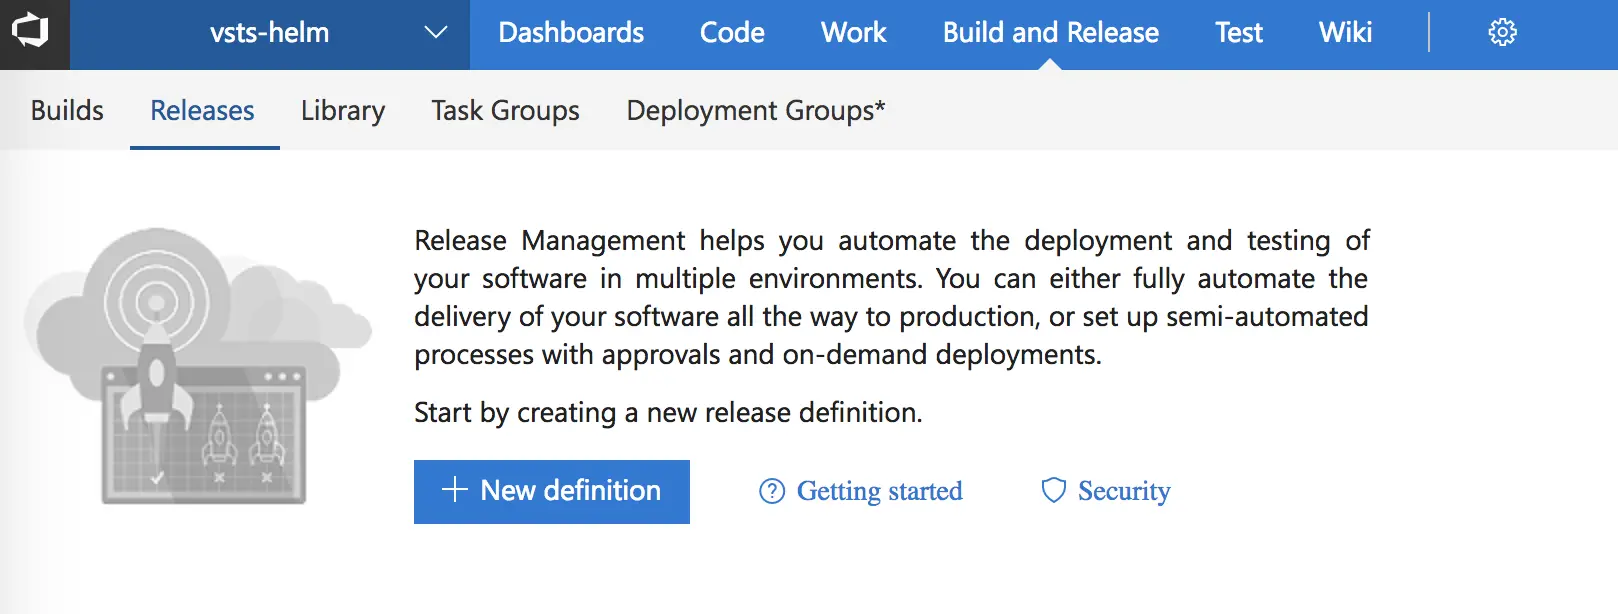
That’s it – you can save it now. Let’s move on to Releases – hit the Releases tab at the top.
Release – Continuous Deployment

We will start by creating a new definition.
And again chose “Empty Process.”
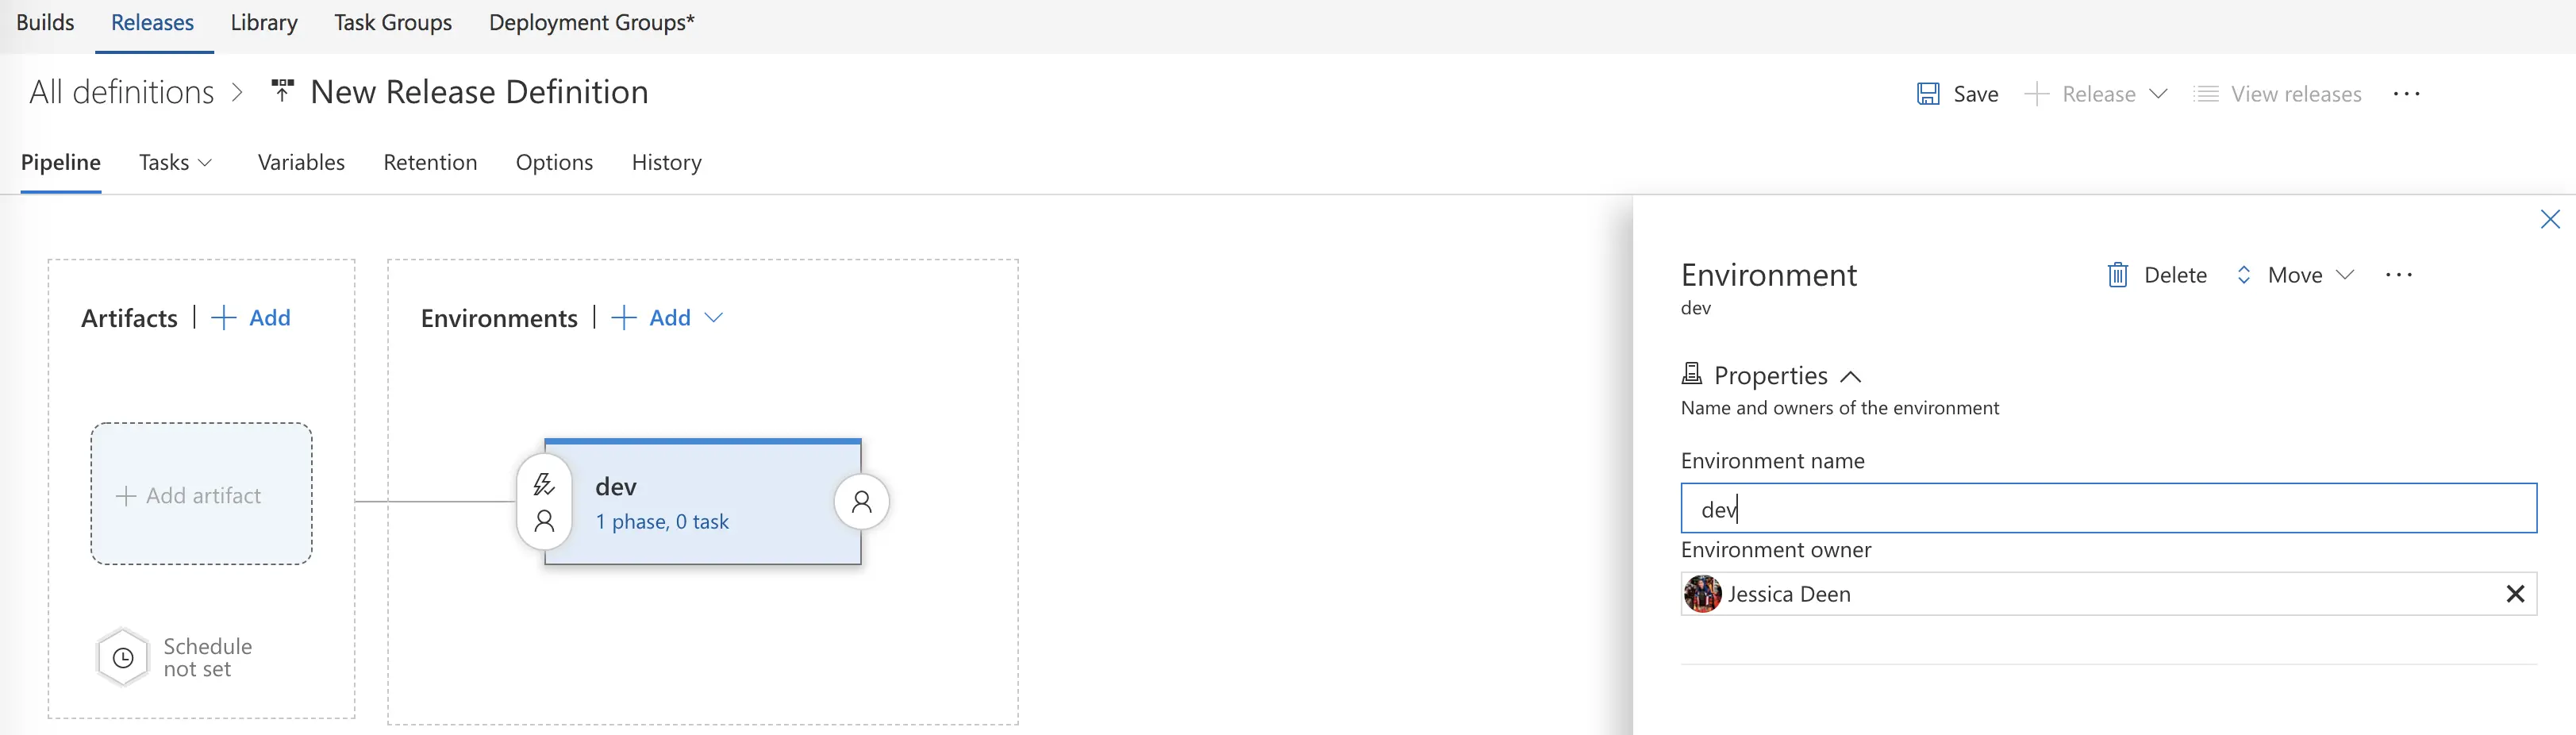
Next, we will name our environment. I have named mine “dev” – note the lowercase alphanumeric characters – this is intentional and I advise you to do the same since we will use an environment variable using this data in a future blog post. Speaking of, my next post will deep dive into DevOps best practices on VSTS and Helm. In that demo we will pull in the name of the environment you’re deploying to and use it for a full dev > qa > prod pipeline. Helm, as a standard, cannot use capital letters in the release names – you can only use alphanumeric characters, hyphens or periods, also, do not use spaces as a single space is how Helm separates each new argument.
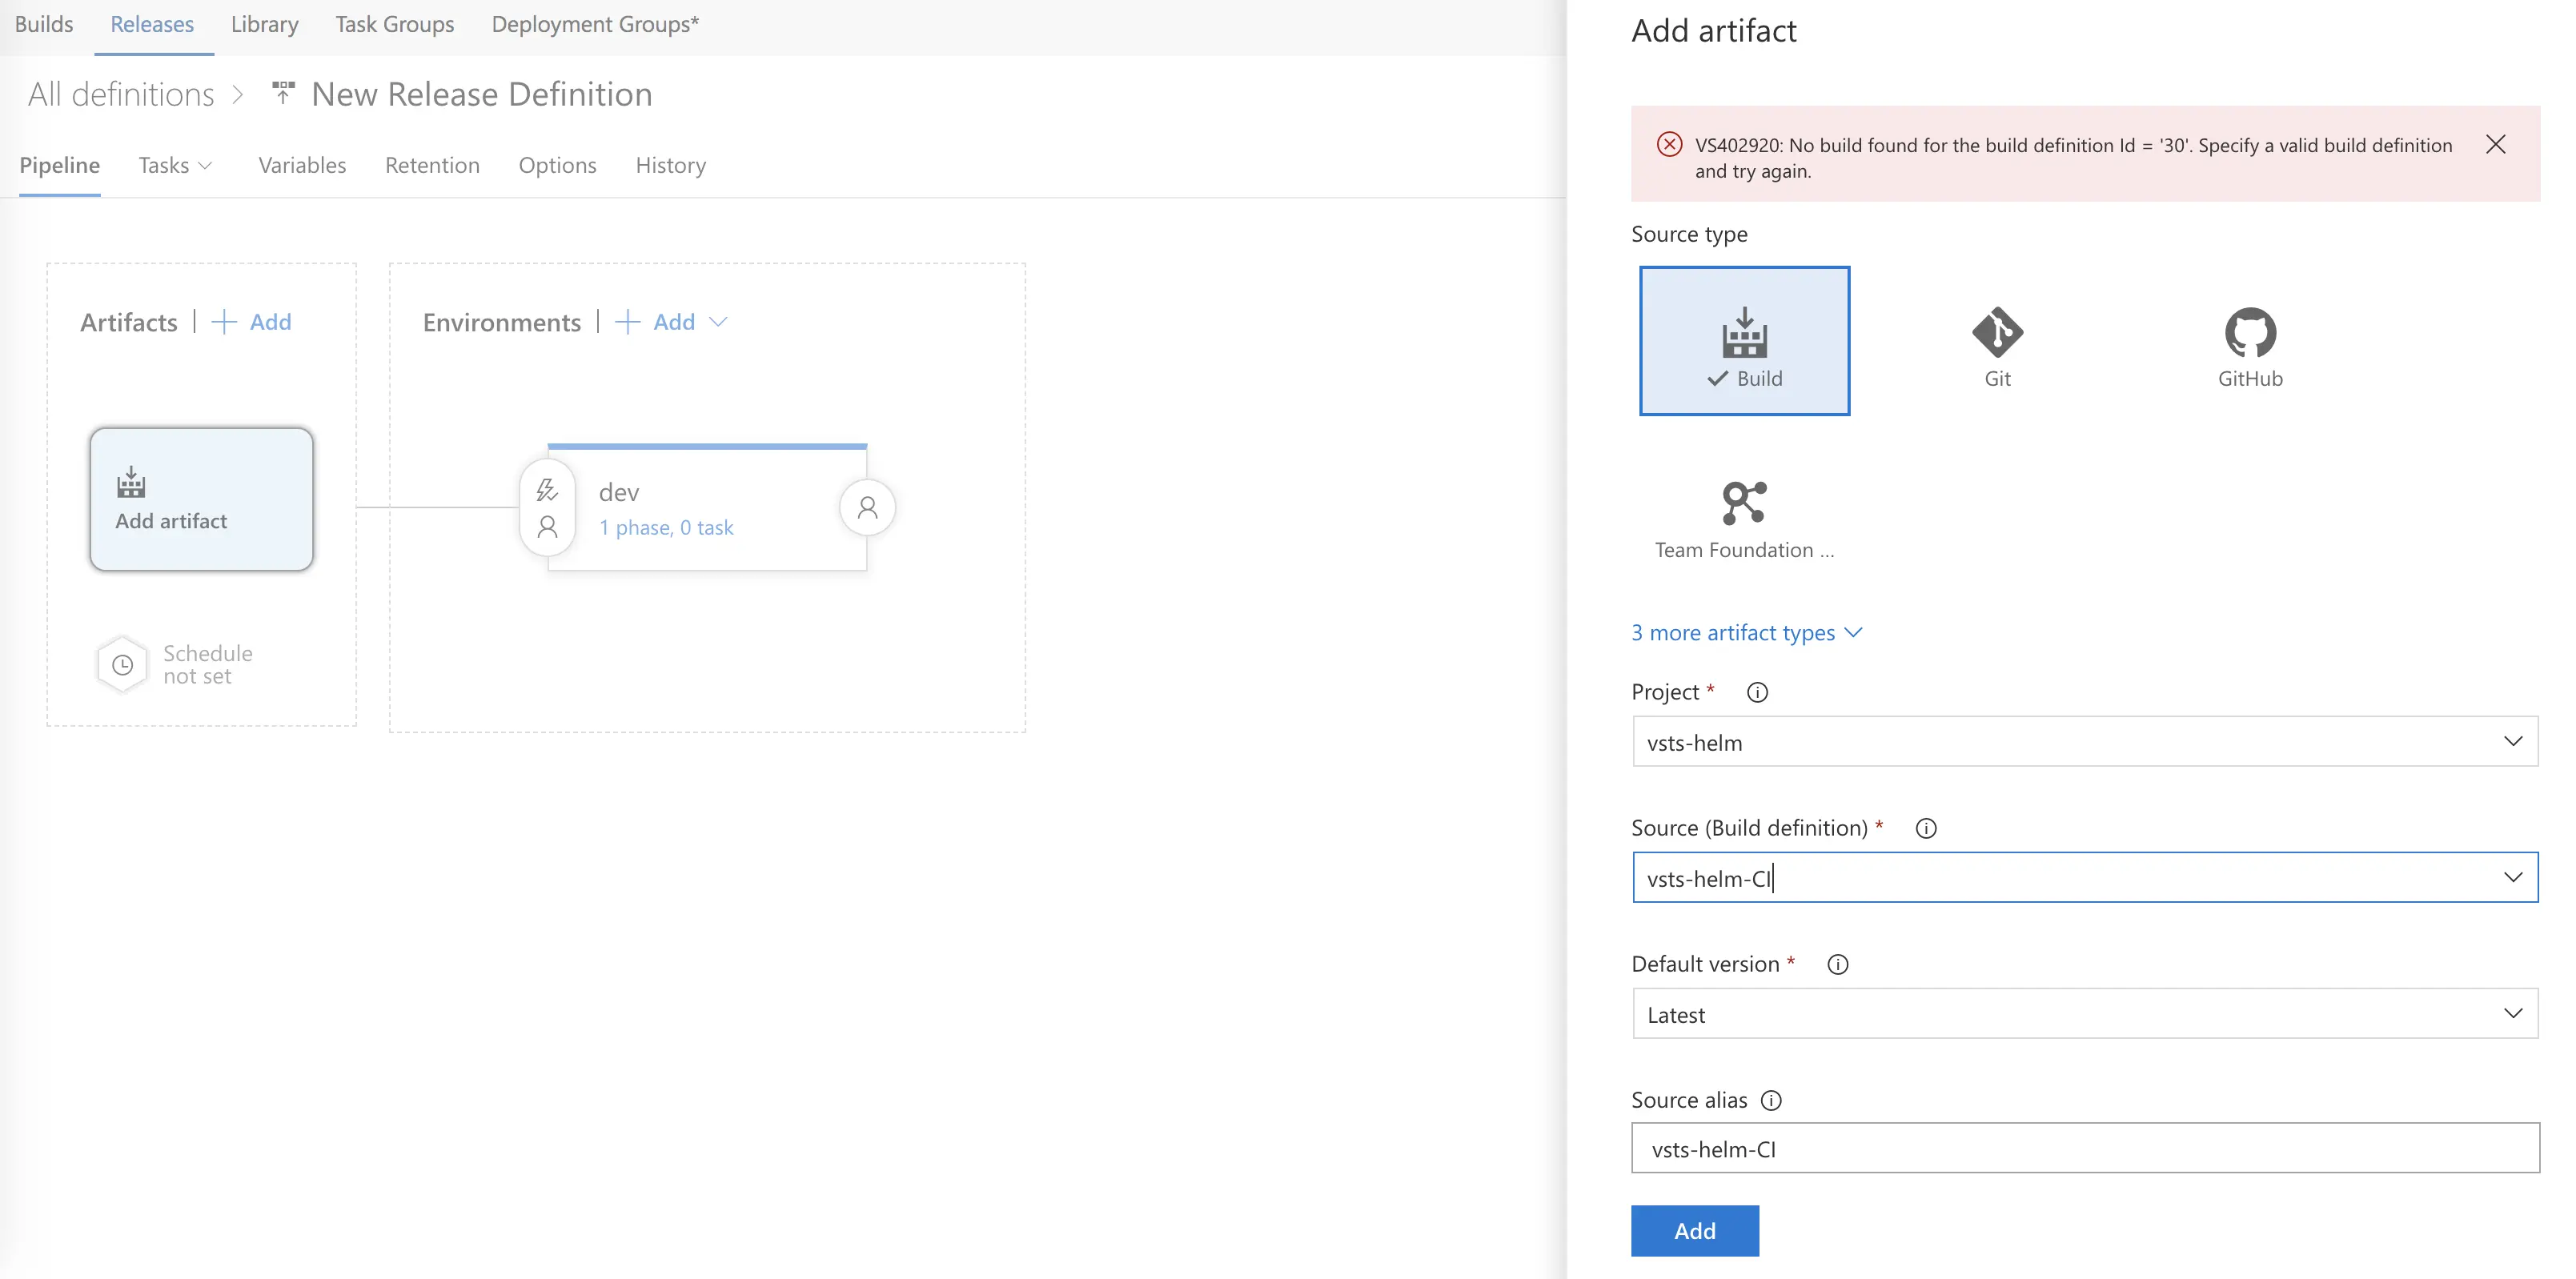
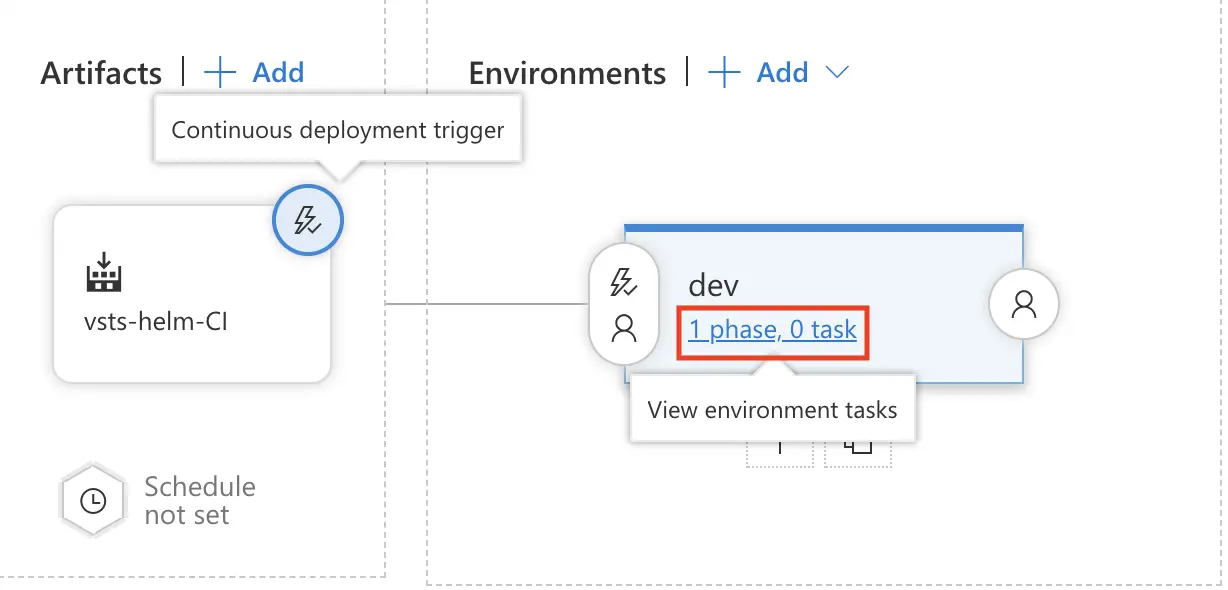
Now we have to add our build artifact – so click add on the left-hand side under Artifacts. The source type should default to “build” (leave it), and under source (build definition), let’s select the build definition we created earlier and hit add. If you see a red message at the top like in my screenshot, that’s okay, it’s just saying a build doesn’t exist yet because we haven’t triggered a build. Had we of triggered a build, we wouldn’t see this message and our release would have connected our artifact automatically. I want to walk through how to do things manually, just to be thorough.
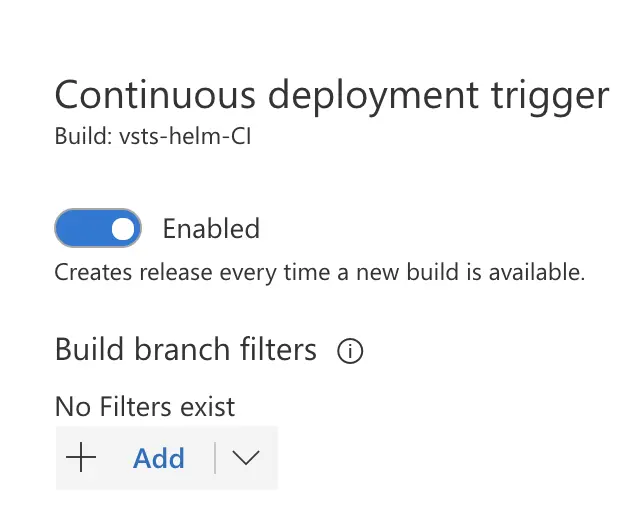
Let’s also add a continuous deployment trigger.

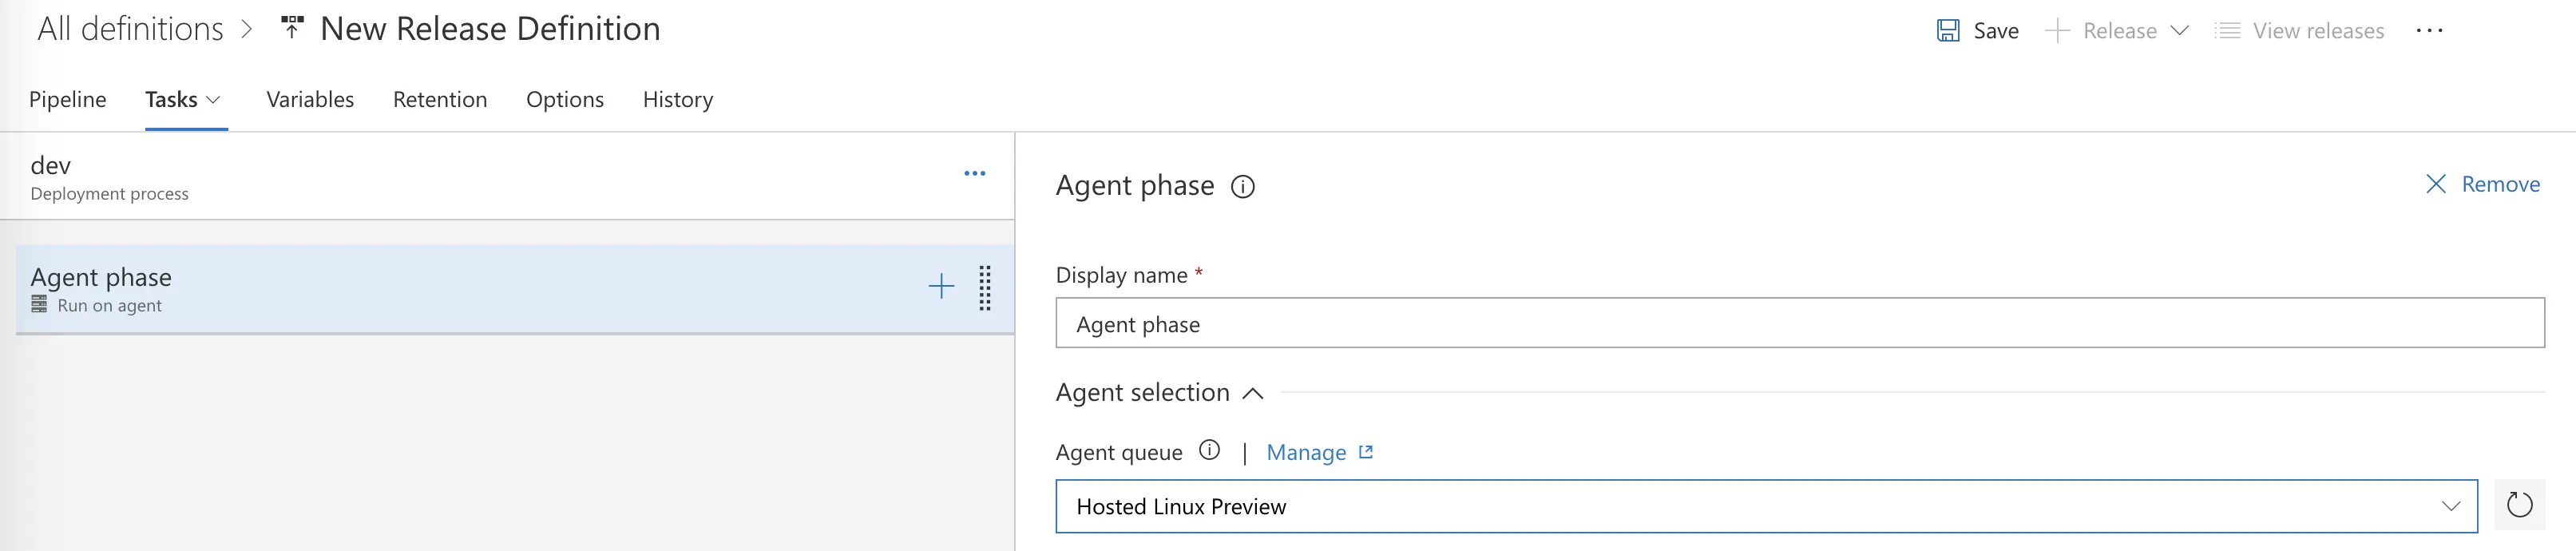
And now let’s configure our dev environment’s tasks.
Under Agent Phase, we again will tell our Release to use a Hosted Linux Agent for our Agent queue.
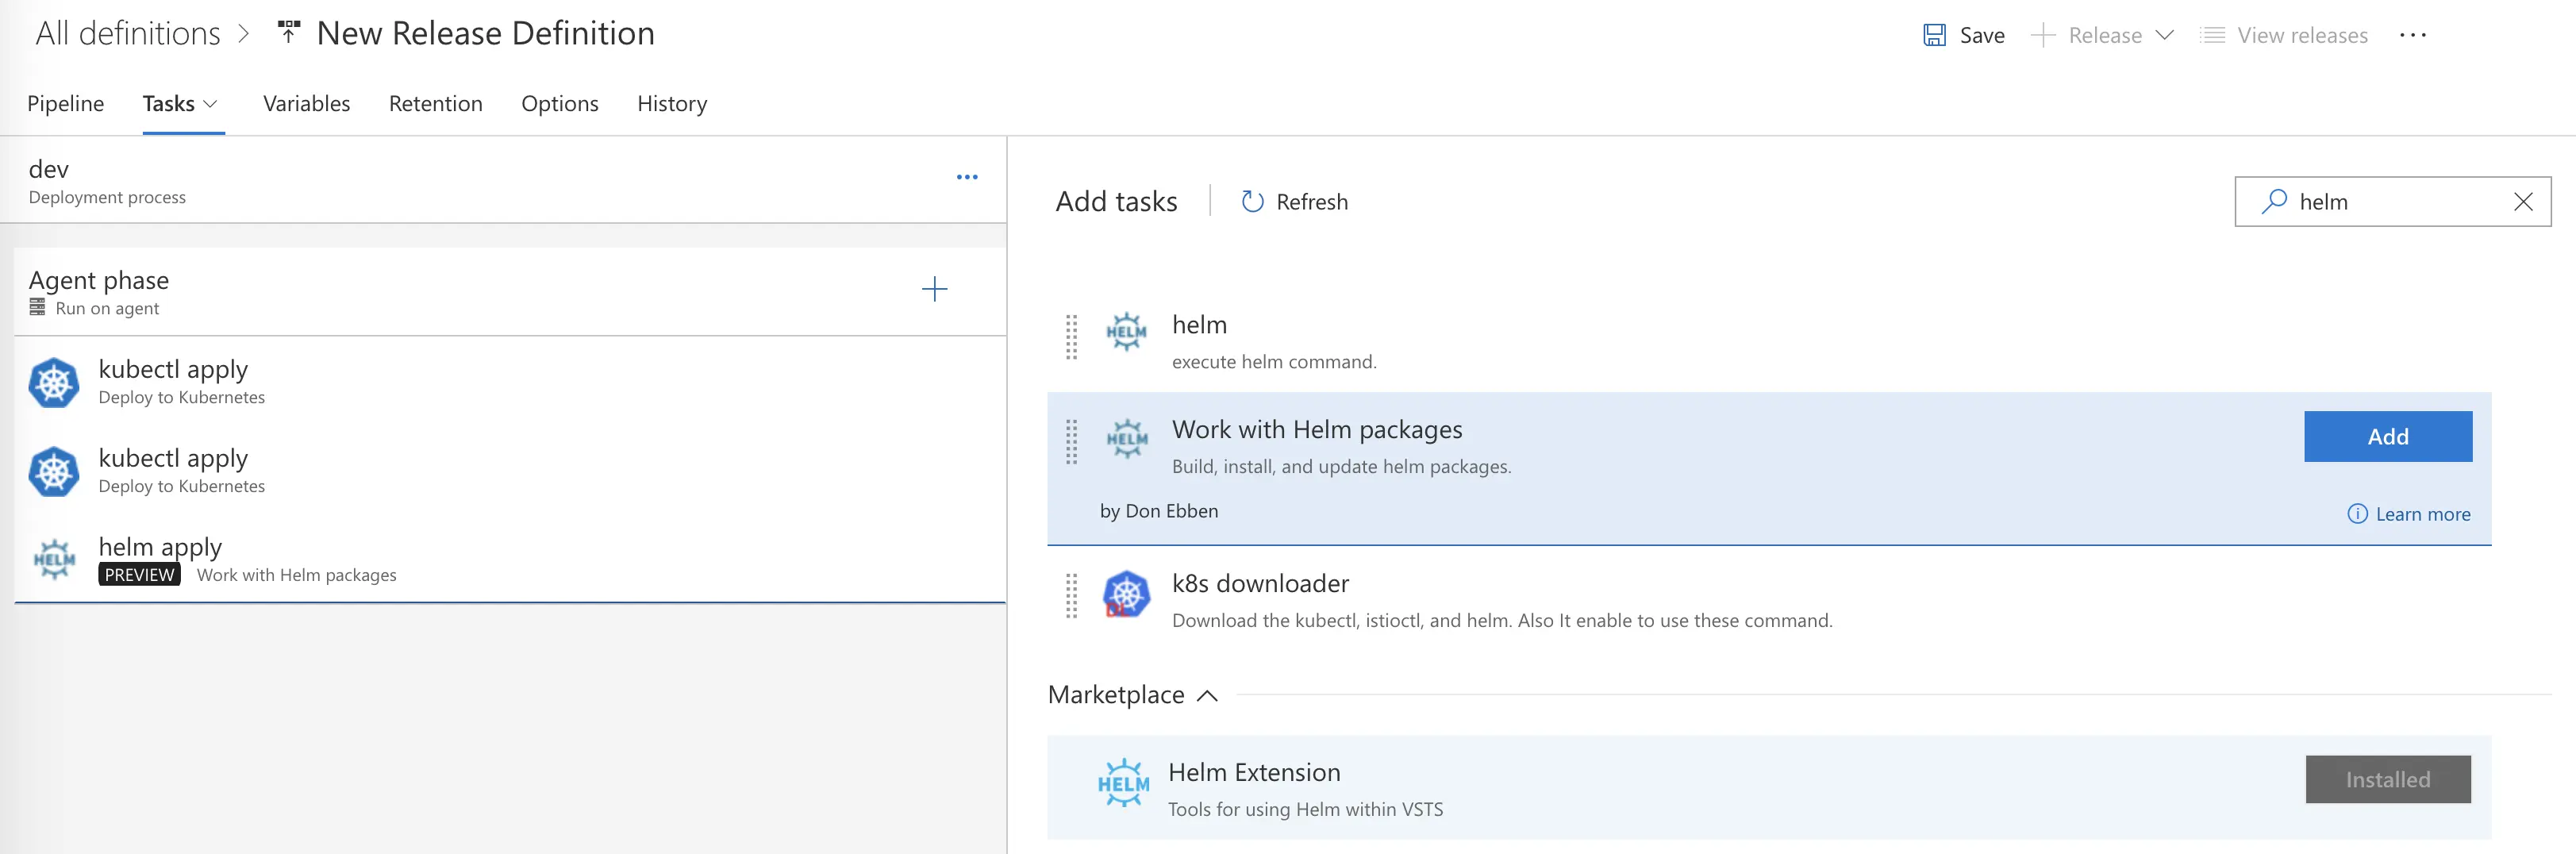
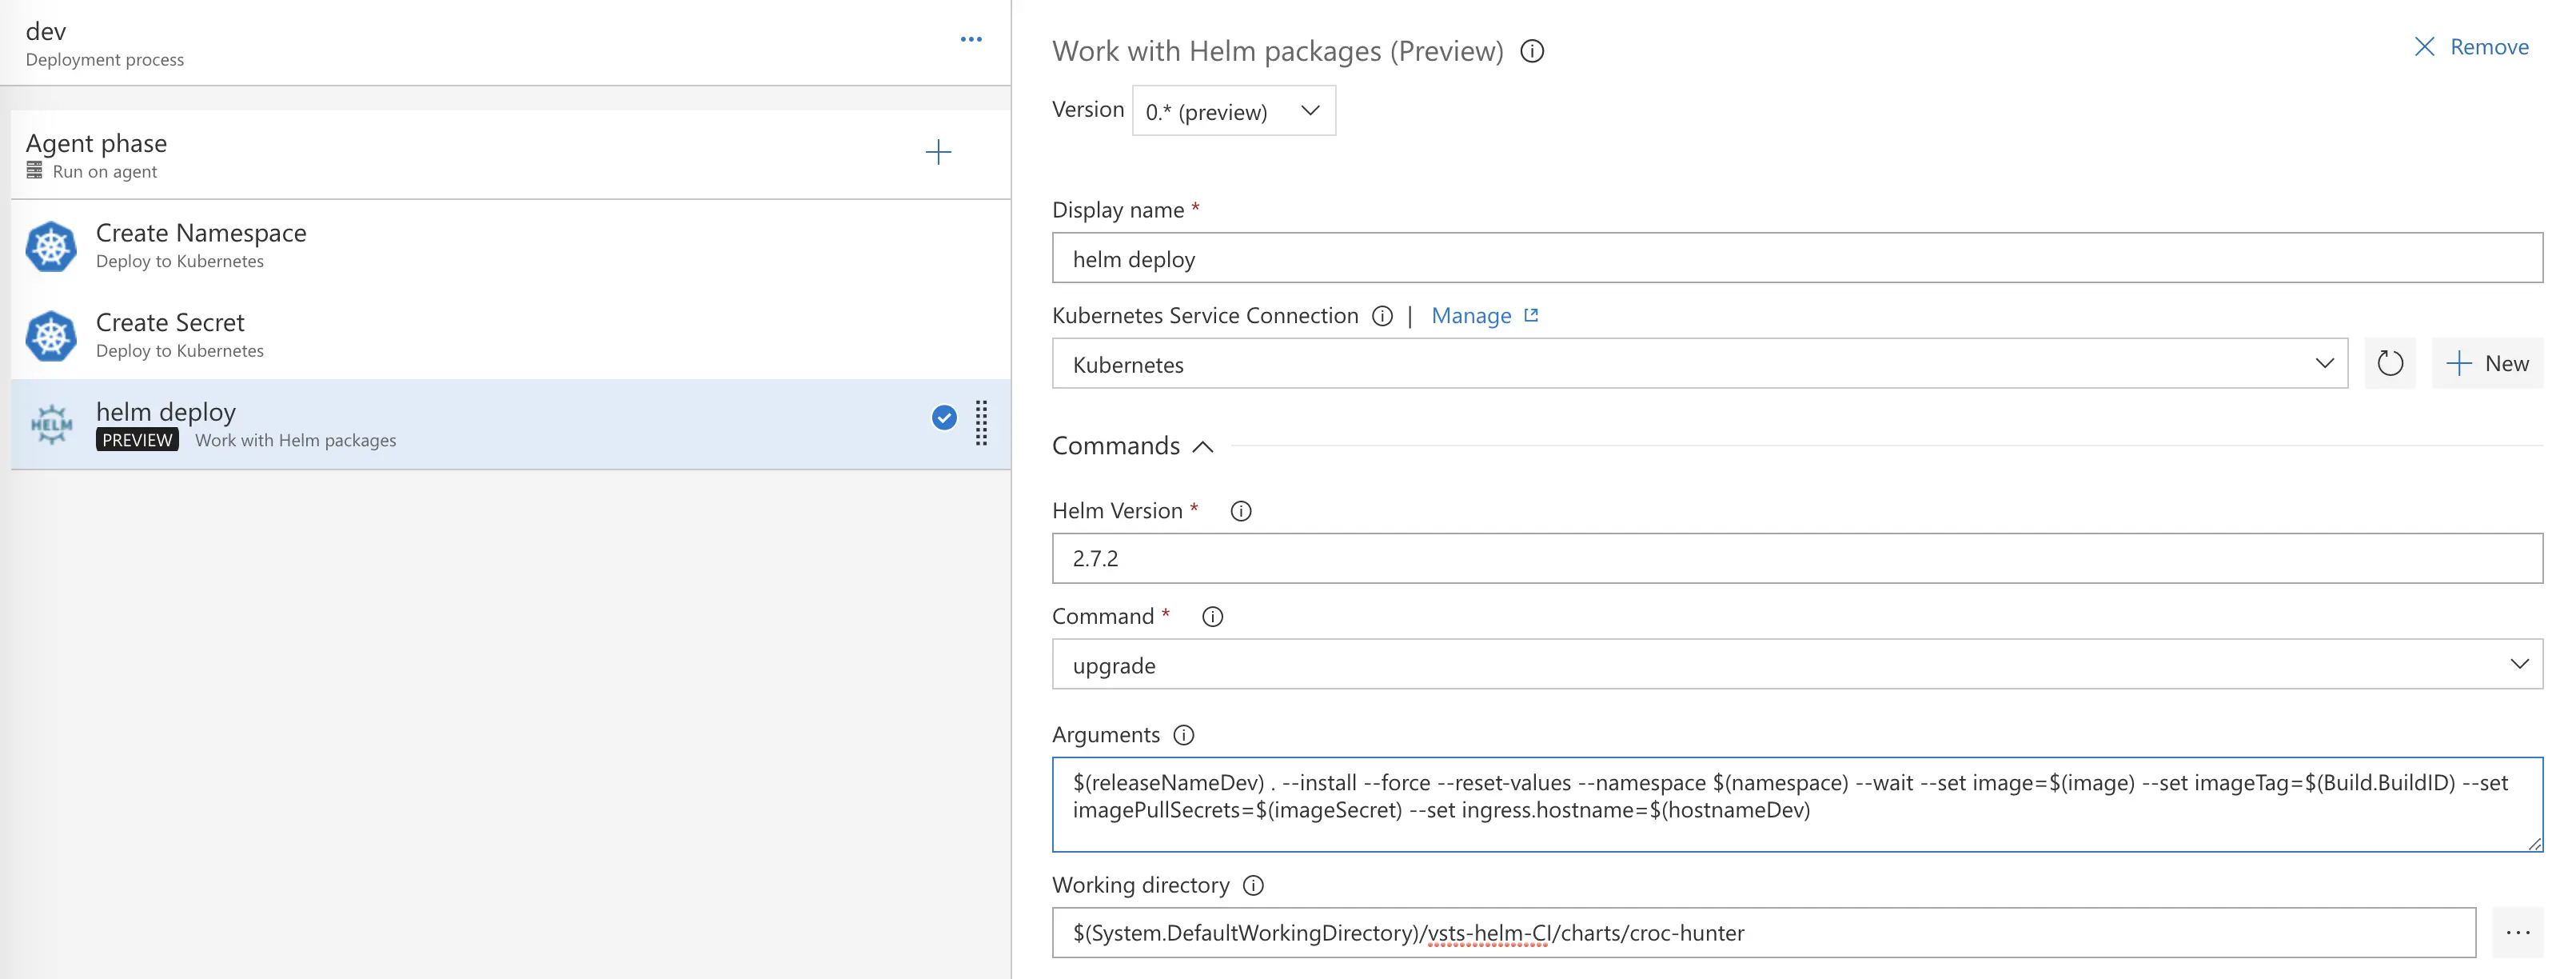
Finally, we get to add our tasks. We need to add 2 instances of the Microsoft Deploy to Kubernetes task (Namespace and Secret creation) followed by the Helm Extension created by Don Ebben (you will have to install this one, it’s free).

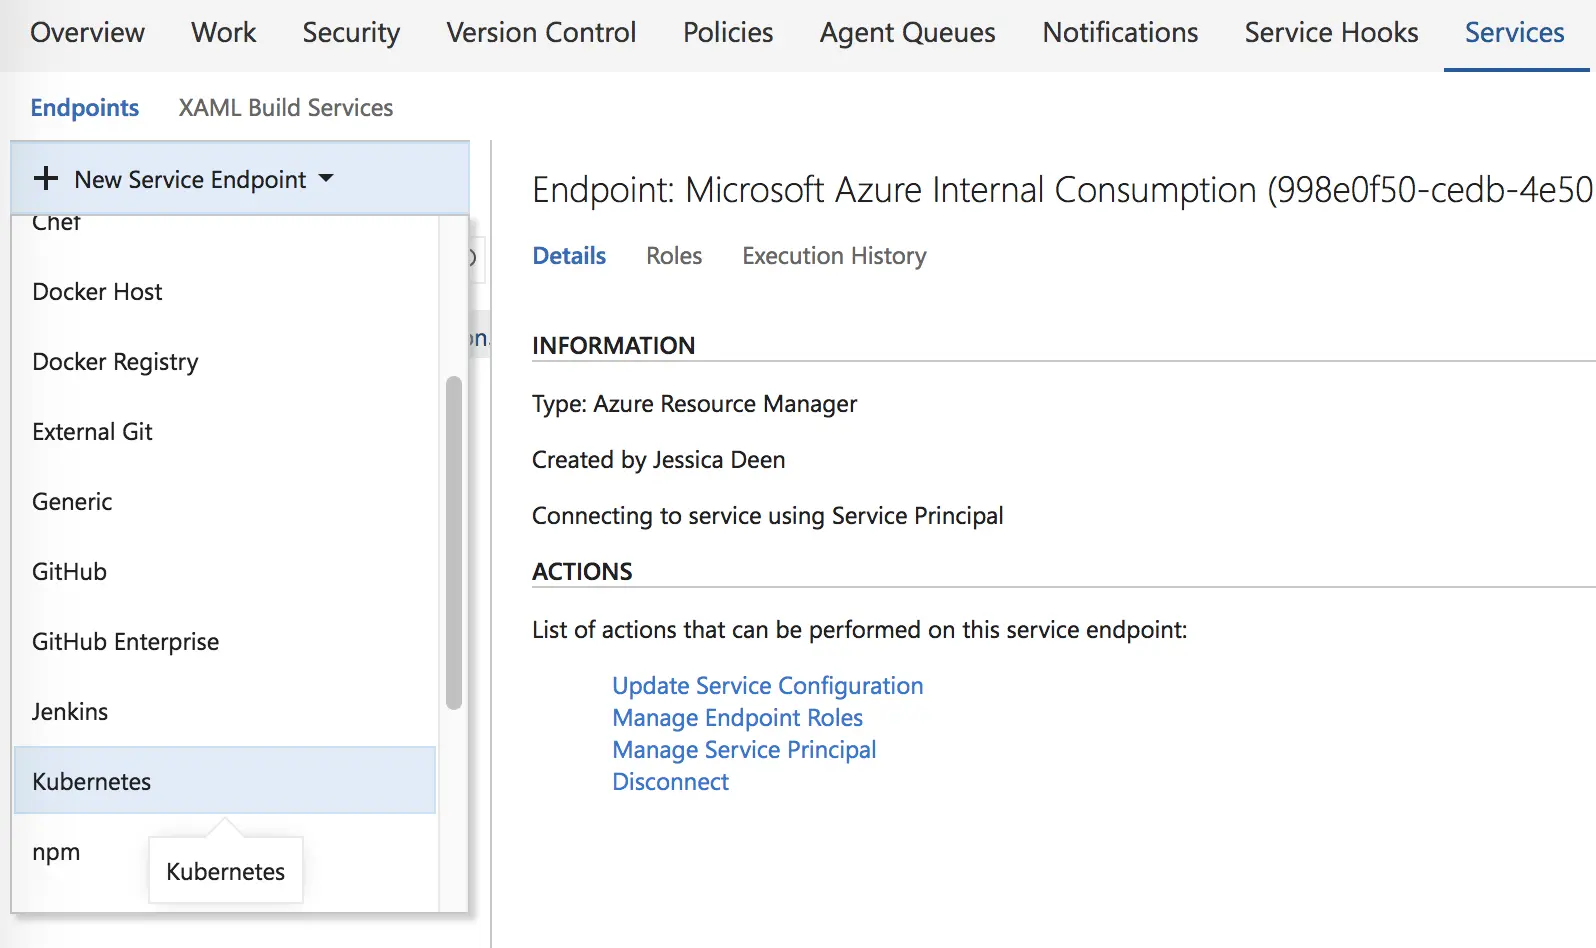
Now we have to setup our Kubernetes Service Connection. Under the first Kubernetes task, you will see an option for it with a “Manage” link right next to it. Let’s open that in a new tab. 
From there, click “New Service Endpoint” in the top left corner and select Kubernetes.
You will then need to put in your Kubernetes cluster information. You can find it in $HOME/.kube/config. 
Hit OK to save it and return to the previous window where we were configuring our K8s and Helm tasks. We should be able to hit the ‘refresh’ icon next to the Kubernetes Service Connection box and find out K8s cluster available. Let’s select it.
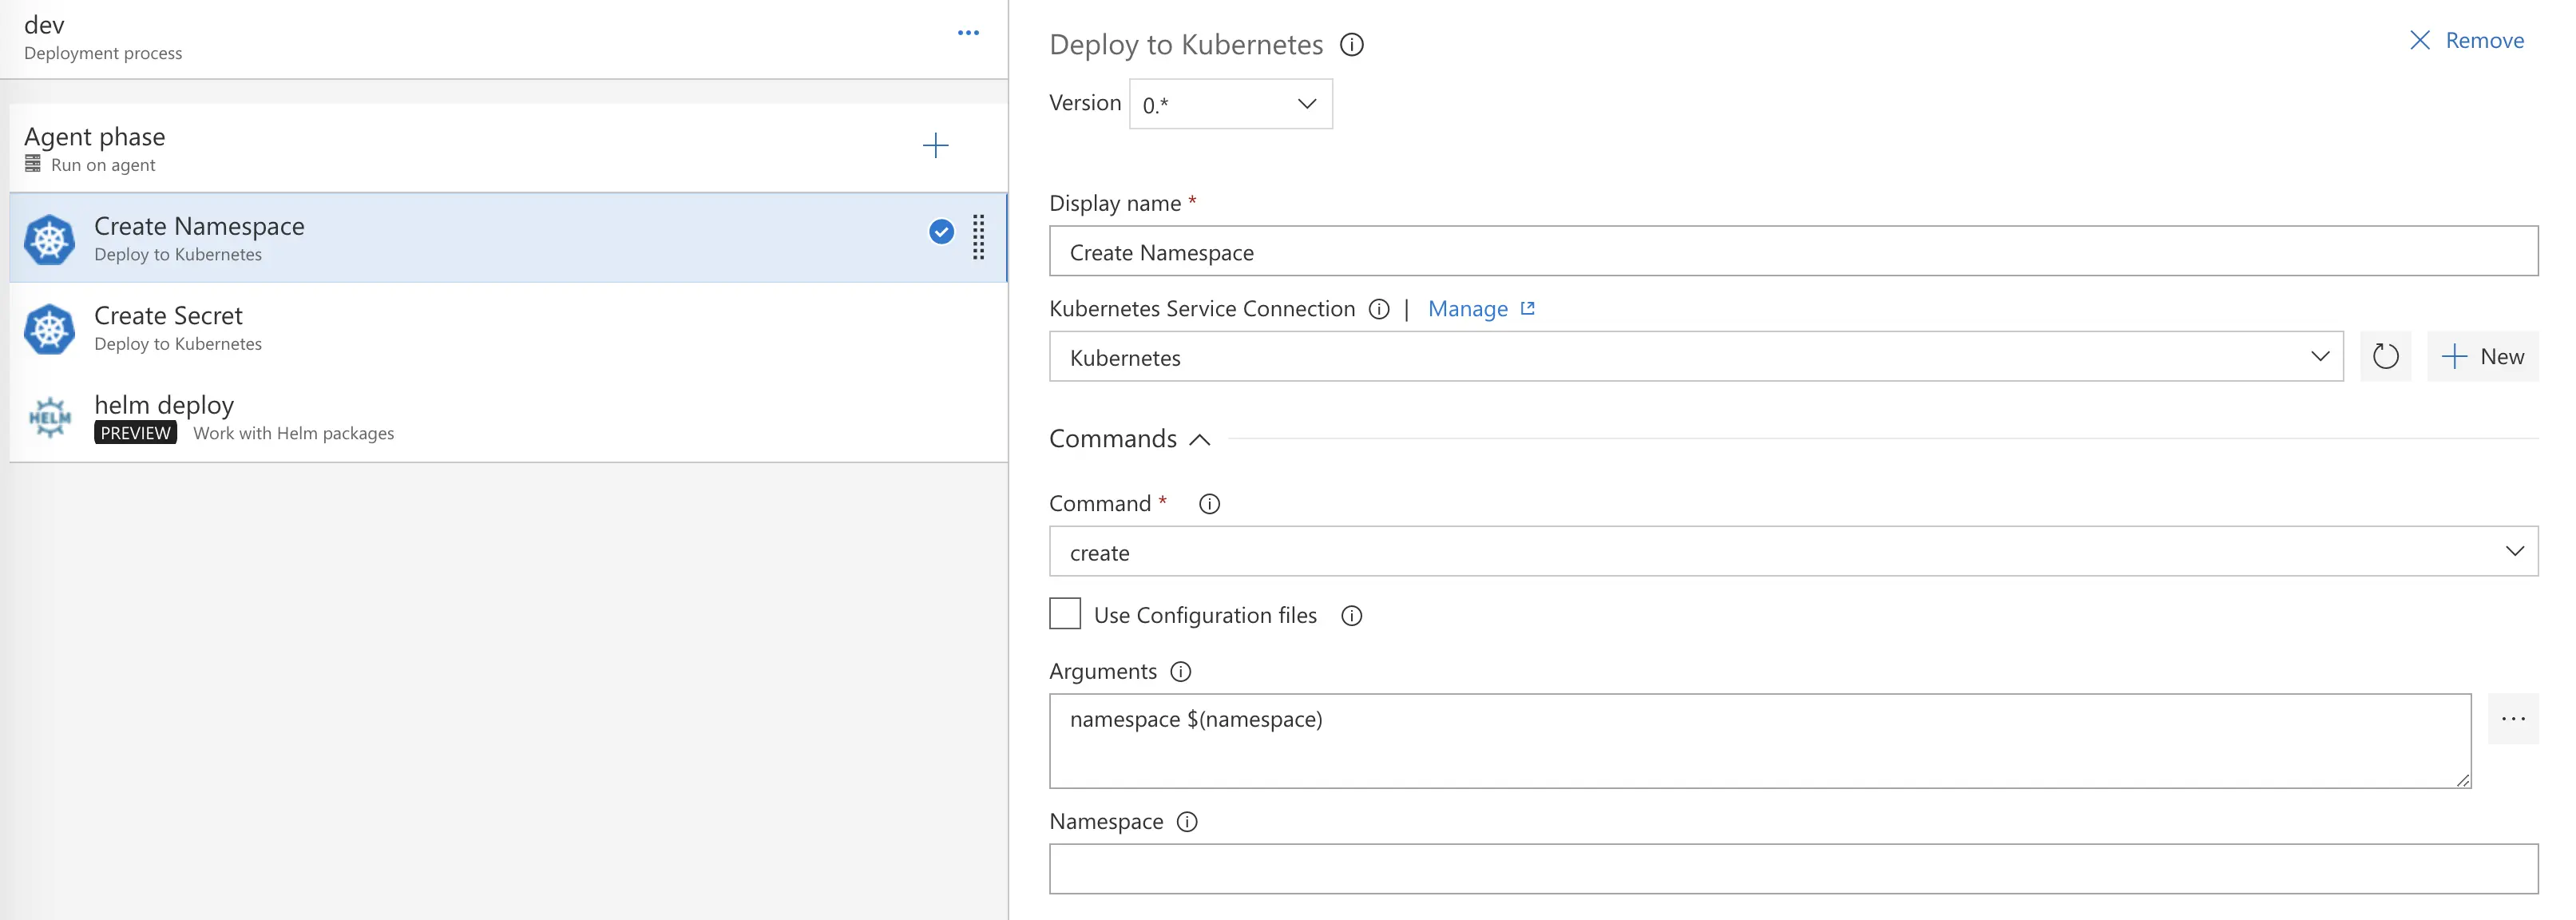
Now we will update our “Create Namespace” and “Create Secret” tasks. Both Kubernetes tasks will be “create” tasks because we are creating a namespace for our helm deployment and creating a secret for that namespace to pull our image from our private repo.
Create Namespace Arguments
namespace $(namespace)
Create Secret Arguments – update the bold and underlined text with your own info; you may leave the email as is unless you wish to update it with your own address.
secret docker-registry vsts-secret --docker-server=<span style="text-decoration: underline;"><strong>server-address-here</strong></span> --docker-username=<span style="text-decoration: underline;"><strong>username-here</strong></span> --docker-password=$(regPass) --docker-email=ServicePrincipal@AzureRM
Example:
secret docker-registry vsts-secret --docker-server=acrjdtest.azurecr.io --docker-username=acrjdtest --docker-password=$(regPass) --docker-email=ServicePrincipal@AzureRM
Under Create Secret, also fill in the Namespace field with:
$(namespace)

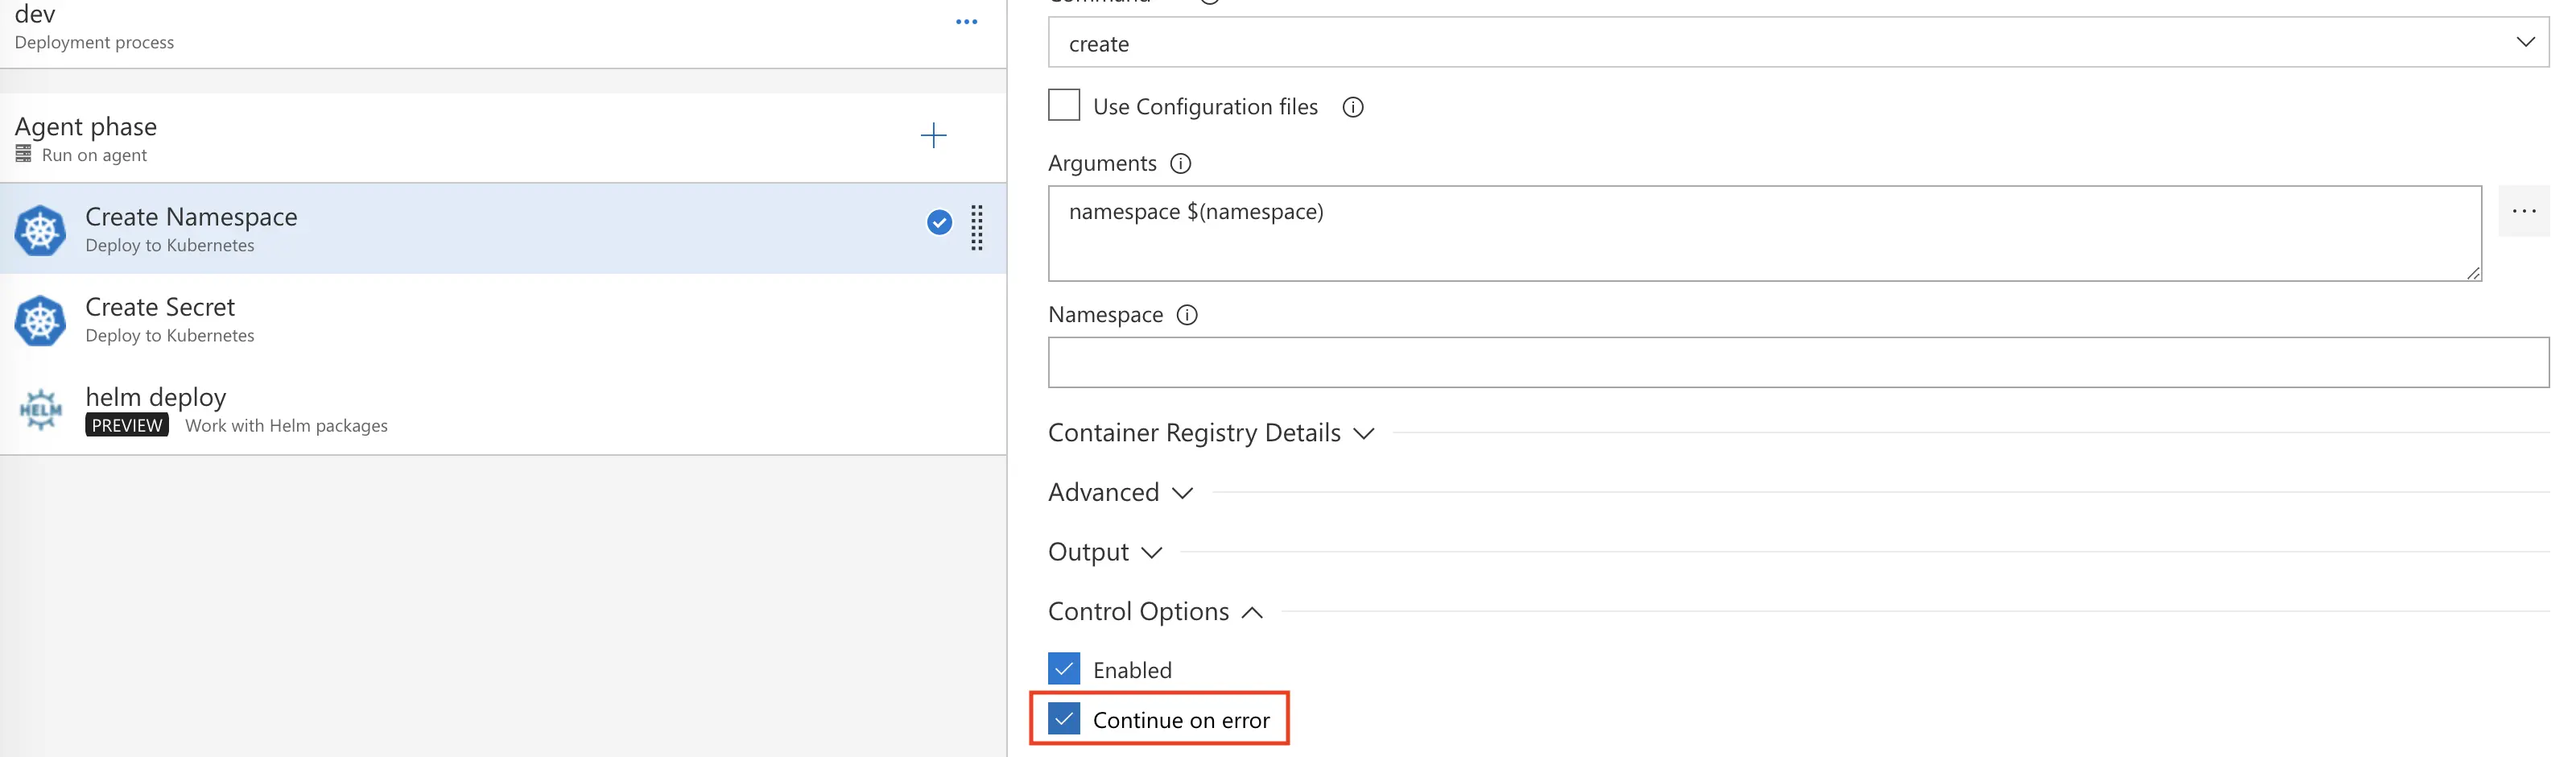
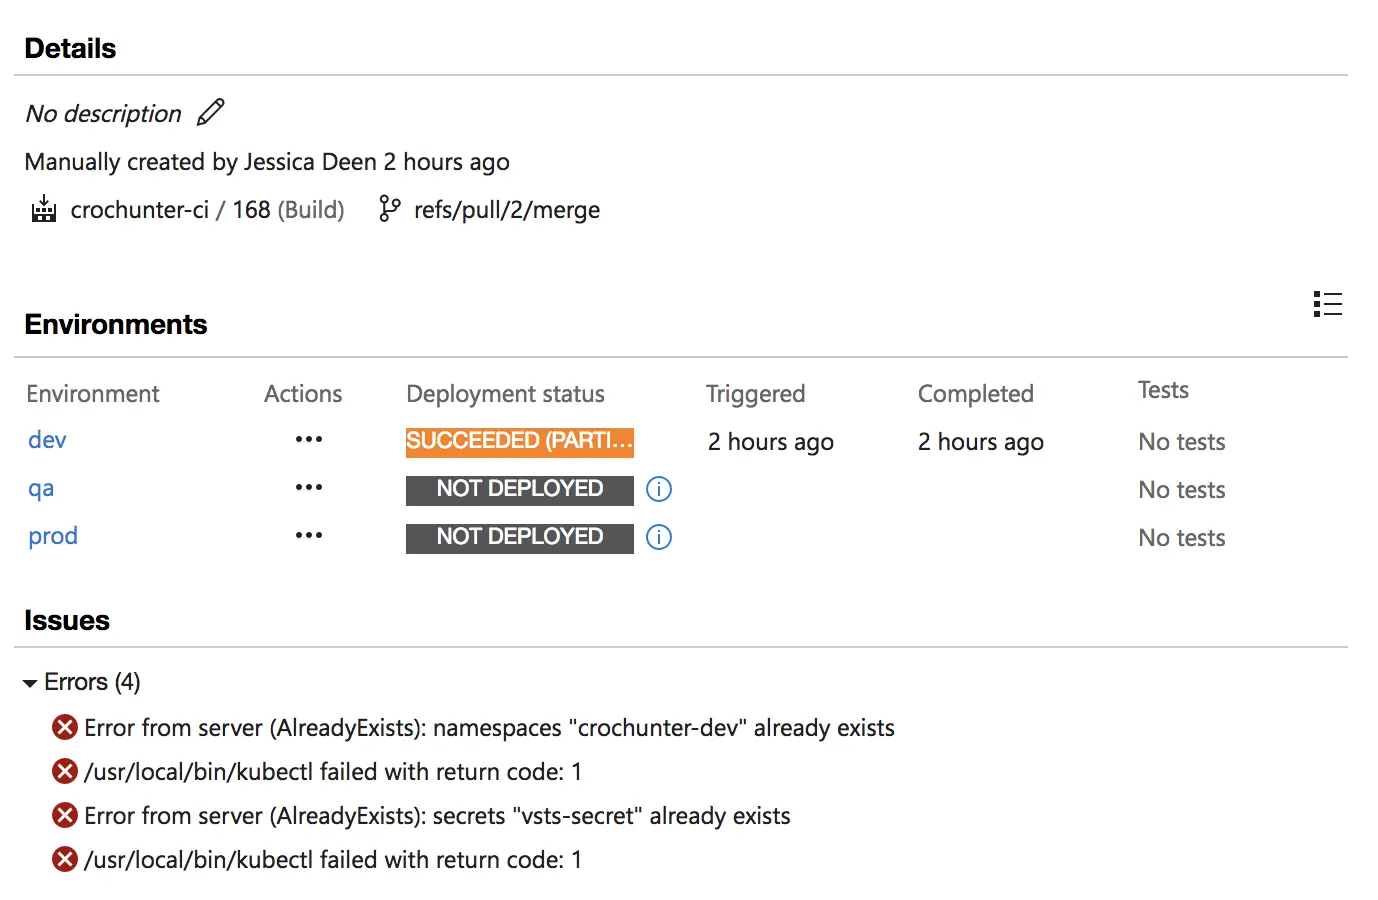
Finally, for both tasks, we need to choose “continue on error” under Control Options. This will allow our release to proceed even if the namespace or secret already exists. I know this isn’t ideal, but it is a working deployment method for Helm and VSTS at this time. I am working to refine this part as a whole.
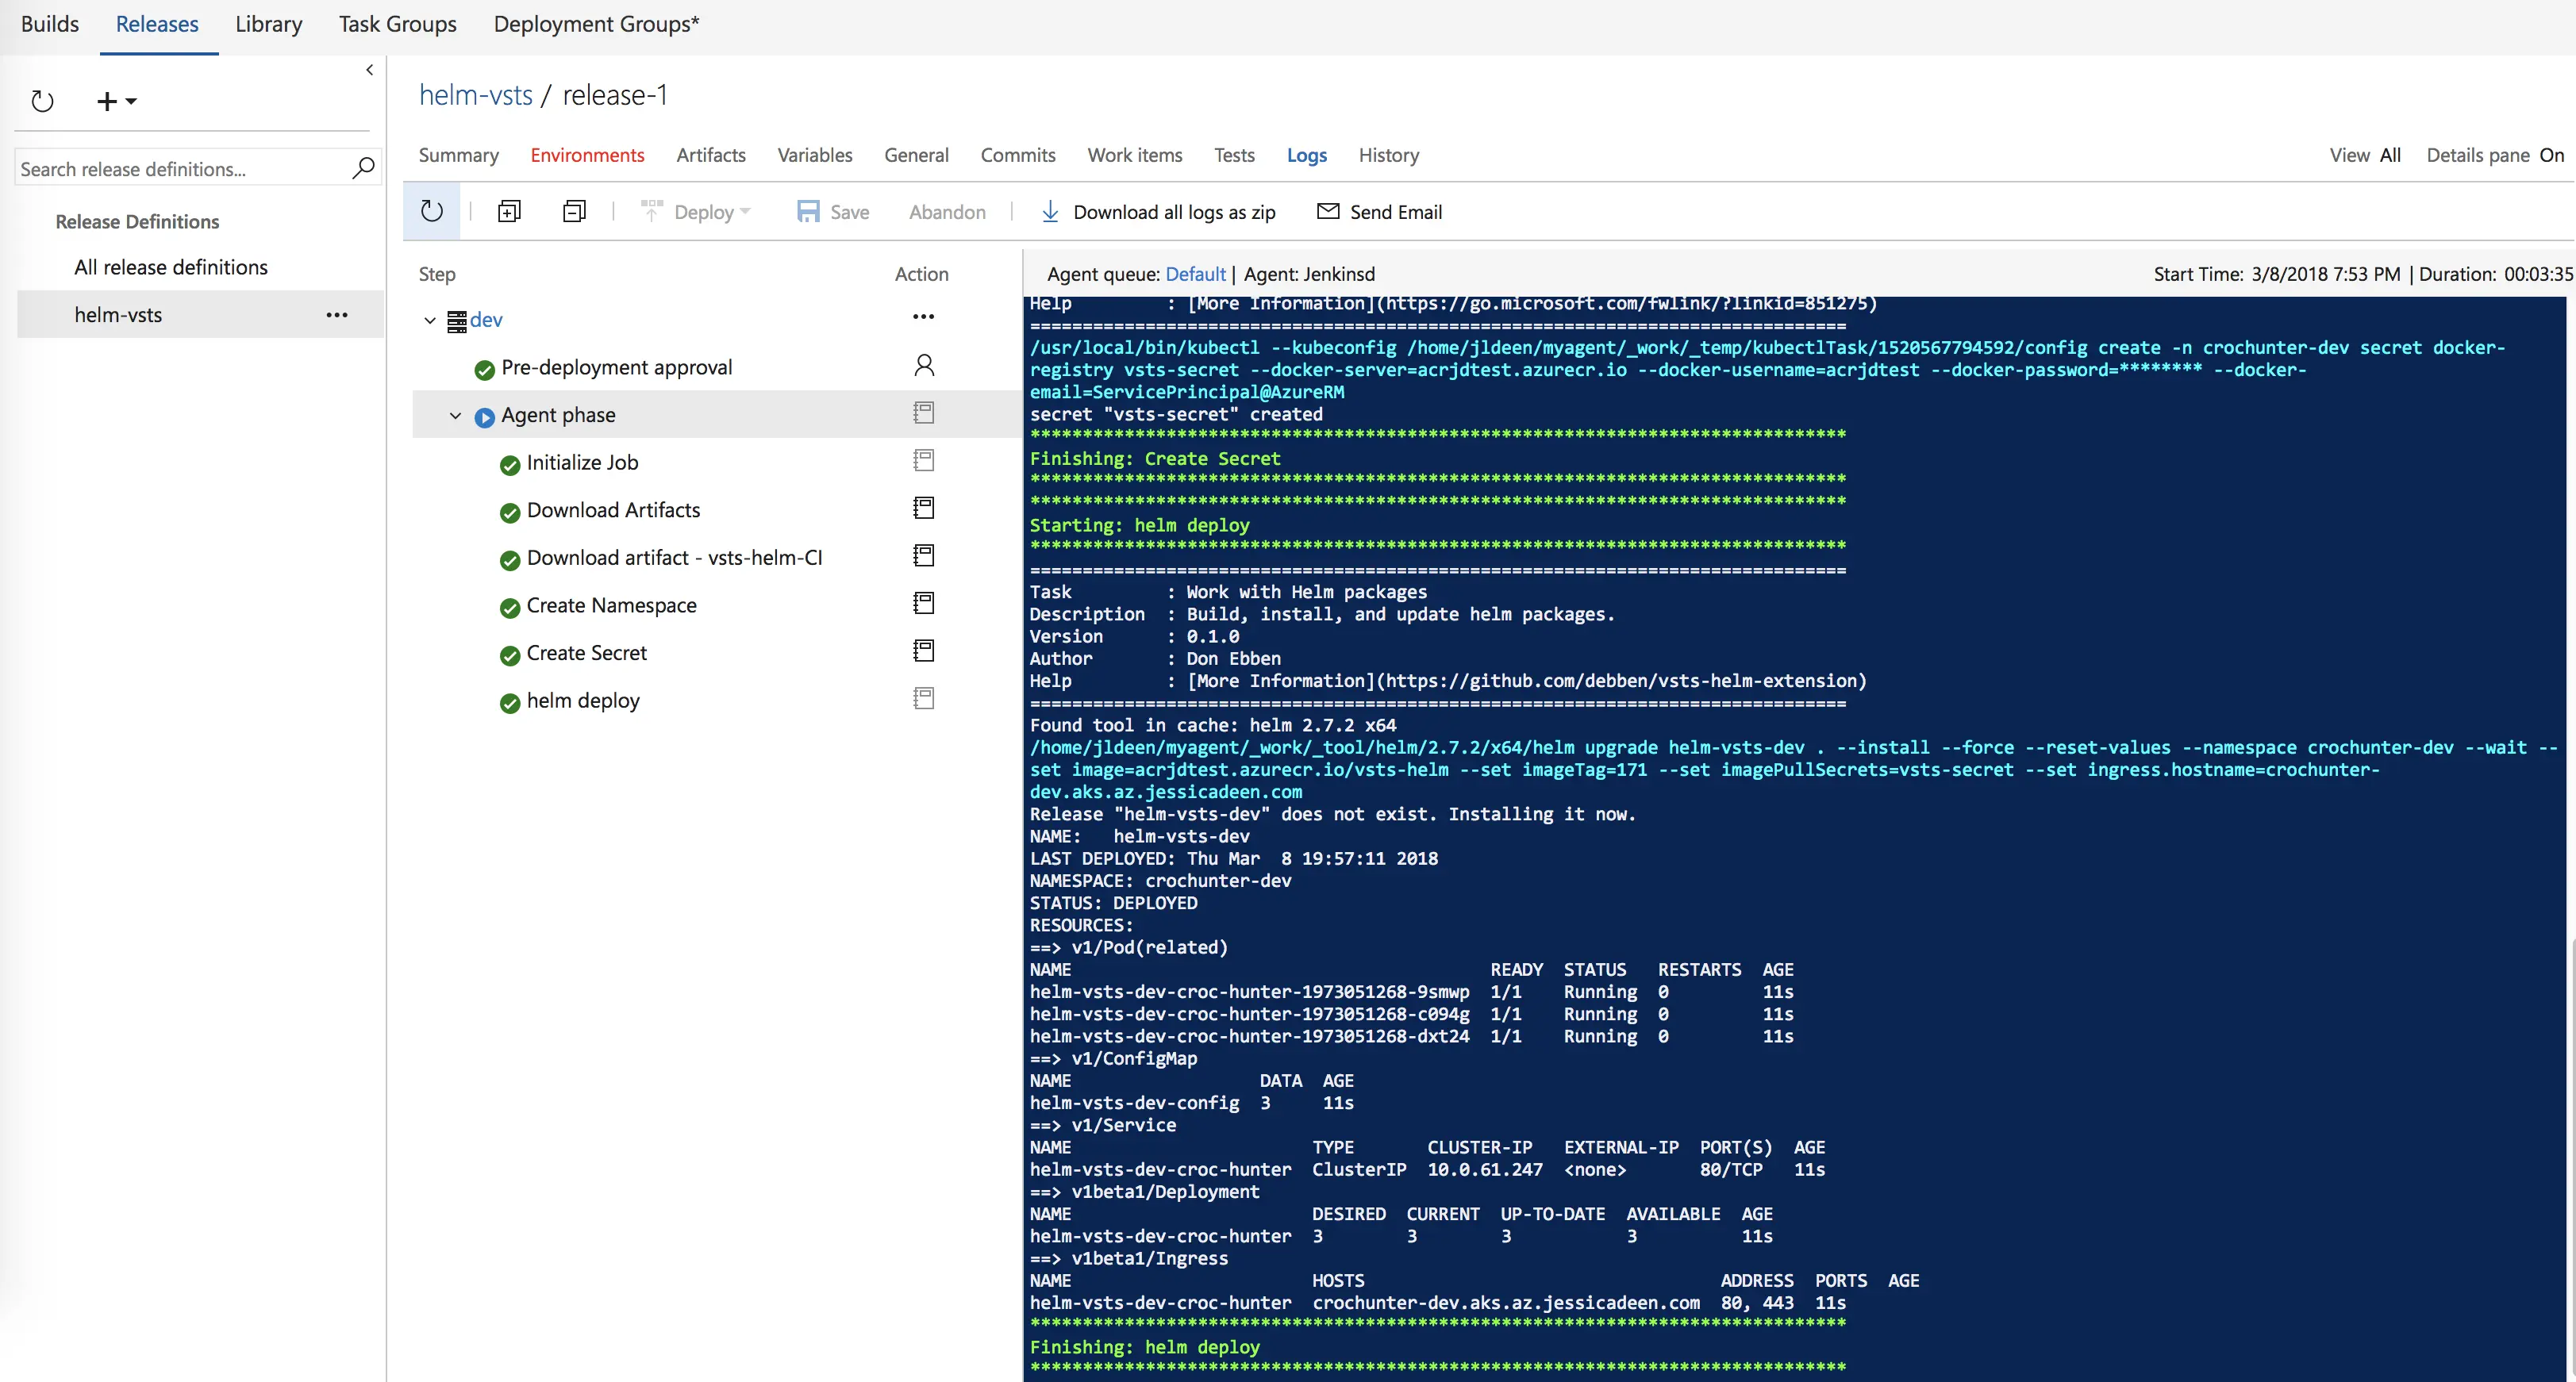
Let’s move on to our “helm deploy” task. We will again select our Kubernetes cluster under Kubernetes Service Connection. I am running Helm 2.7.2 on my cluster so I will specify that version of Helm.
Next, the command I want to use for my helm task is the “upgrade” command. We don’t want to use the “install” command since the release plan will run and deploy a release of the chart the first time, but would fail on subsequent releases as there already is a chart with that name installed.
The arguments you will want to use are as follows:
$(releaseNameDev) . --install --force --reset-values --namespace $(namespace) --wait --set image=$(image) --set imageTag=$(Build.BuildID) --set imagePullSecrets=$(imageSecret) --set ingress.hostname=$(hostnameDev)
I am using an Nginx ingress controller for my DNS/hostname – that’s a blog post for another time. You’ll notice I’m using the –set flag to override settings in my values. yaml. I’m only choosing to do this for two reasons:
Note the “.” (period) in between $(releaseNameDev) and the –install flag. This is intentional as I am specifying my working directory in the field beneath arguments so my helm task will run from my croc-hunter folder and be able to find my Chart.yaml file.
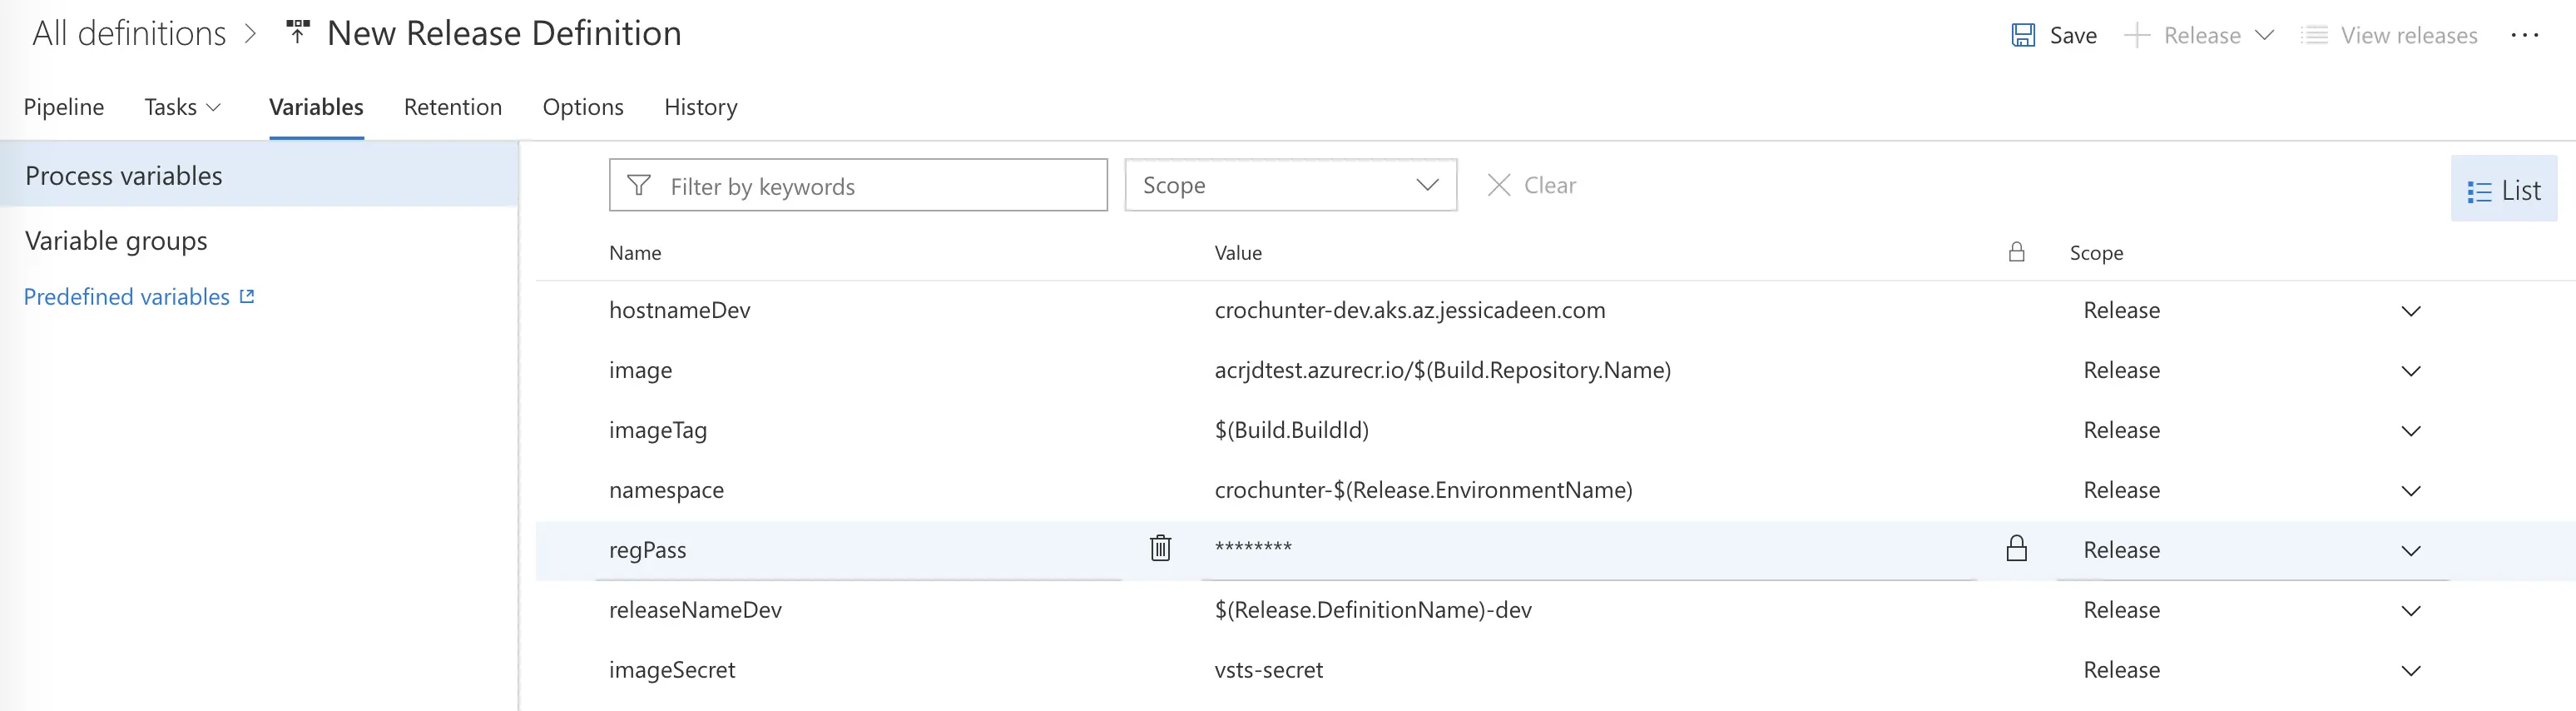
Now, you will notice I’m using a lot of variables – this is so I can quickly update fields and use vars in multiple environments in the future. To access the variables part of our release, simply click the “Variables” button at the top in between “Tasks” and “Retention.” You will want the following variables when following this demo. Fill them in with the appropriate values.
hostnameDev
image
imageTag
namespace
regPass
releaseNameDev
imagesecret
Rename your release definition, be sure to use all lowercase letters, and then save it.

Now, we are ready to go back to our Builds tab and hit “Queue New Build.”
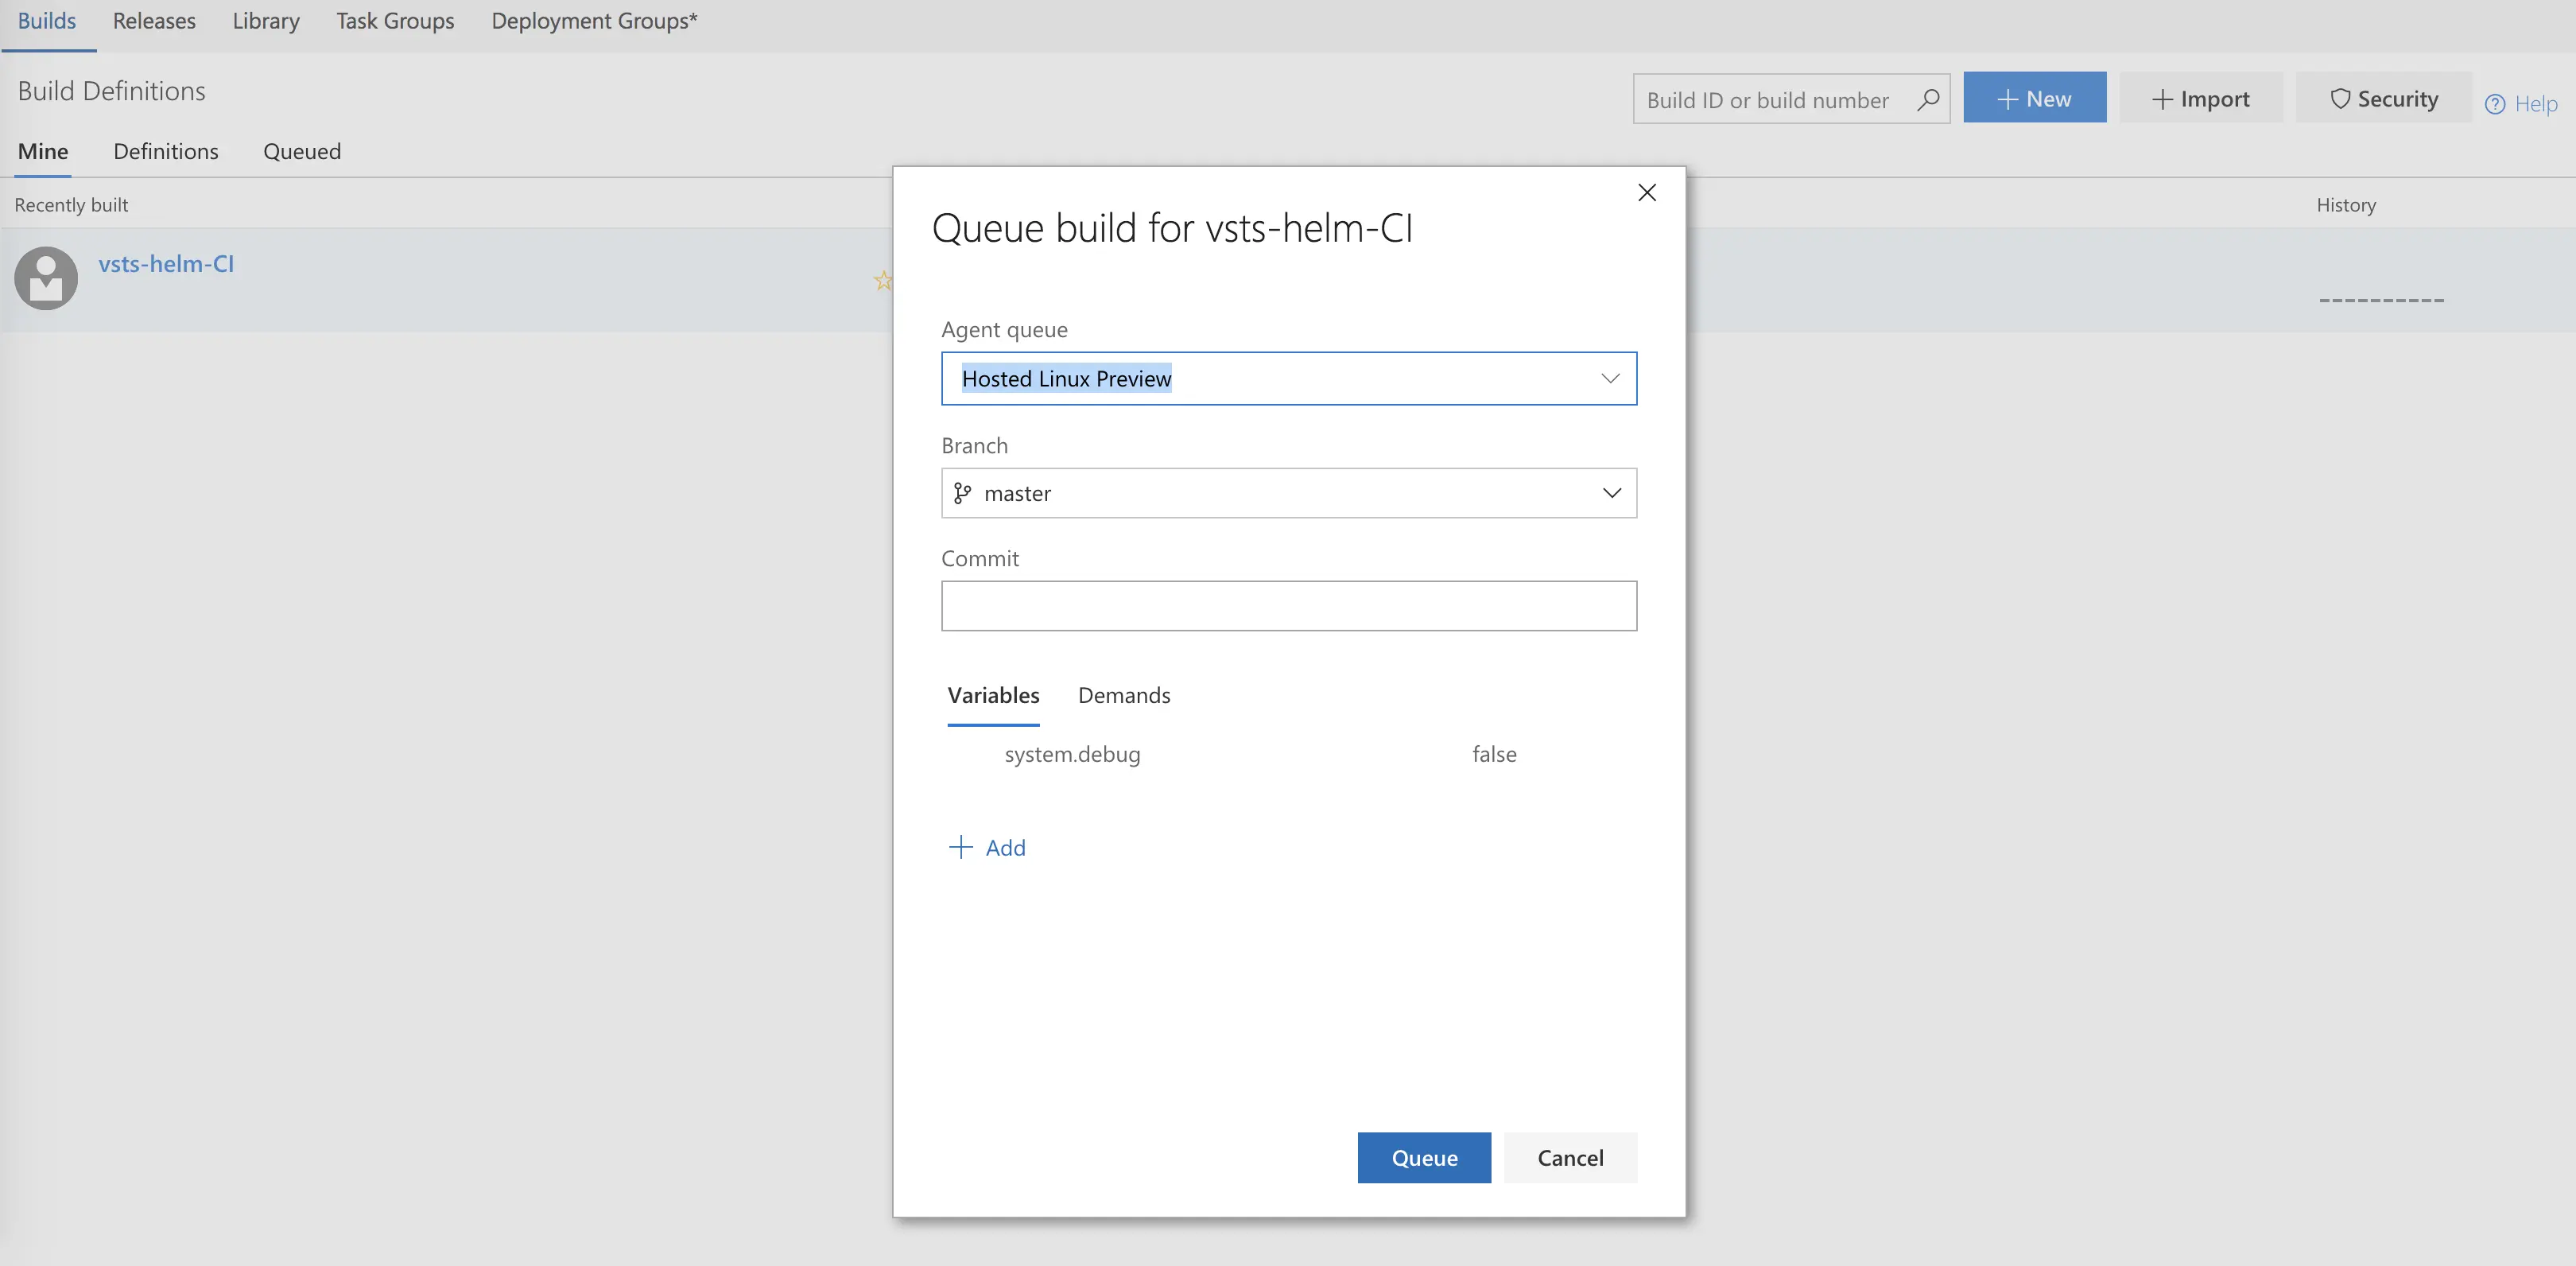
We can watch as our build completes.
And now let’s go create a release using our newly completed build.


**Some things to note. **
You will not see the release as “green” after the initial release where the namespace and secret are both created. This is due to the “continue on error” flag we set earlier on in both Kubernetes tasks. Instead, you will see an orange color for the release and any errors noted in the Summary section. “Namespace and secret already exist” errors will typically look like this (the below screenshot is from a test build/release, not this demo):
Ideally, I would like the namespace and secret creation options to be individual fields under the helm task and have a “Force update” checkbox where the secret and namespace will automatically be deleted and recreated if found (similar to how the Kubernetes extension task works).
Still, this blog post details a workaround allowing for successful helm deployment to Kubernetes via VSTS.
Final note, I strongly recommend creating your own build/release agents (the same agent can handle both tasks), as I found myself waiting as much as 10 minutes for a hosted agent to become available.
If you haven’t at least read the first post in this series, I recommend checking it out …

If you haven’t yet read the first post in this series, I recommend checking it out now. …

Testing - it’s an important part of a developer’s day-to-day, but it’s also …