
How to control and automate your Elgato Keylight from the command line
All code featured in this blog post can be found here on GitHub. Problem Have you ever wanted …
GitHub Actions enables you to “automate, customize, and execute your software development workflows right in your [GitHub] repository.” This means you can create workflows or pipelines without ever leaving GitHub, assuming your source code is hosted there.
GitHub Actions is actually built on top of the infrastructure used for Azure Pipelines so if you see similarties at all, that’s why. However, I do feel writing pipelines for Actions is a bit easier than Pipelines, but that’s a blog post for another time.
If you’re like me, you probably want to have control over your build server and what agent (Azure DevOps term for build server) / runner (GitHub Actions term) you use for your production pipelines. By default, when getting started with GitHub Actions, you get the option of a hosted runner, which can be Windows, Linux, or macOS based. The problem with hosted, however, is you don’t own it. Lack of ownership of your own build server can make things like pipeline debugging more cumbersome, or even, more time consuming if you’re in the container world (hosted does not allow for caching of image layers, for example).
It should also be noted (and is on GitHub’s website), “Adding self-hosted runners to a public repository introduces a significant security risk. Anyone can create forks of public repositories and run arbitrary workflows on your self-hosted runners through pull requests. Before proceeding, be sure to read about Self-hosted runner security.”
First, runners are per repo so you will have to configure a runner for every project you wish to automate. If you come from the Azure Pipelines world, this is a significant change because you can setup your own build agent, attach it to a pool (which I do without thinking about it), and use it with any project within your organization.
With this in mind, I run the below commands in a directory with my repo name or project name to keep things organized.
Second, you have to be the owner of the repository. I feel as though this should go without saying.

Let’s begin.
From within your desired build repo, navigate to “Settings”

Once in Settings, you should see “Actions” on the left hand side.
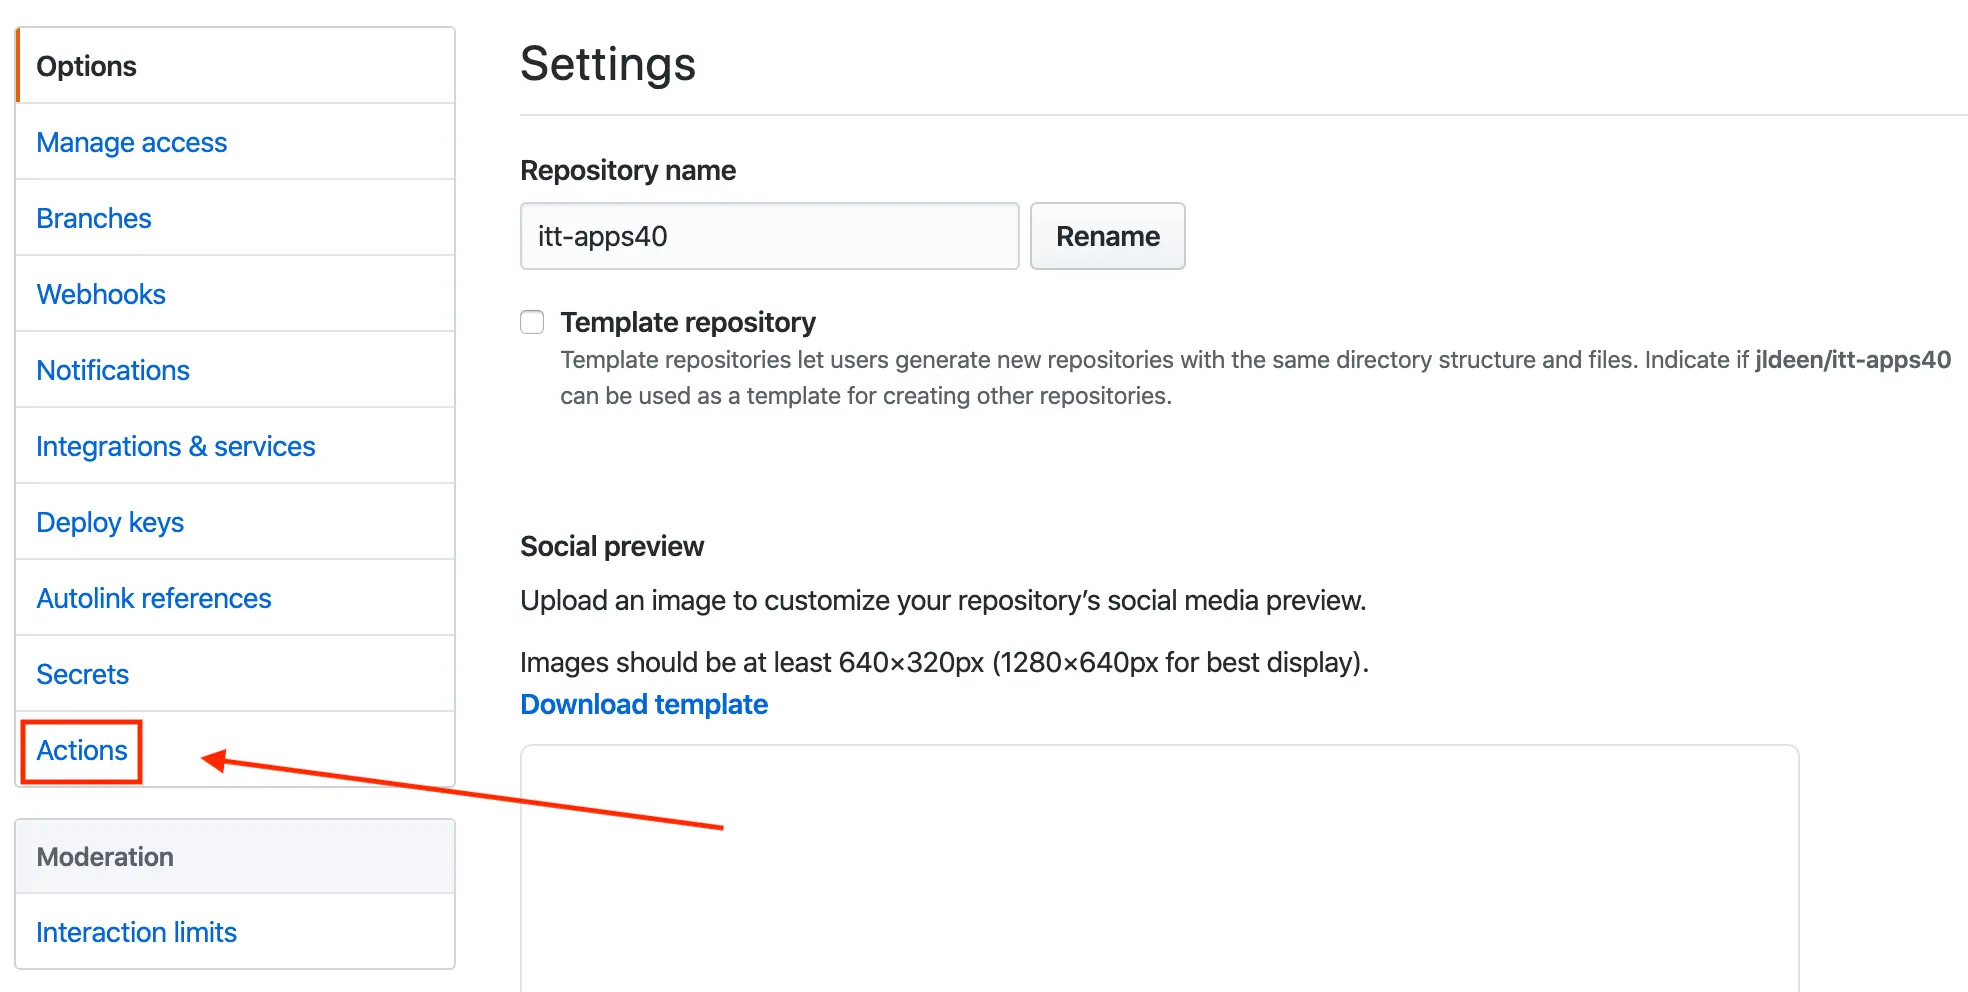
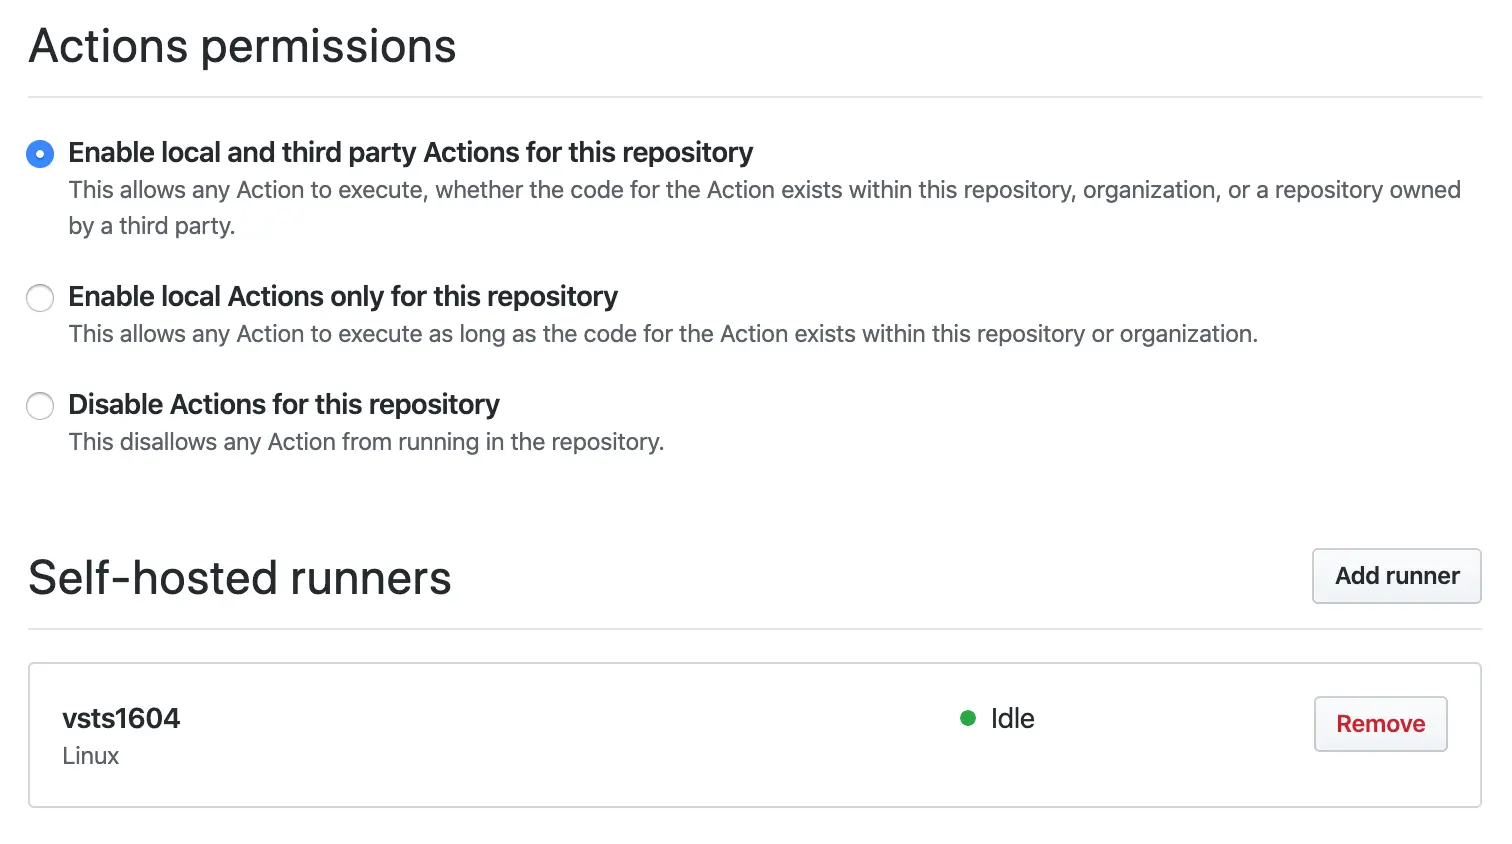
And once in Actions, you should see “Add runner” under “Self Hosted Runners.”
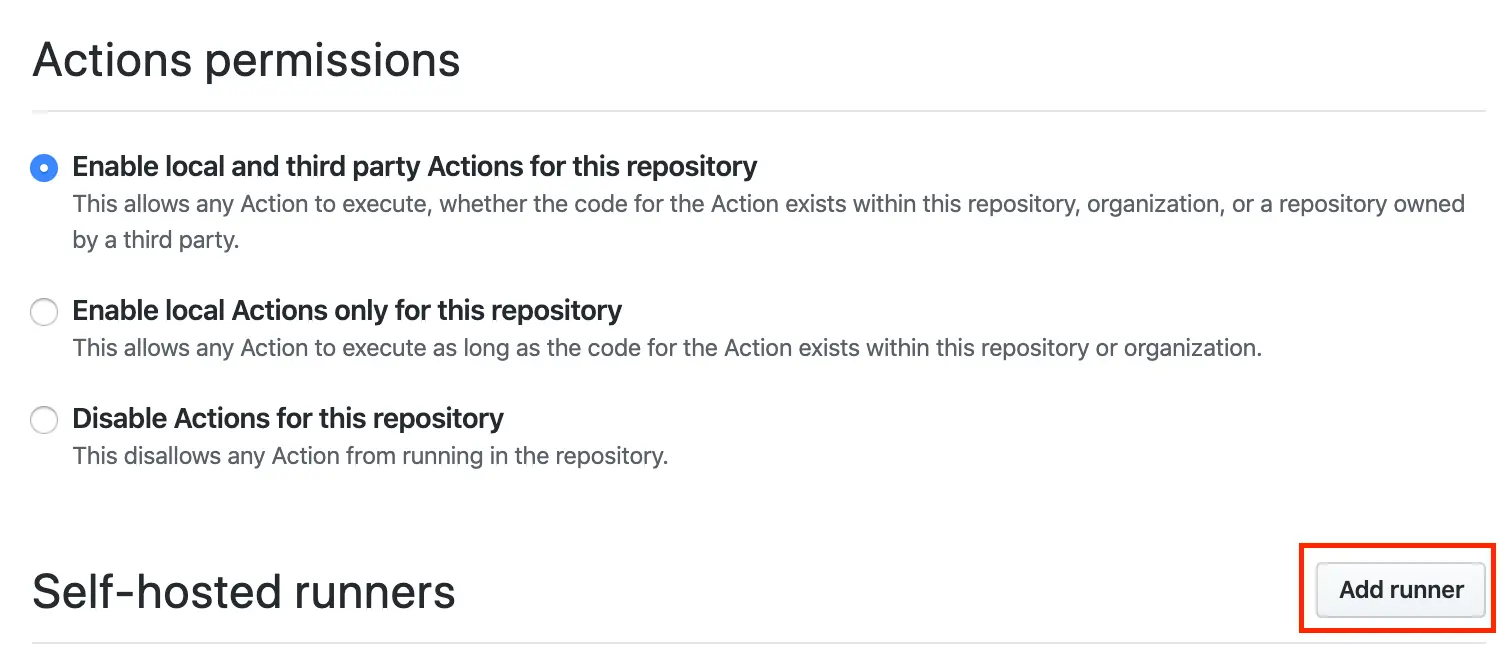
Now, this will bring up a window with instructions, based on operating system, to help configure your runner. I have included the Linux instructions below. However, what is not on this pop up is how to configure it as a service (if you just want the “as a service” instructions, scroll down to the “Configuring as a Service” section. It also fails to explicitly make note of how you will have to follow these instructions each and every time you want to add a runner to a repo. Here’s an example of this window:

Let’s say my project name is itt-40, here are the commands I would run on the build server (runner) I wish to use:
// Create a folder
mkdir itt-40 && cd itt-40

// Download the latest runner package
curl -O https://github.com/actions/runner/releases/download/v2.165.2/actions-runner-linux-x64-2.165.2.tar.gz

// Extract the installer
tar xzf ./actions-runner-linux-x64-2.165.2.tar.gz

// Create the runner and start the configuration experience
./config.sh --url https://github.com/[github-alias]/[repo] --token [alpha-numeric-token]

// Last step, run it!
./run.sh
Note: Your token will be provided in your own download instructions.
When I first figured out the below instructions, I honestly took a guess and ran the same commands I would run if I were setting up a build agent within Azure DevOps.
To configure your repo runner as a service, run the following commands:
// From the ~/itt-40 [cd && cd ~/itt-40]
sudo ./svc.sh install
sudo ./svc.sh start
sudo ./svc.sh status
Now, you might be thinking! Great! I have an Actions runner! What do I do now. Great question.
To use your new runner, you just add the following line to your pipeline. This line replaces your existing “runs-on:” setting:
runs-on: self-hosted
Let’s show you a full example:
Basic example:
on: [push]

name: self-hosted-example

jobs:
  simpleExample:
    runs-on: self-hosted
    steps:
    # checkout branch
    - uses: actions/checkout@master
Additional details about using your self hosted runners in your workflows can be found on GitHub’s docs pages here.
On a final note, it should be mentioned after I wrote this post, I did some digging and found this GitHub doc, which walks through these same steps (but without pictures). What can I say? It never hurts to have things documented…twice.

Happy DevOps’ing!

All code featured in this blog post can be found here on GitHub. Problem Have you ever wanted …

We’ve all been there. You do everything correct - you set your container to run as non …

If you haven’t yet read the first post in this series, I recommend checking it out now. …