
How to use Azure DevOps open REST API with Curl
“Any language, any platform, any cloud” that’s what Azure DevOps is capable …
A week or so ago a colleague turned me on to oh-my-zsh and I just went down the rabbit hole. I have always found the built-in Terminal in macOS (formerly OS X) to be bland and boring, but never really sat down to try to change it. I started using iTerm2 awhile ago, but again, never tried to “spice it up” so to speak. Now I did and I came up with this:

First off, make sure you’re using iTerm2, if you’re not already.
Next, we will have to install oh-my-zsh and tmux before setting up Powerlevel9k and your vim settings. There are a few caveats to getting everything setup neatly on Mac, so this post will go over that.
I used Homebrew to install tmux by simply typing the following:
brew install tmux
If you don’t have brew installed, you can do so by typing:
/usr/bin/ruby -e "$(curl -fsSL https://raw.githubusercontent.com/Homebrew/install/master/install)"
You can follow the documentation on GitHub, or simply use the following command:
sh -c "$(curl -fsSL https://raw.githubusercontent.com/robbyrussell/oh-my-zsh/master/tools/install.sh)"
After the install completes, you will want to enable some plugins and set a theme in your .zshrc file.
The plugins I have enabled are as follows:
plugins=(sudo git history taskwarrior tmux tmuxinator zsh-autosuggestions) source /usr/local/share/zsh-syntax-highlighting/zsh-syntax-highlighting.zsh
Note: I had to manually install the following:
– zsh-completions
– zsh-autosuggestions
– zsh-syntax-highlighting
Next, the theme I used is Powerlevel9k, which I will get to next. To set it in my .zshrc file I used:
POWERLEVEL9K_MODE='awesome-patched' ZSH_THEME="powerlevel9k/powerlevel9k"
Luckily, the install for Powerlevel9k is super simple for oh-my-zsh. Simply run the following command:
git clone https://github.com/bhilburn/powerlevel9k.git ~/.oh-my-zsh/custom/themes/powerlevel9k
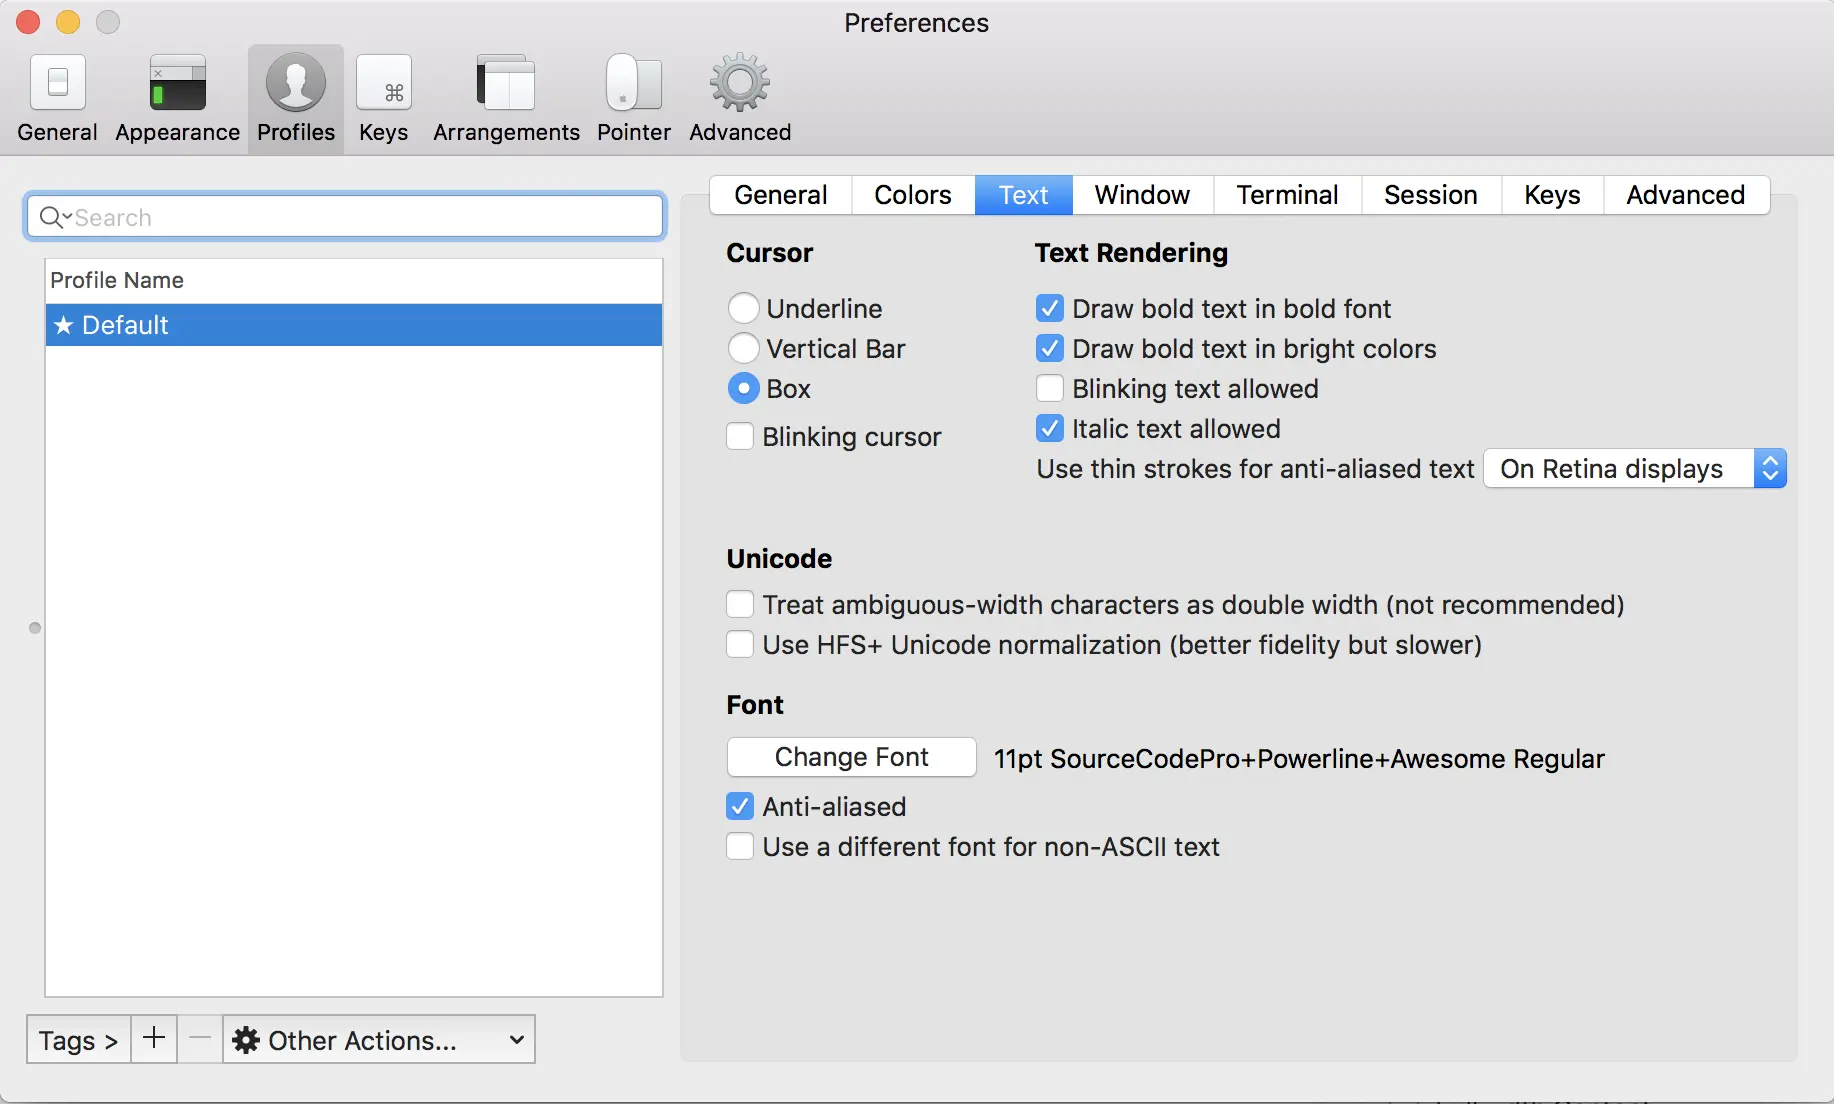
In most cases, you will need a powerline font. Powerline was a bitch to try to install on macOS with the new python packages, so I used tools that were inspired by it. The font I used is here; alternatively, you can install all powerline fonts by running:
git clone https://github.com/powerline/fonts.git $ sh fonts/install.sh
You will need to set whichever font you want in your iTerm2 preferences. Note the font selected in my preferences:
Now that you have oh-my-zsh, tmux, and powerlevel9k installed, let’s get to configuring everything.
Configuration
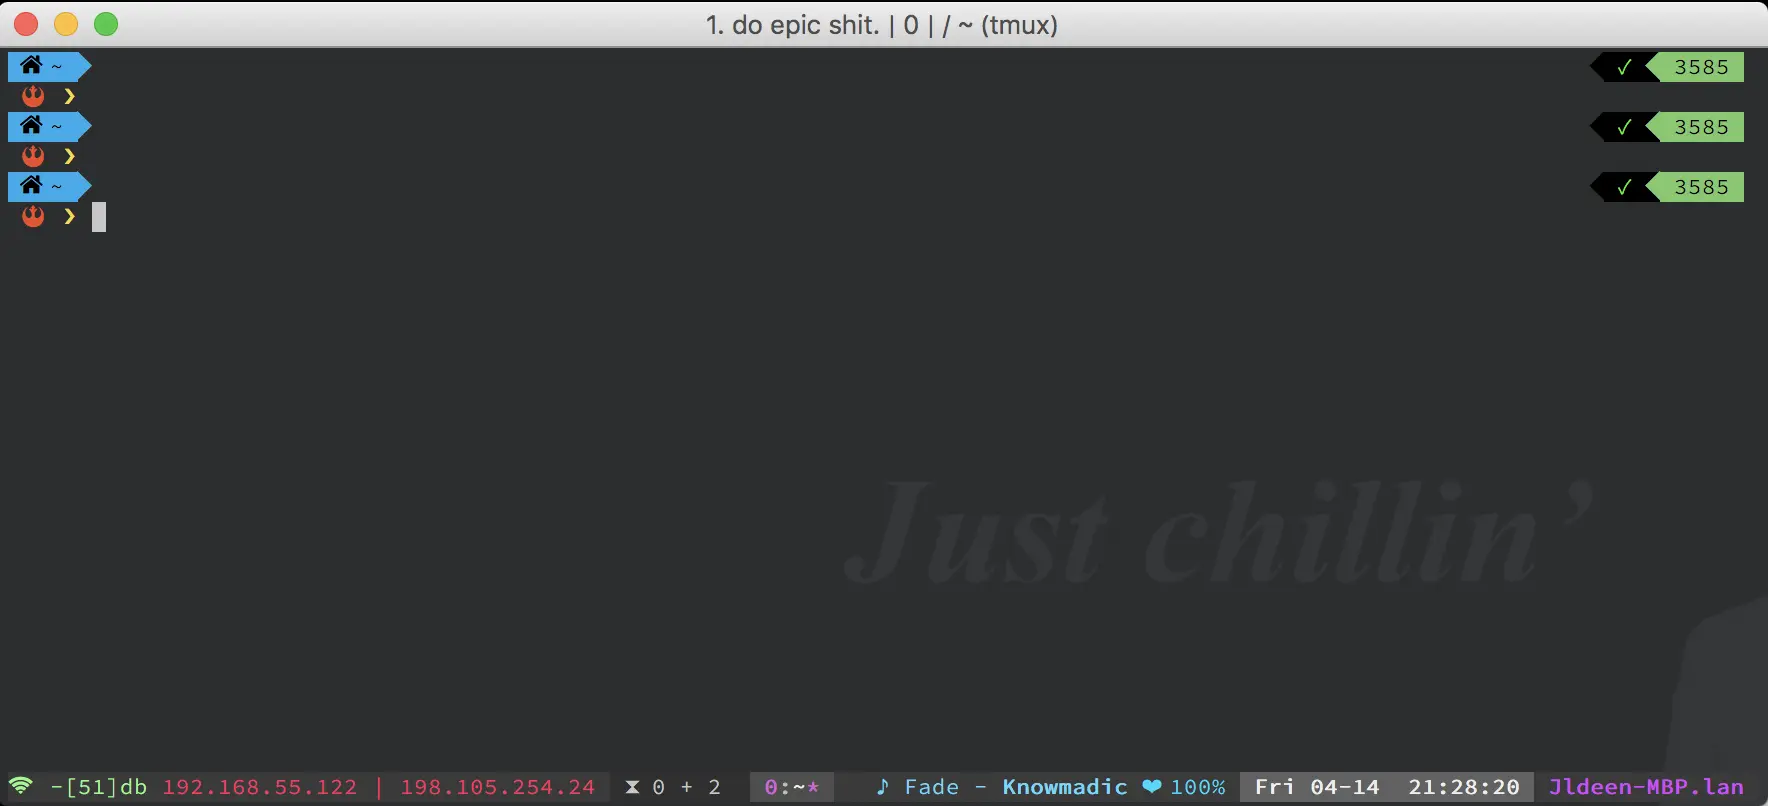
First, I selected the “Darkside” color preset for iTerm2 because it reminded me of Star Wars. You can get a bunch of presets for iTerm2 here.
My terminal was inspired by a bunch of different user’s screenshots, but two that stand out are Semartin’s and Sevenfoxes’, specifically because of the Spotify, wifi, and battery info. Rather than having the info show in my terminal, I opted to include it as part of my tmux configuration. In order to have tmux launch every time I opened iTerm2 (and thus, zsh), I needed to add the following to my .zshrc file:
zsh tmux settings ZSH_TMUX_AUTOSTART='true'
My full zshrc file can be found here.
I ultimately took what I needed from their .tmux.conf configs and threw them into .sh scripts, which can be accessed here. My status line config for my .tmux.conf is as follows:
set -g status-position bottom
set -g status-bg colour237
set -g status-fg colour137
set -g status-attr dim
set -g status-left '#[fg=colour197]#(~/bin/internet_info.sh) #{tasks_status} ' set -g status-right '#[fg=colour81]♪ #(~/bin/now_playing.sh) #(~/bin/battery.sh) #[fg=colour255,bg=colour241,bold] %a %m-%d #[fg=colour255,bg=colour241,bold] %H:%M:%S #[fg=colour165]#[bg=default] #H '
set -g status-right-length 100
set -g status-left-length 70
My full tmux.conf can be found here. Note: To get the now_playing.sh with Spotify to work, you will have to install shpotify:
brew install shpotify
I also installed the tmux-current-pane-hostname plugin (bottom right corner) so it will auto populate with the hostname when I am connected to an ssh session, or disply my hostname when disconnected.
Vim
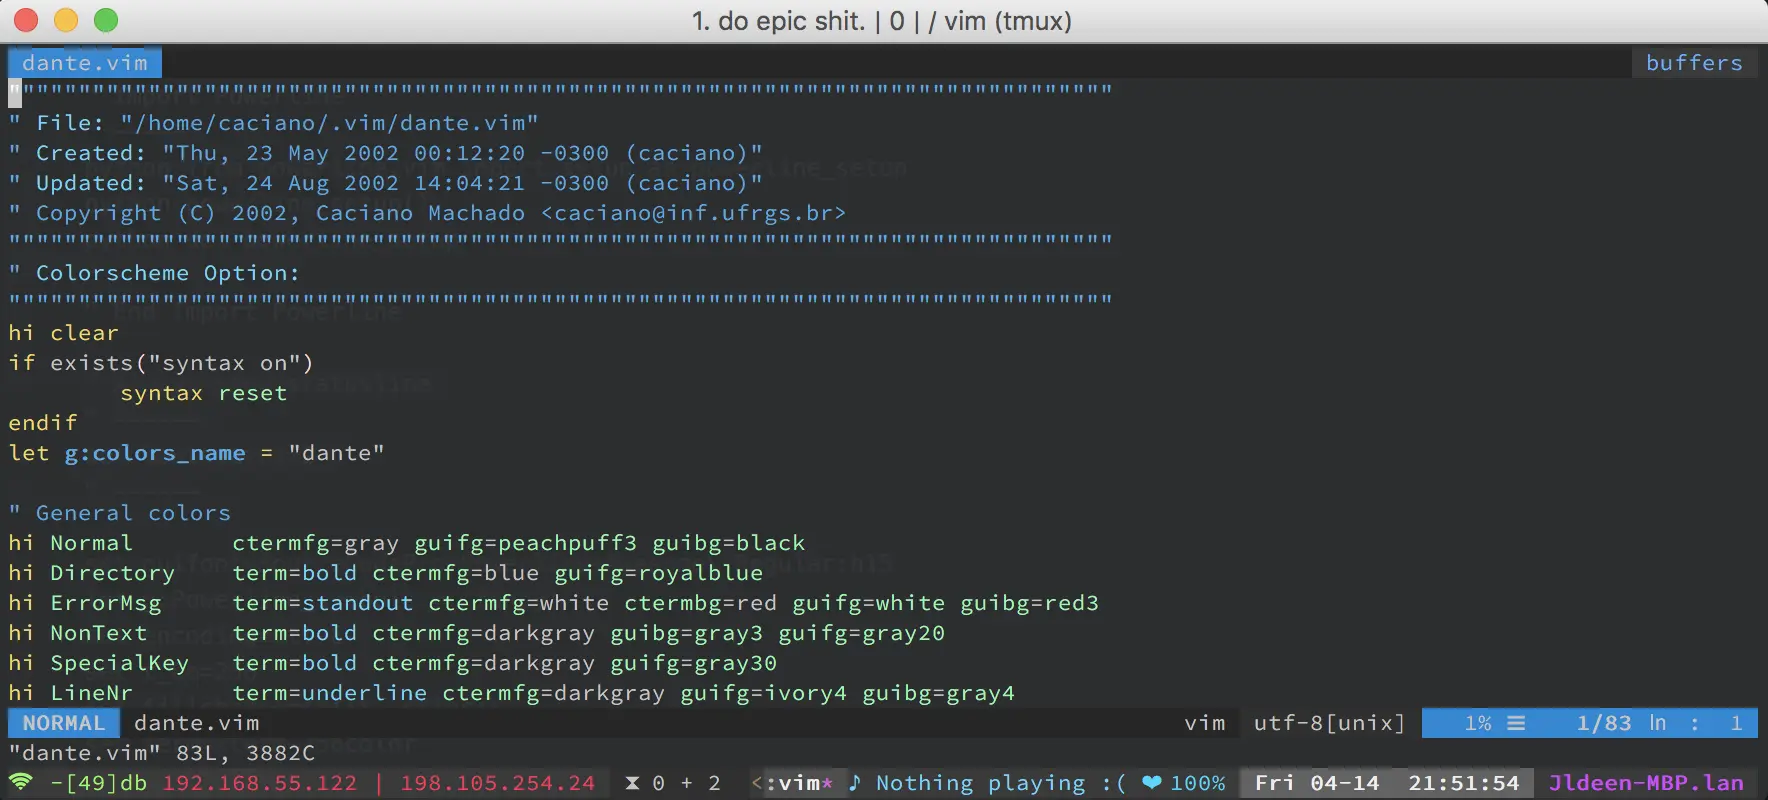
Last, but not least, Vim! I had a hell of a time configuring Vim at first because I was trying to set it up using Powerline. I used this post as a guide, but was unable to configure things the way I wanted. Regardless, I am including the link in case it’s helpful to you. I ended up choosing vim-airline because it’s lightweight and simple.
To start, I configured my .vimrc file to use Vundle.
git clone https://github.com/VundleVim/Vundle.vim.git ~/.vim/bundle/Vundle.vim
Then, put this at the top of your .vimrc file:
set nocompatible              " be iMproved, required
filetype off                  " required

set rtp+=~/.vim/bundle/Vundle.vim
call vundle#begin()
Plugin 'VundleVim/Vundle.vim'
Plugin 'tpope/vim-fugitive'
Plugin 'git://git.wincent.com/command-t.git'
Plugin 'rstacruz/sparkup', {'rtp': 'vim/'}
Plugin 'dracula/vim'
Plugin 'nightsense/seabird'
Plugin 'tomasiser/vim-code-dark'
Plugin 'Xuyuanp/nerdtree-git-plugin'
Plugin 'christoomey/vim-tmux-navigator'
call vundle#end()            " required

filetype plugin indent on    " required
" To ignore plugin indent changes, instead use:
"filetype plugin on

" Put your non-Plugin stuff after this line
Next, to install plugins type vim +PluginInstall +qall from command line or launch vim and run :PluginInstall
After you have Vundle setup, you can add these two plugins to your .vimrc and run your preferred command to install the plugins again:
Plugin ‘vim-airline/vim-airline’ Plugin ‘vim-airline/vim-airline-themes’
This will install vim-airline and vim-airline-themes.
Now, to always show the statusline in Vim, you have to add:
" Always show statusline set laststatus=2
I went with the wombat colorscheme for now. Also, I found a bunch of vimthemes here. For my vim-airline plugin, I went with the bubblegum theme.
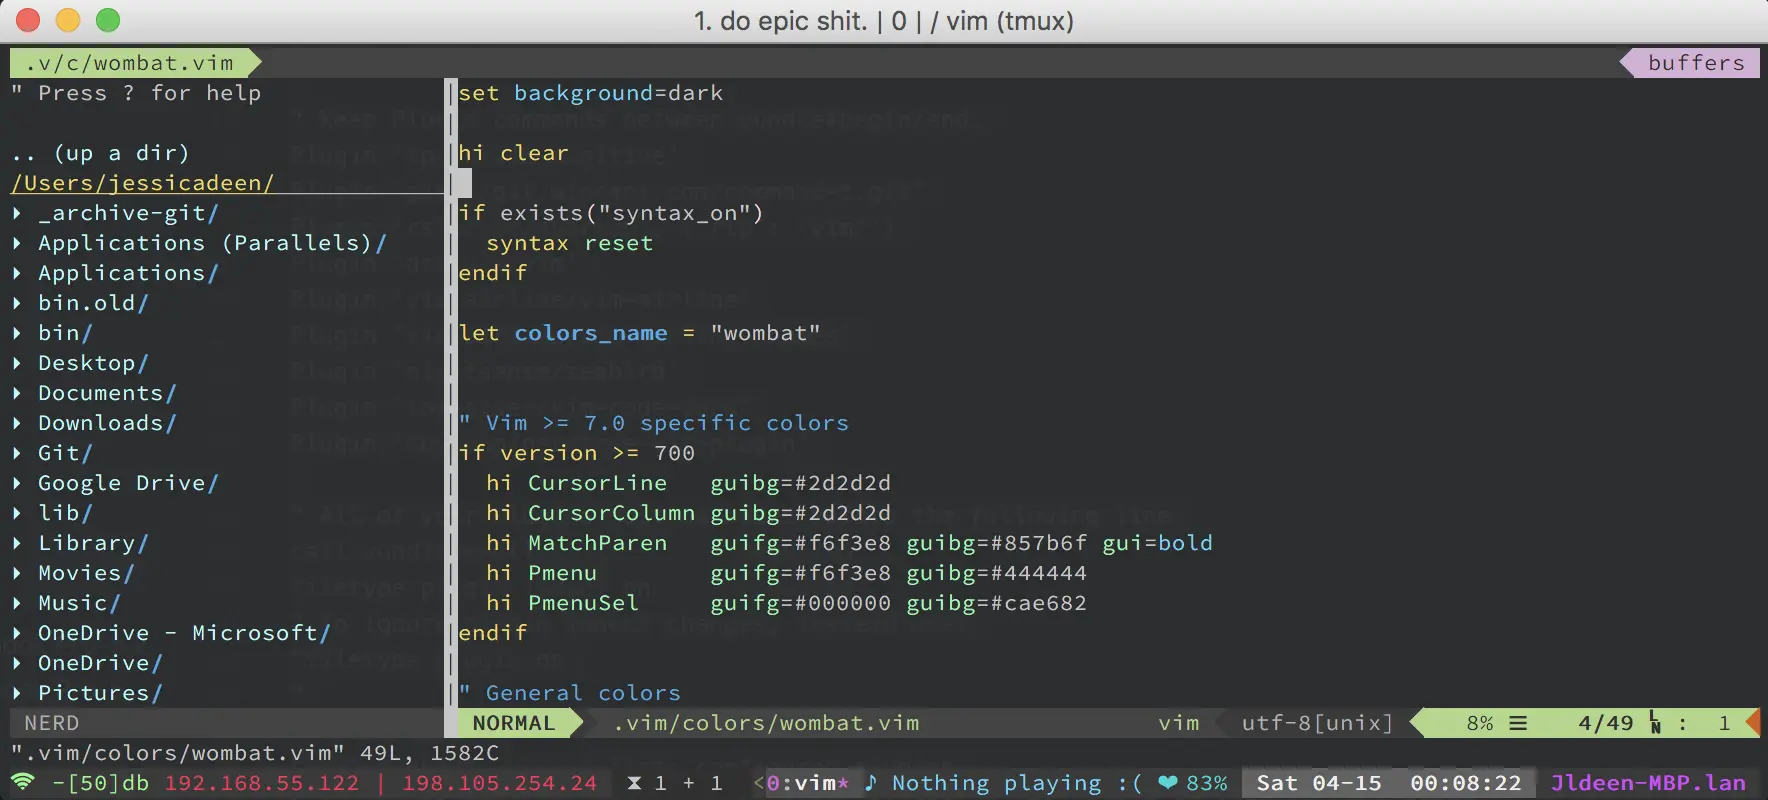
Next, I wanted to install Nerdtree, but first I decided to install Pathogen to keep present and future installs simple:
mkdir -p ~/.vim/autoload ~/.vim/bundle && curl -LSso ~/.vim/autoload/pathogen.vim https://tpo.pe/pathogen.vim
I added the following to my .vimrc to enable pathogen:
execute pathogen#infect()
Now I could install Nerdtree:
git clone https://github.com/scrooloose/nerdtree.git ~/.vim/bundle/nerdtree
I added the following minor customizations, again, to my .vimrc to tell Nerdtree to startup with Vim every time, map the NerdTreeToggle to ‘Ctrl+n’, and have the cursor stay in the edit area by default on launch.
" Nerdtree Settings autocmd VimEnter * NERDTree | wincmd p map <C-n> :NERDTreeToggle<CR>
My complete .vimrc file can be accessed here.
Finally, my iTerm2 configuration, as well as every dotfile and .sh mentioned here, can be downloaded here.

“Any language, any platform, any cloud” that’s what Azure DevOps is capable …
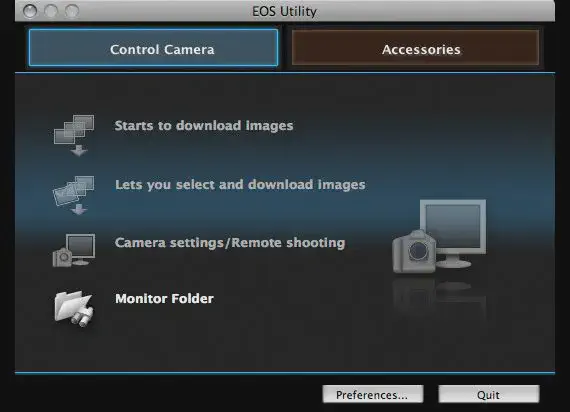
First, if you have a T6i and you go to the Canon Support Website you may notice no EOS utility …

If you're using macOS 10.14 Mojave and are having trouble with the hotspot redirect for wifi networks, this post is for you! "A problem occurred. The webpage couldn't be loaded." This doesn't give me a lot to go on, but thanks to some digging, I discovered the captive redirect wasn't working right.